
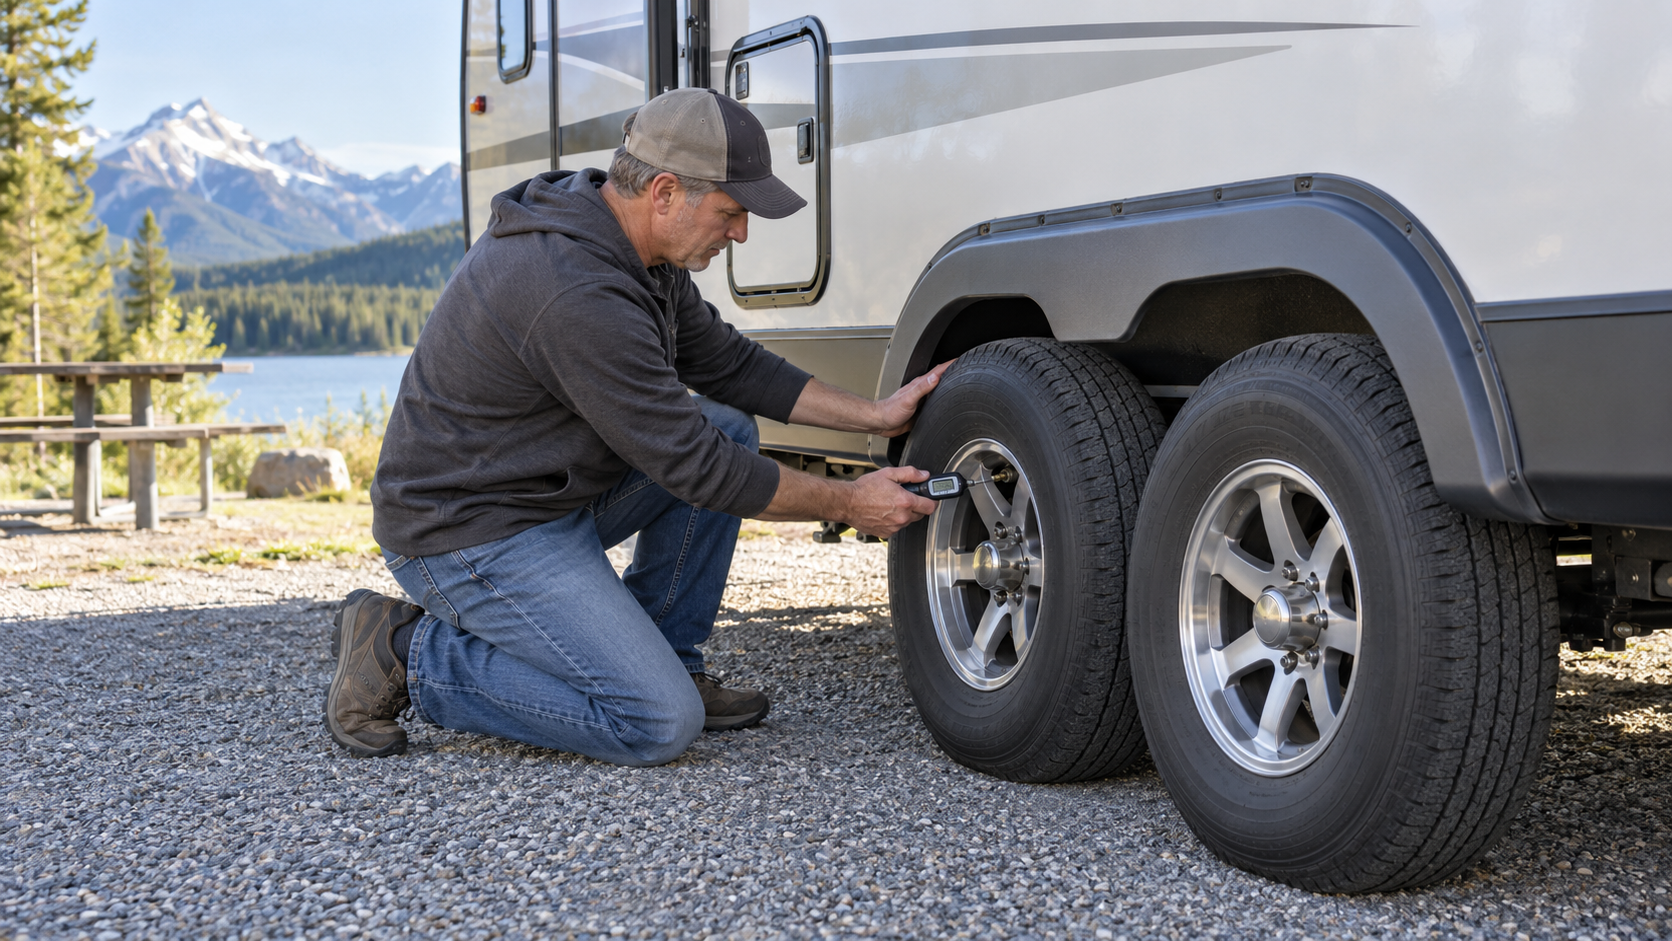
RV tire safety starts with understanding how heavily loaded tires age and wear. RV tires carry heavy loads while enduring highway heat, sharp turns, long storage periods, sunlight, changing temperatures, and impacts from uneven roads. Unlike the tires on a frequently driven passenger vehicle, RV tires may age significantly before their tread appears worn.
A tire failure can damage the RV’s wheel well, plumbing, wiring, flooring, exterior panels, and suspension components. It can also affect control of the tow vehicle or motorhome. Regular inspections, correct inflation, proper loading, and timely replacement are therefore essential parts of RV maintenance.
RV Tire Safety: Why Tires Require Special Attention.
Many RVs spend weeks or months parked between trips. During storage, tires remain exposed to weather while supporting a concentrated load in the same position. When the RV returns to the road, those tires may immediately face highway speeds, high pavement temperatures, and a heavily loaded vehicle.
Common causes of RV tire trouble include:
- Underinflation
- Overloading
- Excessive speed
- Heat buildup
- Age-related deterioration
- Sun and ozone exposure
- Impact damage
- Misalignment
- Worn suspension components
- Incorrect wheel or tire selection
- Improper installation
- Long periods of storage
- Neglected valve stems
A tire can look acceptable from the outside while having internal damage. As a result, any tire that has been seriously underinflated, overloaded, struck a large pothole, or driven after losing pressure should be inspected professionally. Because tires age even when the RV is parked, regular inspection matters regardless of how many kilometres the RV has travelled.
Know the Difference Between Trailer and Motorhome Tires
Travel trailers and fifth wheels commonly use tires marked ST, meaning Special Trailer. These tires are designed for trailer service and are not intended for use on the steering or drive axles of a passenger vehicle.
Motorhomes may use passenger, light-truck, or commercial-style tires depending on their size and weight rating. The correct tire type, size, construction, load range, speed rating, and inflation requirements depend on the vehicle.
Never assume that a tire is suitable simply because it fits the wheel. A replacement must be compatible with:
- The RV manufacturer’s specifications
- The wheel’s size and pressure rating
- The axle ratings
- The tire’s load capacity
- The intended application
- The expected operating speed
- The available clearance
However, installing a tire with a higher load range does not increase the RV’s gross vehicle weight rating, axle rating, wheel capacity, or allowable cargo.
Find the RV’s Tire Information Label
The RV manufacturer normally provides a certification or tire-information label. Its location varies, but it may be found near the main entrance, on the front roadside exterior, inside a cabinet, near the driver’s seat, or with the owner’s documentation.
The label may identify:
- Original tire size
- Recommended cold inflation pressure
- Gross vehicle weight rating
- Gross axle weight ratings
- Cargo information
- Wheel or rim specifications
Use the RV manufacturer’s label and owner’s manual as the starting point when checking inflation or selecting replacement tires.
The pressure moulded into a tire’s sidewall identifies a rated or maximum cold inflation pressure associated with the tire’s load capacity. It is not automatically the correct pressure for every RV on which that tire could be installed.
If the installed tires differ from the original specification, or if the label is missing or unreadable, consult the RV manufacturer, tire manufacturer, or a qualified tire professional.
Check Tire Pressure When the Tires Are Cold
Tire pressure should normally be checked when the tires are cold. This generally means before travelling, after the RV has been parked long enough for the tires to return to the surrounding temperature.
Driving causes tires to flex and heat up, increasing their pressure. This increase is expected. Do not release air from a warm tire simply because its pressure is higher than the cold specification. Doing so may leave it underinflated after it cools.
Check pressure:
- Before each travel day
- Before a long trip
- After extended storage
- After a significant temperature change
- When a tire appears different from the others
- When a tire-pressure monitoring system reports a concern
Use a reliable gauge that covers the required pressure range. A gauge intended for low-pressure passenger tires may not be appropriate for a high-pressure RV tire.
Remove the valve cap, press the gauge squarely onto the valve stem, and take the reading. Then adjust the pressure to the RV or tire manufacturer’s cold specification, and finally reinstall the valve cap. If a tire reads low, inspect it for damage before simply adding air.
Why Underinflation Is Dangerous
An underinflated tire flexes more than intended. Excessive flexing creates heat within the tire and can damage its internal structure.
Underinflation can contribute to:
- Tread separation
- Sidewall damage
- Poor handling
- Increased rolling resistance
- Uneven shoulder wear
- Reduced load-carrying capacity
- Sudden tire failure
A tire may lose pressure without appearing visibly flat, especially when it carries a heavy RV. Visual inspection alone is not enough.
If a tire has been operated while seriously underinflated, reinflating it does not reverse possible internal damage. Therefore, have it removed and inspected by a qualified tire professional before returning it to service. Although a tire may hold air, internal damage can still develop after a serious underinflation event.
Why Overinflation Can Also Cause Problems
Excessive inflation can reduce the tire’s ability to absorb road impacts and may contribute to uneven wear, harsh ride quality, or damage from potholes and road debris.
Never exceed the pressure limits of the tire, wheel, valve stem, or other components. The lowest applicable component rating controls the safe limit.
Do not increase pressure simply to compensate for an overloaded RV. Instead, reduce the load and correct the reason the vehicle exceeds its ratings.
Monitor Pressure During Travel
A tire-pressure monitoring system, commonly called a TPMS, can provide pressure and temperature warnings while the RV is moving. Trailer TPMS sensors are available as valve-cap-mounted or internally mounted systems.
A TPMS can alert the driver to a developing leak before the tire is destroyed or the RV is damaged. However, it does not replace manual pressure checks, visual inspections, correct loading, or routine maintenance.
Before relying on a TPMS:
- Confirm that every sensor is working
- Set alerts according to the system and tire manufacturer’s instructions
- Replace sensor batteries when required
- Make sure external sensors do not overload unsuitable valve stems
- Confirm that the display can communicate with all sensors
- Use a signal repeater if required by the RV’s length
- Investigate repeated pressure or temperature warnings
A temperature difference can be caused by sunlight, braking, bearing problems, loading, pressure differences, or road conditions. A tire that becomes significantly hotter than the others requires investigation.
Understand Tire Load Capacity
Every tire has a maximum load capacity at a specified inflation pressure. The combined capacity of the tires must be appropriate for the actual load being carried.
Do not rely only on the RV’s estimated weight. The safest way to understand loading is to weigh the RV in its normal travel condition, including:
- Passengers
- Food
- Clothing
- Water
- Propane
- Batteries
- Camping equipment
- Tools
- Accessories
- Hitch equipment
- Cargo
- Pets
A public vehicle scale can provide axle weights. Individual wheel-position weighing gives more detailed information because an axle’s load may not be distributed evenly from side to side.
The load on an axle must not exceed:
- The axle’s rating
- The combined capacity of its tires
- The combined capacity of its wheels
- Any other applicable component rating
Maintaining total weight below the gross vehicle weight rating does not guarantee that every axle, tire, or wheel position is within its individual limit.
Uneven Loading Matters
Cargo placement can place substantially more weight on one side of an RV. Kitchens, refrigerators, slide-outs, water tanks, generators, storage compartments, and personal belongings can all affect side-to-side loading.
A tire can be overloaded even when the axle’s total measured weight appears acceptable. If possible, obtain individual wheel-position weights.
Distribute cargo carefully and secure it before travel. Heavy items should generally be stored low and positioned to maintain appropriate balance without exceeding any rating.
Do not attempt to correct poor weight distribution by changing tire pressure beyond approved specifications.
Inspect Tires Before Every Trip
Walk around the RV before departure and examine every tire, including the inside sidewalls where visible. Use a flashlight when necessary.
Look for:
- Cuts
- Cracks
- Bulges
- Blisters
- Punctures
- Embedded objects
- Exposed cords
- Missing pieces of tread
- Uneven wear
- Flat spots
- Separation
- Abrasion
- Oil or chemical contamination
- Damage near the bead
- Contact with the RV body or suspension
- A tire sitting noticeably lower than the others
Inspect dual tires carefully on motorhomes equipped with them. Objects can become trapped between dual tires, and incorrect spacing or unequal pressure can cause the tires to contact one another.
Do not travel on a tire with a bulge, exposed cords, significant cracking, tread separation, or other serious damage. Have it replaced or professionally evaluated. Even if a tire looks fine, use a gauge rather than relying on appearance alone.
Examine the Tread
Tread depth affects wet-weather traction and the tire’s ability to move water away from its contact area. Tires have moulded tread-wear indicators across their grooves. When the tread reaches these indicators, the tire requires replacement.
Transport Canada identifies tread worn to the level of the wear indicators—approximately 1.5 millimetres or 2/32 of an inch—as requiring replacement. Provincial requirements and vehicle classifications may vary, and better wet or winter performance generally requires more tread than the legal minimum. For more information on tire and vehicle safety, see Transport Canada’s road safety guidance.
Measure tread depth at several locations around each tire. Uneven readings can reveal developing mechanical problems.
Common wear patterns include:
- Wear on both shoulders, often associated with underinflation
- Wear through the centre, sometimes associated with excessive inflation
- Wear on one edge, which may indicate alignment or suspension problems
- Cupping or scalloping, which may involve balance, bearings, shocks, or suspension
- Irregular wear on one trailer tire, which may indicate a bent component or axle concern
Wear patterns are diagnostic clues. Because of this, replacing the tire without correcting the cause may allow the new tire to wear the same way. Since tread depth affects wet-weather traction, replace tires before they reach the wear indicators in wet climates.
Check the Tire Date Code
A tire’s age is determined by its manufacturing date, not the date it was purchased or installed.
The final four digits of the tire identification code indicate the week and year of manufacture. For example:
- 1824 means the tire was manufactured during the 18th week of 2024
- 4322 means it was manufactured during the 43rd week of 2022
The complete identification code may appear on only one sidewall, so checking the inside of the tire may be necessary.
Also, tires age through heat, oxygen, sunlight, flexing, and environmental exposure. Long periods without use do not stop that process.
There is no single replacement age that applies to every tire. Follow the tire and RV manufacturers’ recommendations. Have older tires inspected regularly by a qualified professional, and replace them sooner if they show damage, have an uncertain history, or have been subjected to severe service.
So a tire with deep tread can still be unsafe because of age or internal deterioration. Because tires age from the inside, a tire that looks new may still be unsafe
Inspect Valve Stems and Extensions
Valve stems are small components with an important job. A cracked, loose, deteriorated, or incorrectly rated valve stem can cause gradual or sudden pressure loss.
Check for:
- Cracks around the base
- Cuts or deterioration
- Corrosion
- Missing valve caps
- Air leakage
- Movement at the wheel
- Contact with wheel covers
- Unsupported extensions
- Damage from external TPMS sensors
High-pressure tires require appropriately rated valve stems. Metal stems may be required for some applications or monitoring systems.
Flexible valve extensions on dual wheels must be installed and supported correctly. If an extension leaks, vibrates, or rubs against the wheel, have it corrected.
Use valve caps with internal seals where recommended. The cap provides a secondary barrier against leakage and keeps dirt and moisture out of the valve.
Inspect the Wheels
Tire inspections should include the wheels. Look for:
- Cracks
- Bends
- Elongated stud holes
- Heavy corrosion
- Missing wheel nuts
- Loose decorative covers
- Damage around the valve stem
- Signs that the wheel has contacted another component
- Rust trails around wheel nuts
- Shiny metal or movement marks
Therefore, a cracked, bent, or damaged wheel requires professional evaluation. Never weld or repair a wheel unless the wheel manufacturer specifically authorizes an approved procedure performed by a qualified facility.
Replacement wheels must match the required diameter, width, bolt pattern, offset, centre opening, load capacity, and pressure rating.
Wheel-Nut Torque
Correct wheel-nut torque helps secure the wheel without overstressing the studs, nuts, or wheel.
Use:
- The RV, axle, or wheel manufacturer’s torque specification
- A properly calibrated torque wrench
- The correct socket
- The specified tightening pattern
- Clean components prepared as directed by the manufacturer
Do not guess the torque value. Do not assume that all trailers use the same specification.
Wheel nuts may require rechecking after a wheel has been removed and installed, after initial travel, and at intervals specified by the manufacturer. Follow the exact retorque schedule in the owner’s manual.
An impact wrench may be useful during removal, but it should not replace final tightening with a torque wrench. Excessive torque can stretch studs, damage wheels, distort mounting surfaces, or make roadside removal difficult.
If a wheel nut repeatedly loosens or cannot hold the specified torque, stop using the RV and have the wheel, studs, nuts, hub, and mounting surfaces inspected.
Bearings, Brakes, and Suspension Can Affect Tires
However, abnormal tire wear or heat may originate somewhere other than the tire.
Possible causes include:
- Loose or damaged wheel bearings
- A dragging brake
- Bent axles or spindles
- Worn suspension bushings
- Broken or flattened springs
- Damaged equalizers
- Loose U-bolts
- Misalignment
- Incorrect ride height
- Overloading
- Frame or suspension damage
After stopping during a trip, cautiously check for unusual heat or odours around the wheels without touching potentially hot components. One hub or wheel that is much hotter than the others may indicate a tire, bearing, or brake problem.
Do not continue travelling when a wheel is smoking, producing a burning smell, visibly leaning, or generating extreme heat. For routine maintenance that helps prevent these issues, see our RV Maintenance guides.
Protect Tires During Storage
Also, storage conditions can accelerate tire deterioration. Before storing the RV:
- Inflate tires to the manufacturer’s recommended cold pressure
- Confirm that the RV is not overloaded
- Park on a firm, well-drained surface
- Avoid long-term contact with petroleum products or chemicals
- Protect tires from prolonged sunlight when appropriate
- Keep tire covers clean and ventilated
- Check pressure periodically
- Inspect for pests or physical damage
- Move the RV periodically if recommended
- Follow the manufacturer’s lifting or storage instructions
Also, do not use stabilizing jacks to lift the RV or remove weight from its tires unless the system is specifically designed and approved for that purpose.
If the RV will be supported during storage, use the designated structural lifting or support points and suitable equipment. Never work beneath an RV supported only by levelling or stabilizing jacks.
Tire covers can reduce sunlight exposure, however, they do not stop ageing or eliminate the need for inspection.
Avoid Tire Dressings That Can Cause Damage
In addition, some tire dressings contain petroleum distillates, solvents, or silicone formulations that may not be recommended by the tire manufacturer.
Clean tires with mild soap, water, and a soft brush unless the tire manufacturer specifies another method. Avoid harsh chemicals, pressure-washing too closely, and products that leave an excessively oily coating.
A glossy appearance does not indicate that a tire is protected or safe.
Spare-Tire Maintenance
The spare tire ages and loses pressure even when it is never used.
Inspect the spare for:
- Correct pressure
- Cracks or weathering
- Mounting damage
- Corrosion
- A secure carrier
- A functioning lock or release mechanism
- A readable date code
- Compatibility with the installed wheels and tires
Make sure the tools required to lower or remove the spare are accessible and functional. Confirm that the jack and lifting procedure are suitable for the RV.
A spare tire mounted on the rear of an RV receives considerable sunlight and weather exposure. A cover may help protect it, but the tire still requires regular inspection and eventual replacement.
What to Do During a Tire Failure
If a tire fails while travelling:
- First, hold the steering wheel firmly
- Then, avoid abrupt steering
- Reduce speed gradually
- Activate the hazard lights
- Move to a safe location away from traffic
- Stop on firm, level ground when possible
- Keep passengers away from passing vehicles
- Assess the surroundings before attempting any work
- Contact roadside assistance if conditions are unsafe
Do not stop in an active traffic lane unless the vehicle cannot be moved. Do not crawl beneath an RV supported only by a roadside jack.
After a trailer tire failure, inspect the surrounding wheel well, brake wiring, propane lines, plumbing, suspension, underbelly, and exterior panels. Pieces of a failed tire can cause significant hidden damage.
The tire on the opposite side of the same axle may also have been overloaded during the event and should be inspected.
Replacing RV Tires
When purchasing replacement tires, confirm:
- Correct tire type
- Correct size
- Adequate load capacity
- Appropriate load range
- Suitable speed rating
- Wheel compatibility
- Valve-stem compatibility
- Clearance around the tire
- Manufacturer approval
- Current manufacturing dates
Tires installed on the same axle should normally match in size, construction, load capacity, and overall diameter. Mixing unsuitable tires can affect loading, braking, handling, and suspension operation.
Have tires mounted and balanced by a shop familiar with RV, trailer, or commercial tires. Ask the installer to inspect the wheels, valve stems, studs, nuts, and mounting surfaces.
After installation, set the cold pressure correctly and follow the required wheel-nut retorque schedule.
When to Seek Professional Assistance
Contact a qualified tire, RV, chassis, or suspension technician when you find:
- A bulge, blister, or exposed cord
- Significant cracking
- Tread separation
- Repeated pressure loss
- A damaged wheel or valve stem
- Unusual or rapid tread wear
- One tire running hotter than the others
- A wheel that appears tilted
- Vibration or pulling
- Repeatedly loose wheel nuts
- Damaged studs
- A suspected bearing or brake problem
- Evidence of axle or suspension damage
- Uncertain tire compatibility
- A tire that was driven while seriously underinflated
- Damage following a blowout or impact
If you are unsure whether a tire is safe, have it inspected rather than risk a highway failure. Do not continue driving simply because a damaged tire still holds air. For help identifying related problems, see our RV Troubleshooting guides.
RV Tire-Safety Checklist
Before each travel day:
- Check every tire’s cold pressure
- Inspect tread and accessible sidewalls
- Look for cracks, bulges, cuts, and embedded objects
- Check valve stems and caps
- Confirm TPMS operation when equipped
- Inspect the spare tire
- Look for leaning wheels or unusual suspension position
- Confirm that the RV is not overloaded
- Check wheel-nut torque when required by the manufacturer
During travel stops:
- Walk around the RV
- Look for pressure loss or tire deformation
- Watch for unusual odours
- Compare wheel and hub temperatures cautiously
- Check the TPMS display
- Inspect for fresh damage or debris
- Investigate any new vibration or handling change
During seasonal maintenance:
- Record tire date codes
- Measure tread depth
- Inspect inside and outside sidewalls
- Check wheels for corrosion or cracking
- Inspect suspension and axle components
- Examine the spare-tire carrier
- Review tire and RV manufacturer recommendations
- Schedule professional inspection when needed
RV Tire Safety: Key Takeaways.
RV tire safety depends on more than tread depth. Correct cold inflation pressure, sufficient load capacity, balanced loading, sound wheels, secure fasteners, healthy suspension components, and the age and condition of each tire all matter.
Check pressure with a reliable gauge before travelling. Inspect every tire regularly, including the spare, and investigate unusual wear, heat, vibration, or pressure loss promptly.
Most importantly, do not ask a damaged or questionable tire to complete one more trip. Replacing a tire or stopping for an inspection is far less costly than dealing with a highway failure and the damage it can cause.