
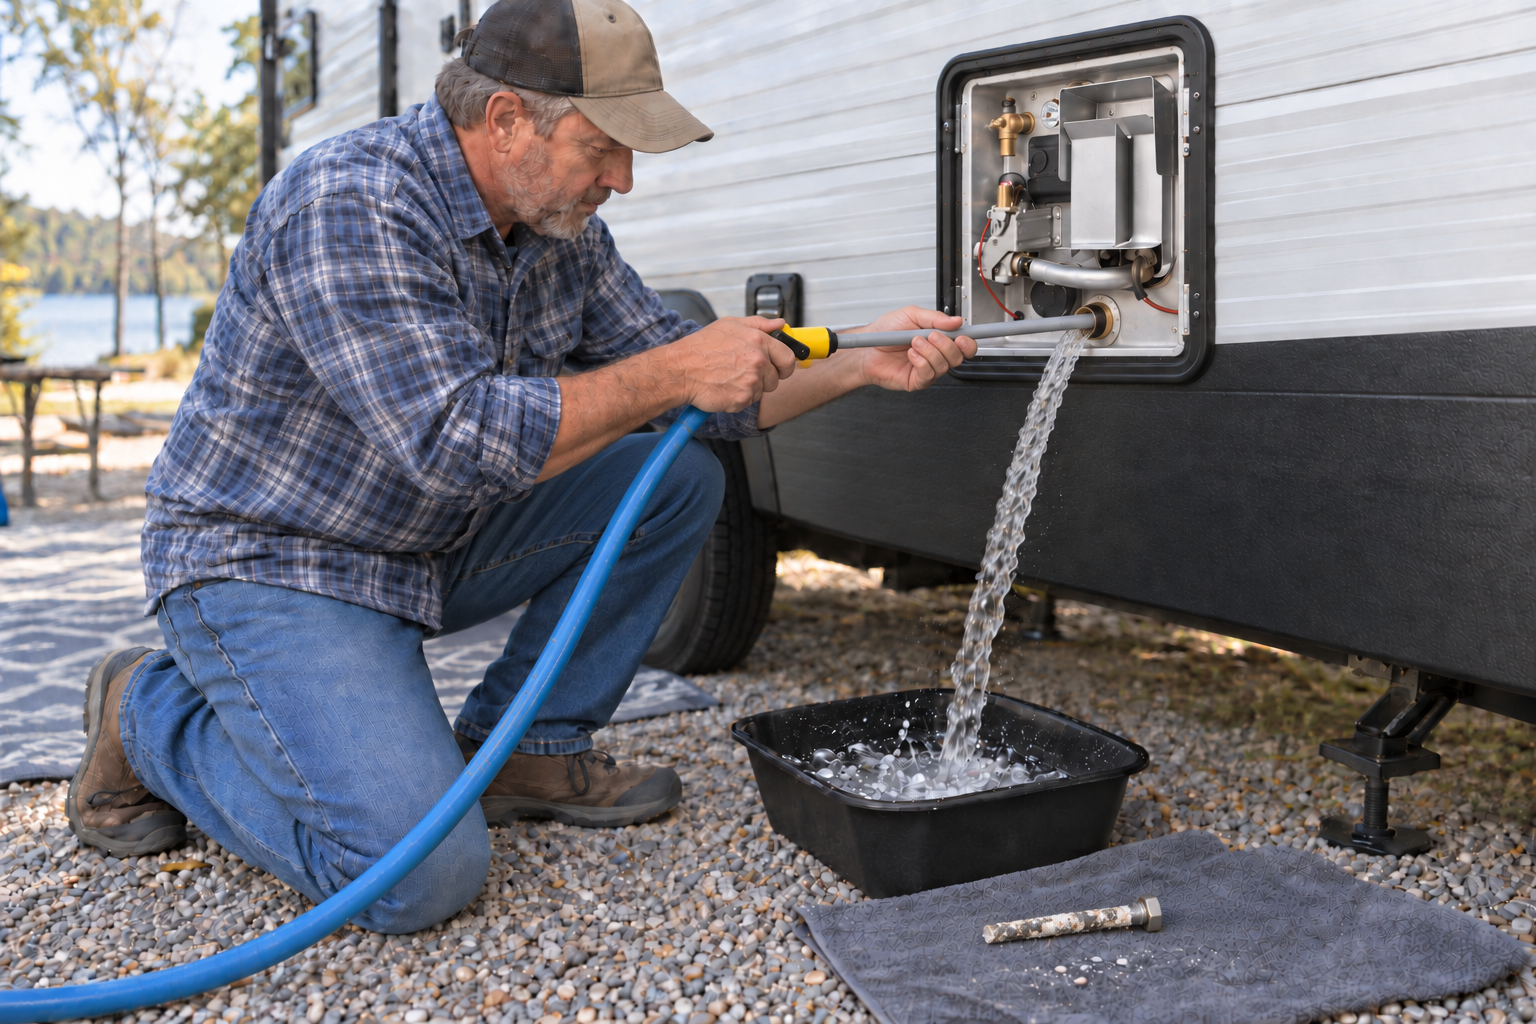
A tank-style RV water heater collects mineral sediment during normal use. Regular RV water heater flush and draining removes loose deposits and gives you a chance to inspect its drain plug or anode rod. It is also part of protecting many tank-style heaters before freezing weather.
This guide is a procedure for conventional tank-style RV water heaters. Tankless and hydronic systems have different service requirements. For operating problems, leaks, temperature changes, and general maintenance, see RV Water Heater Maintenance and Troubleshooting.
Hot water, pressure, propane, and electricity can cause serious injury. Read the instructions for your exact heater before starting. Stop if a fitting is seized, the tank will not depressurize, or you find signs of propane or electrical damage.
Identify the Heater and Gather Supplies
Find the heater’s manufacturer and model number. Confirm whether it uses an anode rod, nylon drain plug, valve, or another manufacturer-specific arrangement. Do not choose a part simply because its threads look right.
Depending on the model, useful supplies may include safety glasses, gloves, the correctly sized socket or wrench, a drinking-water-safe hose, an approved rinsing wand, a flashlight, towels, and a compatible replacement drain component. Use thread sealant only if your heater’s instructions call for it and specify a suitable type.
Service intervals depend on the manufacturer, water quality, and use. Inspect the tank at the interval in its manual and more often when mineral-rich water or sediment makes it necessary. Record when you drain, flush, and replace a component.
Turn Off Heat and Let the Water Cool
Turn off every heating mode. Depending on the heater, that may include an interior propane control, electric control, or exterior electric-element switch. Isolate electrical and propane sources as its service instructions require so the heater cannot turn on while empty.
Allow the tank to cool completely. Water may remain dangerously hot well after the appliance has been switched off. Never remove a drain plug or anode rod while the heater is operating or while water is hot.
Shut Off Water and Relieve Pressure
Disconnect the campground water supply and turn off the RV water pump. Open a hot-water faucet and allow pressure to release. Follow any additional pressure-relief steps specified by the heater manufacturer.
Do not remove the drain component until the tank is cool and depressurized. Pressurized hot water can discharge suddenly and cause severe burns.
Locate and Remove the Drain Component
Open the exterior water-heater access door. On many tank-style heaters the drain is near the bottom of the appliance; the pressure-and-temperature relief valve is higher up and is not the primary drain.
Inspect the compartment before removing anything. Stop and seek qualified help if you smell propane or find soot, scorched wiring, melted connectors, or a suspect leak.
Stand to one side of the drain opening. Fit the correct tool squarely on the plug or anode rod and loosen it carefully. Once loose, remove it without placing your face or body in front of the opening. Let the water and sediment drain.
Do not force a seized component. Excessive torque can damage the tank fitting or its threads.
Inspect the Anode Rod or Drain Plug
If the heater specifies a sacrificial anode rod, examine it for substantial material loss, severe thinning, widespread exposure of its core, damaged threads, or distortion. Roughness and some corrosion are normal because the rod is intended to wear. Replace it according to the heater manufacturer’s criteria, using the specified type.
If the model uses a nylon or plastic drain plug, inspect its head, threads, and body for cracks, distortion, heat damage, or evidence of cross-threading. Replace a damaged plug with the correct part. Do not substitute a metal plug or install an aftermarket anode in a heater not designed for one unless its manufacturer explicitly approves it.
RV Water Heater Flush: Removing Sediment
If the manufacturer permits flushing through the drain opening, use a suitable drinking-water-safe hose and RV water-heater rinsing tool. Insert the tool gently and direct a controlled stream toward different parts of the tank. Do not strike internal surfaces or heating components.
Continue until the discharged water runs reasonably clear. White mineral flakes, fine sediment, and pieces of worn anode material may appear. Let debris leave through the opening rather than pushing it farther inside.
Do not scrape the tank with a screwdriver, metal rod, drill attachment, or other sharp tool. Avoid excessive pressure and chemicals not approved for the model. Tankless heat exchangers require their own descaling procedure; do not flush one using this tank method.
Clean Only Accessible Exterior Debris
With the heater off and cool, remove loose leaves, dust, or spider webs from accessible parts of the exterior compartment using a soft brush or vacuum. Check that the access door and vents are clear.
Do not insert tools into a burner tube, change propane adjustments, or disturb wiring. Soot, delayed ignition, or damaged components requires professional service rather than cleaning around the symptom.
Reinstall the Correct Component
Clean loose debris from the drain opening without damaging its threads. Prepare the anode or plug as the heater manufacturer directs. If approved thread sealant is required, use it sparingly and exactly as instructed.
Start the component by hand. It should engage without immediately binding or sitting crooked. Stop if it appears cross-threaded. Tighten it to the manufacturer’s specification; do not overtighten a nylon plug.
Refill the Tank Before Restoring Heat
If the bypass valves were moved for winterization, return them to the normal operating positions according to the RV’s plumbing diagram. Restore the city-water connection or pump supply, then open a hot-water faucet.
Keep the faucet open while air escapes. When water flows steadily without sputtering, check the drain fitting, relief-valve area, and accessible plumbing connections for leaks. Correct any leak before using the heater.
Do not turn on an electric element or propane burner until you have confirmed that the tank is completely full. An empty tank can damage the heater, and an electric element can fail rapidly. Only after filling and checking should you restore its power and propane supply and test the desired mode as the manual directs. For a printable version of the maintenance schedule, see our RV Checklists page.
If Draining for Winter Storage
Draining a tank is only one part of winterizing an RV. Set the bypass valves, protect connected plumbing, and follow both the RV and heater manufacturers’ instructions. Do not assume that draining the RV’s water lines has emptied or protected the heater. For a complete seasonal routine, see our Seasonal Care guides.
Some correctly drained tanks retain a small amount of water near the bottom; follow the model’s winterizing procedure rather than improvising additional disassembly. Never use automotive antifreeze in the RV’s potable-water system.
Stop and Get Help When Necessary
Contact a qualified technician if the drain part is seized, threads are damaged, the tank leaks, the relief valve discharges persistently, the burner area shows soot, propane is smelled, wiring appears burnt, or the heater does not fill and drain as expected. For more industry safety information, see the RV Safety & Education Foundation.
The safe sequence matters more than speed: identify the heater, turn it off, let it cool, relieve pressure, drain and flush using approved methods, reinstall the correct part, and refill it completely before restoring heat. For help identifying water heater or plumbing problems, see our RV Troubleshooting guides.