
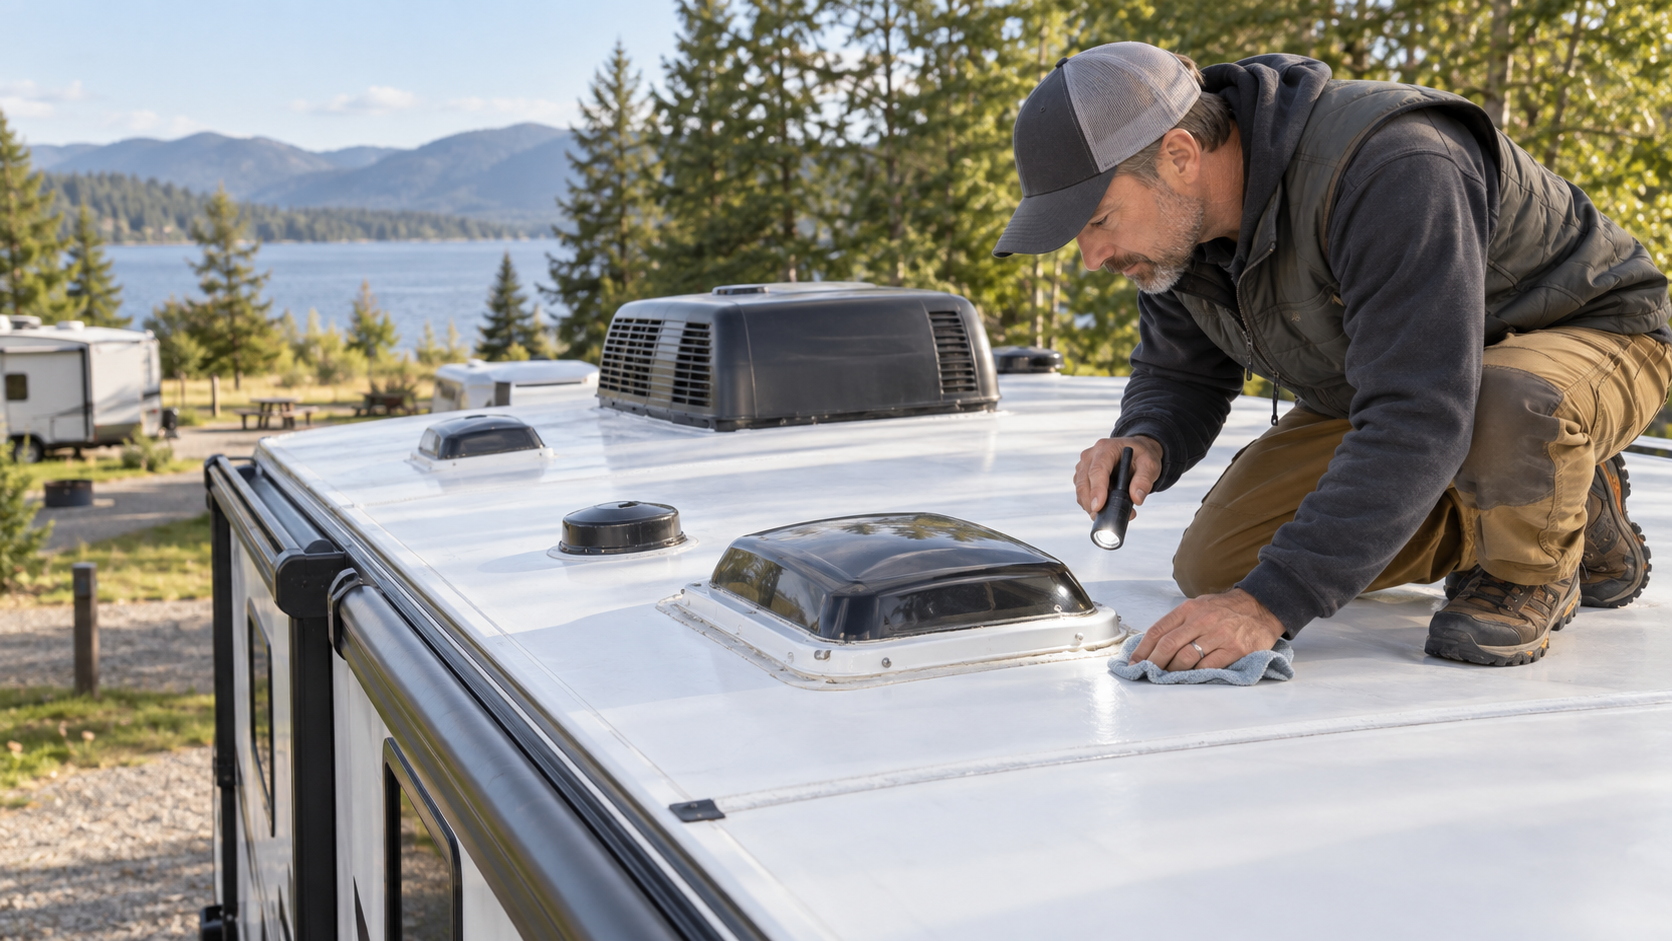
An RV’s roof and exterior protect its structure, insulation, wiring, cabinetry, and interior finishes from weather. Regular RV roof inspection and seal maintenance catch small problems before they become expensive water damage. Every vent, skylight, window, door, light, ladder mount, antenna, and exterior fitting creates an opening that must remain properly sealed.
Movement during travel, sunlight, rain, snow, ice, temperature changes, tree branches, and age can gradually damage roofing materials and sealants. A small opening may allow water into a wall or ceiling without producing an immediate interior drip.
Regular inspections can reveal developing problems before they cause extensive damage. The correct maintenance methods depend on the RV’s construction and roof material, so identify those materials and consult the manufacturer’s instructions before cleaning or repairing anything.
Why Exterior Inspections Matter
Water intrusion is one of the most damaging problems an RV can develop. Once water passes through the exterior, it may spread through insulation, framing, wall panels, flooring, or cabinetry.
Damage Caused by Hidden Moisture
Hidden moisture can cause:
- Staining
- Swollen panels
- Soft walls or floors
- Delamination
- Corrosion
- Mould or mildew
- Damaged insulation
- Electrical problems
- Structural deterioration
- Persistent odours
The visible point where water appears inside may be far from the opening where it entered. Water can follow wiring, framing, roof contours, or interior surfaces before becoming noticeable.
Preventive inspections are generally easier and less expensive than locating and repairing concealed water damage. Because water can travel far from the entry point, interior stains may not appear near the leak. For more on routine RV care, see our RV Maintenance guides.
Identify the Roof Material
Common RV Roof Materials
RV roofs may be made from several materials, including:
- EPDM rubber
- TPO membrane
- PVC membrane
- Fibreglass
- Aluminum
- Manufacturer-specific composite materials
These materials may look similar to an inexperienced owner but require different cleaners, coatings, adhesives, and sealants.
Check the RV documentation, contact the manufacturer, or ask a qualified technician to identify the material. Do not select a product solely because its label says it is intended for RV roofs.
Confirm that the product is approved for:
- The exact roofing membrane
- Existing sealants
- Plastic components
- Fibreglass
- Painted surfaces
- Aluminum
- Exterior graphics
An incompatible cleaner or sealant can soften, stain, swell, crack, or separate the material it was intended to protect. If you are unsure of the roof material, confirm it before buying any cleaner or sealant. For more industry guidance on RV construction and materials, see the RV Industry Association.
Determine Whether the Roof Is Walkable
Not every RV roof is designed to support a person. Even a walkable roof may have weak areas or specific locations that must be avoided.
Before climbing onto the roof:
- Consult the RV owner’s manual
- Confirm the roof’s weight limitations
- Use a stable, appropriate ladder
- Wear footwear with clean, slip-resistant soles
- Keep away from edges
- Avoid wet, icy, or windy conditions
- Protect fragile vents and skylights
- Use suitable fall protection
- Have another person nearby
Do not assume an attached RV ladder means that every roof area is safe to walk on.
If the roof is not designed to support a person, or if you are uncomfortable working at height, arrange a professional inspection.
Never stand on vent covers, skylights, solar panels, antennas, air-conditioner shrouds, or unsupported membrane areas. Even if the roof is rated walkable, avoid it during wet, icy, or windy conditions.
Establish an Inspection Schedule
Follow the inspection interval required by the RV and component manufacturers. Some warranties require inspections or maintenance at specified times.
Additional inspections are sensible:
- At the beginning of the travel season
- Before long trips
- After long trips
- Before storage
- After winter storage
- After severe storms
- After hail
- After contact with branches
- After travelling rough roads
- Whenever interior moisture appears
Record each inspection, including the date, findings, photographs, products used, and repairs performed. Maintenance records may help with future troubleshooting, warranty claims, or resale. Because inspections are quick, schedule them before every long trip.
Cleaning the Roof
A clean roof is easier to inspect because dirt can conceal cracks, lifting edges, punctures, and failed sealant.
Before cleaning:
- Confirm the roof is safe to access.
- Close windows and vents.
- Protect or remove loose equipment.
- Choose a cleaner approved for the roof.
- Review runoff restrictions at the cleaning location.
- Test the product in an inconspicuous area when directed.
- Follow the cleaner manufacturer’s dilution and application instructions.
Use soft brushes, cloths, or other tools approved for the roofing material. Work carefully around sealant, vents, antennas, solar equipment, and membrane edges.
Harsh chemicals, abrasive tools, petroleum-based products, and unsuitable solvents can damage roofing membranes or sealants.
High-pressure washing may force water beneath seals, damage membrane surfaces, or remove protective coatings. Do not pressure-wash the roof unless the RV and roofing manufacturers specifically permit it and provide instructions.
Rinse exterior sidewalls promptly when roof-cleaning runoff could leave streaks or residue. If the cleaner requires rinsing, wash the sidewalls after cleaning the roof.
What to Inspect on the Roof
Examine the entire roof surface and every penetration.
Look around:
- Front and rear roof seams
- Side rails and roof edges
- Plumbing vents
- Roof vents
- Skylights
- Air conditioners
- Antennas
- Satellite equipment
- Solar-panel mounts
- Cable entry points
- Ladder mounts
- Roof racks
- Other installed accessories
Warning Signs to Look For
Look for:
- Cracked sealant
- Gaps or separation
- Lifting edges
- Missing sealant
- Punctures
- Tears
- Bubbles or wrinkles
- Soft areas
- Discolouration
- Exposed fasteners
- Loose hardware
- Damaged vent covers
- Broken air-conditioner shrouds
- Standing water
- Signs of previous repairs
Do not probe a suspected soft area aggressively. Additional pressure can worsen existing damage.
Some membrane movement or appearance changes may be normal for a particular product. Photograph uncertain areas and compare them over time or have them evaluated professionally. If you find a soft area, do not press on it further and arrange professional inspection.
Understanding Exterior Sealants
Different locations require different kinds of sealant. A product intended to flow across a horizontal roof surface may be unsuitable for a vertical wall, window, or corner moulding.
Common categories include:
- Self-levelling roof sealants
- Non-sag sealants for vertical surfaces
- Butyl sealing materials
- Manufacturer-specific tapes
- Adhesives
- Membrane repair products
- Exterior caulks
Colour and appearance do not confirm compatibility. Two white sealants may use different chemistry and may not adhere safely to each other.
Before applying anything, identify:
- The roof material
- The existing sealant
- The surface beneath it
- The location and required movement
- The manufacturer’s approved product
- Surface-preparation requirements
- Temperature and weather limitations
- Curing time
Never use ordinary household silicone merely because it is waterproof. Some silicone products do not adhere reliably to RV materials, can be difficult to remove, and may prevent approved sealants from bonding later. Although two sealants may look alike, their chemistry can be very different.
Repairing Cracked or Failed Sealant
Minor sealant maintenance may be suitable for an owner when the roof is structurally sound, the correct materials are known, and the manufacturer permits the repair.
A typical process may involve:
- Cleaning the area with an approved product.
- Allowing the surface to dry completely.
- Removing loose material only as directed.
- Preparing the existing surface.
- Applying the approved sealant.
- Allowing it to cure before exposure to weather or travel.
- Inspecting the completed repair.
- Recording the product and date.
Do not automatically remove all existing sealant. Some manufacturers permit approved material to be applied over clean, securely bonded sealant, while others require more extensive preparation.
Aggressive scraping can puncture the membrane, damage mouldings, or expose fasteners. If the repair requires extensive removal, contact a professional.
Sealant should not be used to hide structural movement, rotten material, delamination, or a loose component. If the repair requires extensive removal, stop and contact a professional.
Emergency Roof Repairs
A temporary repair may be necessary if damage occurs during a trip. The objective is to limit additional water entry until a permanent repair can be completed.
Carry repair material approved for your roof. Generic tape, household caulk, or incompatible adhesive may cause additional damage or complicate the permanent repair.
Before applying a temporary patch:
- Move to a safe location
- Avoid roof access during wind, rain, or lightning
- Dry the surface as well as possible
- Follow the repair-product instructions
- Photograph the damage
- Arrange permanent inspection promptly
A temporary patch is not evidence that the underlying structure is dry or undamaged. Because temporary patches are not permanent, arrange a full inspection promptly.
Inspecting Sidewalls
Walk around the RV and examine each exterior wall in good light.
Look for:
- Cracks
- Dents
- Punctures
- Loose mouldings
- Missing fasteners
- Damaged graphics
- Open seams
- Bubbling or waviness
- Soft areas
- Staining
- Corrosion
- Gaps around components
A bulge or ripple in a laminated wall may indicate delamination, adhesive failure, or moisture damage. It requires professional assessment.
Pay close attention to upper corners, roof-to-wall transitions, front and rear caps, lower skirting, and areas near storage compartments. If you notice waviness or bubbles, have the wall assessed before travelling again.
Windows and Doors
Inspect the perimeter of every window and door. Look for gaps, cracked sealant, loose frames, damaged weather seals, and staining beneath the opening.
Inside the RV, check for:
- Dampness
- Water stains
- Swollen wall panels
- Soft trim
- Musty odours
- Moisture inside cabinets
- Damaged window tracks
Clean window drainage channels and weep openings according to the manufacturer’s instructions. Blocked drainage paths can allow water to collect or enter the wall.
Door seals should remain clean, flexible, and properly positioned. Use only approved treatments because petroleum-based products can damage some rubber seals.
If a window or door frame has separated from the wall, applying surface sealant may not correct the failed sealing material behind the frame. Because windows rely on drainage paths, clean the weep openings regularly.
Exterior Mouldings and Trim
Corner mouldings, belt rails, roof edges, and other trim pieces often cover structural joints and fasteners.
Inspect for:
- Loose screws
- Missing vinyl inserts
- Shrinking trim
- Separated ends
- Cracked sealant
- Corrosion
- Movement
- Gaps behind the moulding
Do not tighten loose fasteners blindly. A fastener that will not tighten may indicate damaged backing material or concealed water intrusion.
Repeatedly adding sealant to a moving moulding may conceal a larger problem. If a fastener will not tighten, stop and investigate further.
Storage Compartments
Open every exterior compartment and inspect the seals, hinges, latches, frames, and interior surfaces.
Look for:
- Water staining
- Damp carpet
- Rust
- Swollen flooring
- Musty odours
- Damaged seals
- Loose frames
- Cracked doors
- Misaligned latches
- Daylight around the opening
A compartment can leak while travelling even if it remains dry during ordinary rainfall. Road spray and wind pressure can drive water through a damaged seal.
Keep compartment seals clean and use only approved conditioners or lubricants.
Appliance and Utility Openings
Inspect exterior access panels and utility connections, including:
- Refrigerator vents
- Furnace vents
- Water-heater access doors
- Shore-power inlets
- Fresh-water connections
- Cable connections
- Exterior showers
- Fuel fills
- Generator compartments
Keep required ventilation openings clear. Never seal, cover, or modify an appliance vent to prevent rain, insects, or drafts.
Soot, heat damage, melted components, corrosion, or unusual staining around a propane appliance requires professional attention.
Slide-Out Roofs and Seals
Slide-outs create additional seams, seals, corners, and roof surfaces that require inspection.
Before retracting a slide-out:
- Check its roof for branches and debris
- Remove standing water when safe
- Inspect the upper seal
- Confirm that nothing blocks its movement
- Watch both sides as it moves
- Listen for unusual sounds
Inspect slide seals for tears, hardening, separation, distortion, or areas that do not make contact.
Use only seal treatments and lubricants approved by the slide-out and seal manufacturers. Some products attract dirt or damage rubber.
A slide-out that moves unevenly, binds, tilts, or repeatedly damages its seals should be inspected professionally. Before retracting a slide-out, check its roof and remove any debris.
Awning Inspection and Care
Inspect awning fabric, mounting brackets, arms, wiring, fasteners, and sealant.
Look for:
- Tears
- Frayed edges
- Mildew
- Staining
- Loose hardware
- Bent arms
- Damaged wiring
- Failed sealant
- Uneven rolling
- Water trapped in the fabric
Clean the fabric with an approved product and allow it to dry before retracting it for storage.
Never leave an awning extended during strong wind, heavy rain, or when the RV is unattended. Water accumulation and sudden gusts can damage the awning and the RV wall.
Roof Vents and Skylights
Plastic roof components can become brittle from age and ultraviolet exposure.
Inspect vent covers and skylights for:
- Cracks
- Cloudiness
- Missing pieces
- Loose hinges
- Damaged screens
- Failed sealant
- Distortion
- Impact damage
A cracked component should be replaced promptly. Applying sealant across a structural crack may not provide a dependable repair.
Confirm replacement parts are compatible with the opening and installation method.
Exterior Lights and Attachments
Marker lights, cameras, ladders, grab handles, mirrors, and other attachments penetrate or connect to the exterior.
Check for movement, cracked lenses, corrosion, missing screws, and failed seals. Moisture inside a light may indicate a damaged lens, gasket, or wiring opening.
Do not assume that tightening a loose attachment will restore its seal. Movement may have damaged the sealing material or mounting structure.
Ladders and grab handles must be secure before use. A loose mount may indicate concealed structural damage.
Looking for Interior Evidence of Leaks
An exterior inspection should be paired with an interior inspection.
Interior Areas to Check
Check:
- Ceiling corners
- Upper cabinets
- Around vents and skylights
- Window frames
- Door frames
- Slide-out corners
- Beneath mattresses
- Inside wardrobes
- Storage compartments
- Walls behind furniture
- Flooring near exterior openings
Use a flashlight and inspect in good daylight. Touch surfaces gently and compare suspicious areas with nearby material.
Condensation can resemble a leak, but it should not be dismissed automatically. Determine whether moisture is coming from weather, plumbing, condensation, or an appliance. If moisture appears, determine whether it comes from weather, plumbing, or condensation. For help identifying the source, see our RV Troubleshooting guides.
What to Do When You Find Water
If active water intrusion is discovered:
- Protect people from electrical hazards.
- Move belongings away from the wet area.
- Stop additional water entry when safely possible.
- Photograph the affected area.
- Identify the likely exterior opening.
- Dry accessible surfaces.
- Contact the manufacturer, dealer, insurer, or technician as appropriate.
- Arrange a complete moisture assessment.
Visible drying does not confirm that insulation or framing inside the wall has dried. Moisture meters, pressure testing, thermal imaging, or partial disassembly may be needed to determine the extent of the damage. Because visible drying does not confirm the wall is dry, arrange a moisture assessment.
Washing and Protecting the Exterior
Use cleaning products suitable for the RV’s finish, graphics, windows, plastics, and sealants.
Work from top to bottom and rinse cleaning residue before it dries. Avoid abrasive pads and harsh chemicals.
Do not direct high-pressure water at:
- Window seals
- Door seals
- Exterior vents
- Appliance openings
- Electrical connections
- Moulding joints
- Sealant edges
- Slide-out seals
Wax or protective coatings may be appropriate for some exterior surfaces but unsuitable for others. Confirm compatibility before application.
When to Contact a Qualified Technician
Professional inspection is appropriate when you find:
- A soft roof
- Extensive cracking or lifting
- Large membrane bubbles
- Significant punctures or tears
- Active interior water damage
- Wall delamination
- Rotten or weakened structure
- Loose roof equipment
- Damaged slide-out alignment
- Failed windows or mouldings
- Repeated leaks after repair
- Uncertain roofing material
- Damage near electrical equipment
- Work requiring unsafe roof access
A technician should also inspect damage caused by hail, collision, falling branches, or severe storms. What appears to be minor surface damage may extend beneath the exterior. For more on how we approach RV safety, see our Safety Disclaimer.
Routine Roof and Exterior Checklist
During a routine inspection:
- Identify and clean the roof correctly
- Examine the entire roof surface
- Inspect every roof penetration
- Check sealant for cracks or separation
- Examine front and rear seams
- Inspect roof-to-wall edges
- Check vents and skylights
- Inspect solar and antenna mounts
- Examine sidewalls
- Check windows and doors
- Inspect mouldings and trim
- Check storage compartments
- Inspect appliance openings
- Examine slide-out roofs and seals
- Check awning fabric and hardware
- Look inside for moisture
- Photograph questionable areas
- Record maintenance and repairs
Record maintenance and repairs. For a printable version of the maintenance routine, see our RV Checklists page.
RV Roof Inspection: Key Takeaways
Maintaining an RV roof and exterior depends on consistent inspection and material compatibility. Small openings can allow water to travel into hidden areas where damage develops long before a stain or soft spot appears.
Learn which materials and sealants your RV uses, follow the required inspection schedule, and document what you find. Clean surfaces carefully, address developing problems promptly, and avoid covering structural damage with additional sealant.
If roof access is unsafe, the material is uncertain, or water may have entered the structure, professional inspection is the safest choice. Catching a failed seal early can prevent extensive damage and help keep the RV dependable for years.