
An RV air conditioner works hard in conditions that are difficult for any cooling system. It may sit unused for months, endure highway vibration, operate in intense sunlight, and draw power from campgrounds with varying electrical conditions. Regular RV air conditioner maintenance helps catch problems before they become expensive repairs.
Routine maintenance helps the air conditioner cool more effectively, reduces strain on its components, and provides an opportunity to catch water leaks or electrical problems before they cause additional damage.
Some maintenance tasks, such as cleaning an accessible filter, are straightforward. Work involving live electricity, sealed refrigerant components, capacitors, motors, or unsafe roof access should be left to a qualified technician.
How an RV Air Conditioner Works
Most RV air conditioners are mounted on the roof. The rooftop section contains components that remove heat from the interior and release it outside.
A typical unit may include:
- An evaporator coil
- A condenser coil
- A compressor
- One or more fans
- A blower motor
- Electrical controls
- A thermostat or control panel
- A removable interior air filter
- Supply-air outlets
- Return-air openings
- A rooftop shroud
- A foam roof gasket
- Condensate drains or channels
Warm interior air enters through the return-air opening and passes through the filter. The blower moves that air across the cold evaporator coil. Heat and moisture are removed, and the cooled air returns to the RV through ceiling outlets or ductwork.
The refrigerant carries the absorbed heat to the outside portion of the unit. The condenser coil and fan release that heat into the outdoor air.
Understand the RV’s Electrical Supply
Most rooftop RV air conditioners operate on 120-volt alternating-current power. Depending on the RV, that power may come from:
- A campground pedestal
- A generator
- An inverter designed for the load
- A properly configured residential connection
An air conditioner requires significant power, particularly when its compressor starts. Other high-demand appliances operating at the same time may exceed the available electrical service.
Common high-demand equipment includes:
- Electric water heaters
- Microwave ovens
- Electric fireplaces
- Portable heaters
- Hair dryers
- Toasters
- Coffee makers
- Induction cooktops
- Battery converters or chargers operating at high output
A 30-amp RV has less total available power than a 50-amp RV. Even a 50-amp RV can overload an individual circuit if too many appliances share it.
Repeatedly tripping a breaker is not normal operation. It can indicate excessive demand, low voltage, a weak breaker, a failing air conditioner, damaged wiring, or another electrical problem. For more on 12-volt and 120-volt systems, see our Understanding RV Electrical Systems guide.
Low Voltage Can Damage Equipment
An air conditioner may continue trying to operate when campground voltage drops. Low voltage can cause motors and compressors to draw more current, overheat, struggle to start, or fail prematurely.
Warning signs can include:
- The compressor struggling to start
- Lights dimming significantly
- A humming sound without normal startup
- Frequent breaker trips
- The air conditioner cycling off unexpectedly
- An electrical-management system disconnecting power
- Unusually weak airflow or cooling
- Hot electrical plugs or connections
A properly rated electrical-management system can monitor incoming power and disconnect the RV when it detects certain unsafe conditions. This does not repair poor campground wiring, but it can help protect the RV.
Do not continue resetting breakers or repeatedly attempting to start an air conditioner that is struggling. Shut it down and determine why it is failing.
Disconnect Power Before Maintenance
Before removing an air-conditioner cover, filter housing, ceiling assembly, or rooftop shroud, consult the manufacturer’s instructions.
Depending on the task, it may be necessary to:
- Turn off the air conditioner
- Disconnect shore power
- Stop the generator
- Disable an inverter
- Turn off the appropriate circuit breaker
- Disconnect 12-volt control power
- Confirm that automatic generator-start features are disabled
Some components can store hazardous electrical energy even after external power has been disconnected. Capacitors can retain a charge and must not be touched by an untrained person.
Turning off the thermostat alone does not necessarily make the unit safe to service.
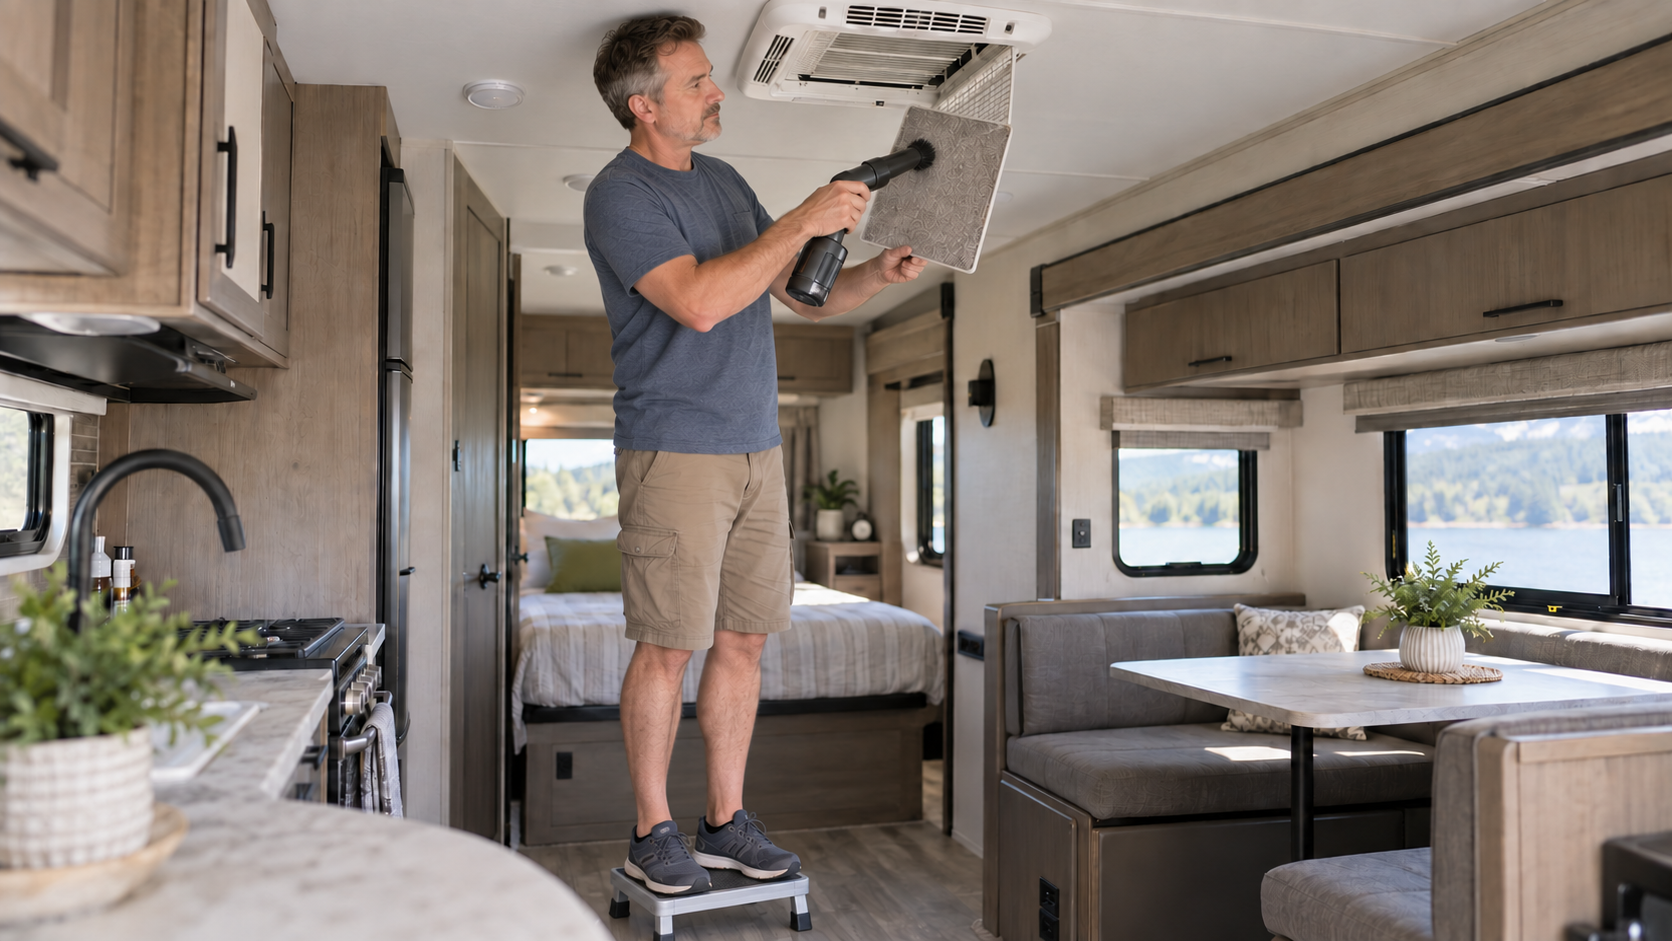
Clean the Interior Air Filter
A dirty filter is one of the most common causes of poor airflow and reduced cooling performance.
The filter is normally located behind the interior return-air grille. Some RVs have one large return opening, while ducted systems may have several smaller filter locations.
To clean a reusable filter:
- Turn off the air conditioner.
- Remove the return-air grille according to the manufacturer’s instructions.
- Carefully remove the filter.
- Vacuum loose dust or rinse the filter if permitted.
- Use mild soap when recommended.
- Allow the filter to dry completely.
- Reinstall it in the correct position.
- Secure the grille.
Do not reinstall a wet filter. Moisture can attract dirt, encourage odours, and affect indoor air quality.
Replace disposable filters rather than washing them. Use the correct size and type. A household filter that is too restrictive can reduce airflow and contribute to evaporator-coil freezing.
Check the filter frequently during dusty conditions, wildfire smoke, heavy use, or travel with pets.
Keep Return-Air Openings Clear
The air conditioner depends on unrestricted airflow. Do not block return-air grilles with:
- Bedding
- Towels
- Clothing
- Storage containers
- Cabinet doors
- Decorations
- Dust buildup
- Replacement filters that are too dense
The return side and cooled supply side must also remain separated within the ceiling assembly. Damaged or displaced foam dividers can allow cold air to circulate directly back into the return opening instead of entering the RV.
This short-cycling of air can reduce cooling performance and contribute to condensation or freezing.
If the interior ceiling assembly appears loose, damaged, or improperly sealed, have it inspected.
Check the Supply-Air Outlets
Make sure ceiling registers and direct-discharge vents are open, clean, and unobstructed.
On a ducted system, weak airflow at one outlet may indicate:
- A closed register
- A disconnected duct
- Crushed ducting
- A leak in the ceiling cavity
- Poorly sealed duct joints
- An obstruction
- An installation problem
Do not close too many outlets in an attempt to force more air into another area. Excessive restriction can reduce total airflow across the evaporator coil.
Clean the Interior Grille and Housing
Dust collects on return grilles, directional vents, and interior plastic surfaces. Turn off the system and clean these areas with a soft cloth or vacuum brush.
Avoid soaking electrical controls or allowing cleaning liquid to enter the ceiling assembly.
Use products that are compatible with the plastic. Strong solvents can discolour, crack, or weaken the housing.
A musty smell may come from a dirty filter, damp interior components, blocked drainage, stored moisture, or microbial growth. Persistent odours should be investigated rather than covered with fragrance.
Inspect the Rooftop Shroud
The rooftop shroud protects the air conditioner from weather, branches, road debris, and sunlight. It also directs airflow through the condenser.
From a safe viewing position, inspect it for:
- Cracks
- Missing pieces
- Loose fasteners
- Warping
- Hail damage
- Branch damage
- Openings caused by deterioration
- Contact with internal fan components
- Insect or animal nests
A damaged shroud can allow water and debris into the unit or interfere with airflow. Replace it with a compatible part rather than attempting an unreliable temporary repair.
Do not climb onto the roof unless the RV manufacturer permits roof access and you can do so safely. Wet, curved, deteriorated, or unsupported roofs create a serious fall hazard.
Clean the Condenser Coil
The condenser coil releases heat outside. Dirt, leaves, cottonwood fluff, insects, and other debris can restrict airflow through its fins.
If the manufacturer permits owner cleaning and the roof can be accessed safely:
- Disconnect all required power sources
- Remove the shroud as instructed
- Protect electrical components from moisture
- Remove loose debris gently
- Use a soft brush or low-suction vacuum where appropriate
- Clean in the direction of the fins
- Follow the manufacturer’s approved cleaning method
- Reinstall the shroud securely
Do not use a high-pressure washer. Strong water pressure can bend the delicate fins, force water into electrical components, and damage seals.
Do not use household coil cleaners unless the air-conditioner manufacturer approves them. Some chemicals can corrode aluminum, damage coatings, or leave residue.
If the coil is heavily blocked, corroded, damaged, or difficult to reach, arrange professional service.
Inspect the Evaporator Coil
The evaporator coil is located on the interior-air side of the rooftop unit. Dust that passes through a dirty or poorly fitted filter can collect on this coil.
A dirty evaporator coil can reduce airflow, lower cooling capacity, and contribute to icing.
Access varies considerably by model. Removing covers may expose electrical components, sharp fins, wiring, and stored-energy devices. Consult the service information before attempting access.
If owner cleaning is permitted:
- Disconnect all required power sources
- Avoid electrical components
- Use only approved tools and cleaning products
- Work carefully around the fins
- Keep water out of ducts and ceiling materials
- Restore all insulation and air dividers correctly
Bent fins can restrict airflow. Minor fin damage may sometimes be corrected with an appropriate fin comb, but extensive damage should be handled professionally.
Check Condensate Drainage
Cooling warm, humid air produces condensation. Many rooftop RV air conditioners allow this water to drain onto the roof and run toward the sides of the RV. Some systems use drain tubes or condensate pumps.
Water running from the roof during humid operation may be normal. Water dripping inside the RV is not.
Interior leakage can result from:
- Blocked condensate drains
- A dirty evaporator coil
- A frozen coil thawing
- An RV that is severely out of level
- Damaged drain channels
- A loose or compressed roof gasket
- Cracked housings
- Deteriorated roof sealant
- Improper installation
Keep visible drainage openings clear, but do not push wire or tools deeply into the unit. This can damage a drain pan, tubing, or internal components.
Investigate interior water promptly. Moisture can damage ceiling panels, insulation, wiring, walls, and cabinetry.
Understand the Roof Gasket
A rooftop air conditioner normally seals to the roof with a compressible foam gasket. Mounting bolts draw the upper unit and interior ceiling assembly together, compressing the gasket.
The gasket is not maintained like an exposed roof seam. Applying sealant around the air conditioner’s exterior base can interfere with drainage and may conceal the true source of a leak.
Mounting bolts should be tightened only to the manufacturer’s specification. Overtightening can crush the gasket, distort the roof, crack components, or create leaks. Uneven tightening can also prevent the gasket from sealing correctly.
If the air conditioner shifts, the ceiling assembly becomes loose, or water appears around the opening, have the gasket and mounting system inspected.
A flattened, hardened, damaged, or leaking gasket may require replacement. The rooftop unit normally must be lifted to replace it, making this a job for a properly equipped person or service facility.
Prevent Evaporator-Coil Freezing
Ice can form on the evaporator coil when its temperature falls below freezing and moisture in the air collects on it.
Common causes include:
- A dirty filter
- Restricted return airflow
- Closed supply registers
- A dirty evaporator coil
- A malfunctioning fan
- Very humid conditions
- Operating at an unsuitable fan setting
- A faulty freeze sensor or thermostat
- Refrigerant or mechanical problems
Symptoms may include weakening airflow, reduced cooling, water dripping after shutdown, or visible ice.
If freezing is suspected:
- Turn off compressor cooling.
- Run the fan only if the manufacturer recommends it.
- Allow the ice to thaw completely.
- Check the filter and accessible airflow openings.
- Dry any interior moisture.
- Resume operation only after correcting an obvious airflow problem.
Do not chip ice from the coil. Sharp tools can puncture the tubing or damage the fins.
If icing returns, arrange professional diagnosis.
Measure Cooling Performance Carefully
An RV air conditioner normally produces supply air that is noticeably cooler than the air entering the return opening. The exact temperature difference varies with humidity, airflow, equipment design, and operating conditions.
To make a basic comparison:
- Close windows and exterior doors
- Allow the unit to operate long enough to stabilize
- Measure return-air temperature near the intake
- Measure supply-air temperature at a nearby outlet
- Avoid placing the thermometer against cold metal or directly on the coil
This comparison can reveal a performance change, but it is not a complete diagnosis. A qualified technician may need to evaluate airflow, electrical current, coil temperatures, controls, and refrigerant-system performance.
Do not connect automotive refrigerant cans or gauges to an RV rooftop unit. Many RV air conditioners use sealed refrigerant systems without owner-serviceable charging ports.
Improve Cooling Efficiency
Even a properly functioning air conditioner has limited capacity. RV walls, windows, roofs, and slide-outs absorb heat quickly in direct sunlight.
To help the system:
- Park in shade when possible
- Use the awning appropriately
- Close blinds or insulated window coverings
- Limit unnecessary door opening
- Start cooling before the interior becomes extremely hot
- Use roof-vent cushions where appropriate
- Seal obvious air leaks
- Keep filters and coils clean
- Use interior fans to circulate air
- Reduce use of heat-producing appliances
- Cook outside when practical
- Confirm that slide-out and door seals close properly
On very hot days, an RV air conditioner may run for long periods without reaching a low thermostat setting. Continuous operation does not automatically mean the unit is defective.
Use Generators Safely
A generator must provide adequate voltage and power for the air conditioner’s starting and running demands.
Before using a generator:
- Confirm its continuous and surge ratings
- Follow the RV and generator manufacturers’ instructions
- Position portable generators outdoors at the required distance
- Direct exhaust away from the RV and neighbouring sites
- Never operate a generator in a compartment not designed for it
- Test the RV’s carbon-monoxide alarm
- Use approved electrical connections
- Avoid overloading the generator
A generator may appear large enough based on wattage alone but still struggle with compressor startup, elevation, high temperature, poor maintenance, or simultaneous electrical loads.
Never operate a portable generator inside an RV, garage, tent, storage compartment, or other enclosed area. For more on electrical system maintenance, see our RV Maintenance guides.
Soft-Start Devices
A soft-start device can reduce the electrical demand created when the compressor starts. This may help an air conditioner operate from certain generators or limited power systems.
A soft-start device does not increase the capacity of the electrical source, correct low voltage, or make an undersized circuit safe. Other loads must still be managed.
Installation involves the air conditioner’s electrical system and may expose hazardous components. Use a compatible, approved product and have it installed by a qualified person when required.
Unauthorized modifications may affect warranties or equipment certification.
Watch for Unusual Sounds
Become familiar with the air conditioner’s normal startup and operating sounds.
Arrange an inspection if you hear:
- Grinding
- Metal-on-metal contact
- Repeated clicking
- Loud humming without startup
- Screeching
- Persistent rattling
- Heavy vibration
- Popping or arcing sounds
- A fan striking the housing
- Sudden changes in compressor noise
A minor rattle may come from a loose grille or shroud, but unusual noise can also indicate a damaged fan blade, failing motor, loose mounting hardware, electrical problem, or compressor concern.
Turn the unit off if it produces smoke, sparks, a burning smell, or severe vibration.
Investigate Electrical Warning Signs
Stop using the air conditioner and obtain qualified assistance if you notice:
- A burning or melting smell
- Smoke or sparks
- A hot plug, receptacle, breaker, or shore-power connection
- Melted or discoloured wiring
- Repeated breaker trips
- A breaker that will not reset
- Severe voltage drop
- Intermittent operation
- Water near electrical components
- A compressor that repeatedly attempts to start
- A motor that hums but does not turn
Do not install a larger circuit breaker or fuse to stop nuisance tripping. Protective devices must match the wiring and equipment specifications.
Never bypass a thermostat, overload protector, freeze sensor, capacitor, or other safety device. For more industry safety guidance, see the RV Safety & Education Foundation.
Thermostat and Control Problems
Not every cooling problem originates in the rooftop unit. Thermostats and digital control systems may depend on 12-volt power, communication wiring, temperature sensors, or control modules.
If the air conditioner does not respond:
- Confirm the thermostat is set to cooling
- Lower the temperature setting appropriately
- Check that the fan setting is correct
- Confirm the RV has adequate 12-volt power
- Verify that 120-volt power is available
- Check the designated breakers and accessible fuses
- Review the thermostat display for error messages
- Follow the manufacturer’s reset procedure when provided
Do not repeatedly cycle the compressor on and off. Many systems require a built-in delay before restarting to allow refrigerant pressures to equalize.
If the system remains unresponsive after basic checks, contact a technician.
Protect the Air Conditioner During Storage
Before storing the RV:
- Clean or replace the interior filter
- Clean the grille and supply registers
- Inspect the rooftop shroud
- Remove accessible exterior debris
- Check for signs of water leakage
- Allow damp components to dry
- Record any unresolved operating concerns
- Follow the manufacturer’s seasonal-storage instructions
A fitted air-conditioner cover may be appropriate for some units, but it must be designed for that model and removed before operation. A poorly fitted cover can trap moisture or damage the shroud.
Do not wrap the unit tightly in plastic unless the manufacturer specifically recommends it.
After storage, check for nests, debris, damaged wiring, cracked shrouds, and blocked airflow before turning the system on.
Suggested Maintenance Schedule
Always follow the schedule supplied by the air-conditioner manufacturer. A general routine may include the following.
Before the Cooling Season
- Inspect the shroud
- Clean or replace the filter
- Clean interior grilles
- Check supply registers
- Inspect for signs of water leakage
- Test the thermostat and fan
- Confirm normal cooling operation
- Inspect the electrical supply equipment
Monthly During Regular Use
- Check the filter
- Clean the return grille
- Confirm that vents remain open
- Watch for unusual sounds or odours
- Look for interior condensation
- Inspect the shore-power connection for overheating
- Confirm that the unit starts and stops normally
After Dusty or Smoky Conditions
- Inspect the filter
- Check return and supply openings
- Examine accessible coils when appropriate
- Remove rooftop debris safely
- Watch for reduced airflow
Before Storage
- Clean and dry accessible components
- Inspect the shroud and roof area
- Record maintenance performed
- Address leaks or electrical concerns
- Follow the manufacturer’s storage procedure
When to Contact a Qualified Technician
Professional assistance is appropriate when:
- The breaker repeatedly trips
- The compressor will not start
- A capacitor or electrical component is suspected
- Wiring is burned, melted, or damaged
- The unit produces smoke or sparks
- A motor or fan has failed
- The evaporator repeatedly freezes
- Cooling remains poor after cleaning the filter
- Water leaks through the ceiling
- The roof gasket requires replacement
- The unit shifts or feels loose
- Refrigerant-system trouble is suspected
- Coils are badly damaged
- The shroud or internal structure is broken
- Safe roof access is not available
- The maintenance procedure is unclear
Depending on the problem, an RV technician, electrician, HVAC technician, generator technician, or roof-repair specialist may be required. For help identifying specific problems, see our RV Troubleshooting guides.
RV Air-Conditioner Maintenance Checklist
Before operating the air conditioner:
- Confirm that the electrical source is appropriate
- Inspect the shore-power cord and connections
- Check the interior filter
- Open the required supply registers
- Clear return-air openings
- Look for signs of previous water leakage
- Confirm that the rooftop shroud appears secure
- Test the thermostat
- Listen for normal startup
While it is operating:
- Monitor airflow
- Watch for ice or dripping inside
- Listen for unusual sounds
- Notice burning or musty odours
- Avoid overloading the electrical service
- Watch for low-voltage warnings
- Keep doors and windows closed
- Confirm that condensate drains outside as designed
After operation:
- Investigate unexpected water
- Note any error messages
- Allow frozen components to thaw completely
- Record repeated problems
- Arrange service before the next trip when necessary
For a printable version of the maintenance checklist, see our RV Checklists page.
RV Air Conditioner Maintenance: Key Takeaways
An RV air conditioner performs best when it has clean filters and coils, unrestricted airflow, adequate electrical power, and a sound weather seal around its roof opening.
Owners can handle many basic inspections and cleaning tasks, but roof work and electrical service carry serious risks. Never open electrical compartments, touch capacitors, alter wiring, or climb onto an unsuitable roof without the necessary knowledge and equipment.
Pay attention to changing airflow, new noises, water intrusion, repeated breaker trips, and struggling compressor starts. Correcting a developing problem early can protect the air conditioner, the RV’s electrical system, and the roof and ceiling surrounding the unit.