
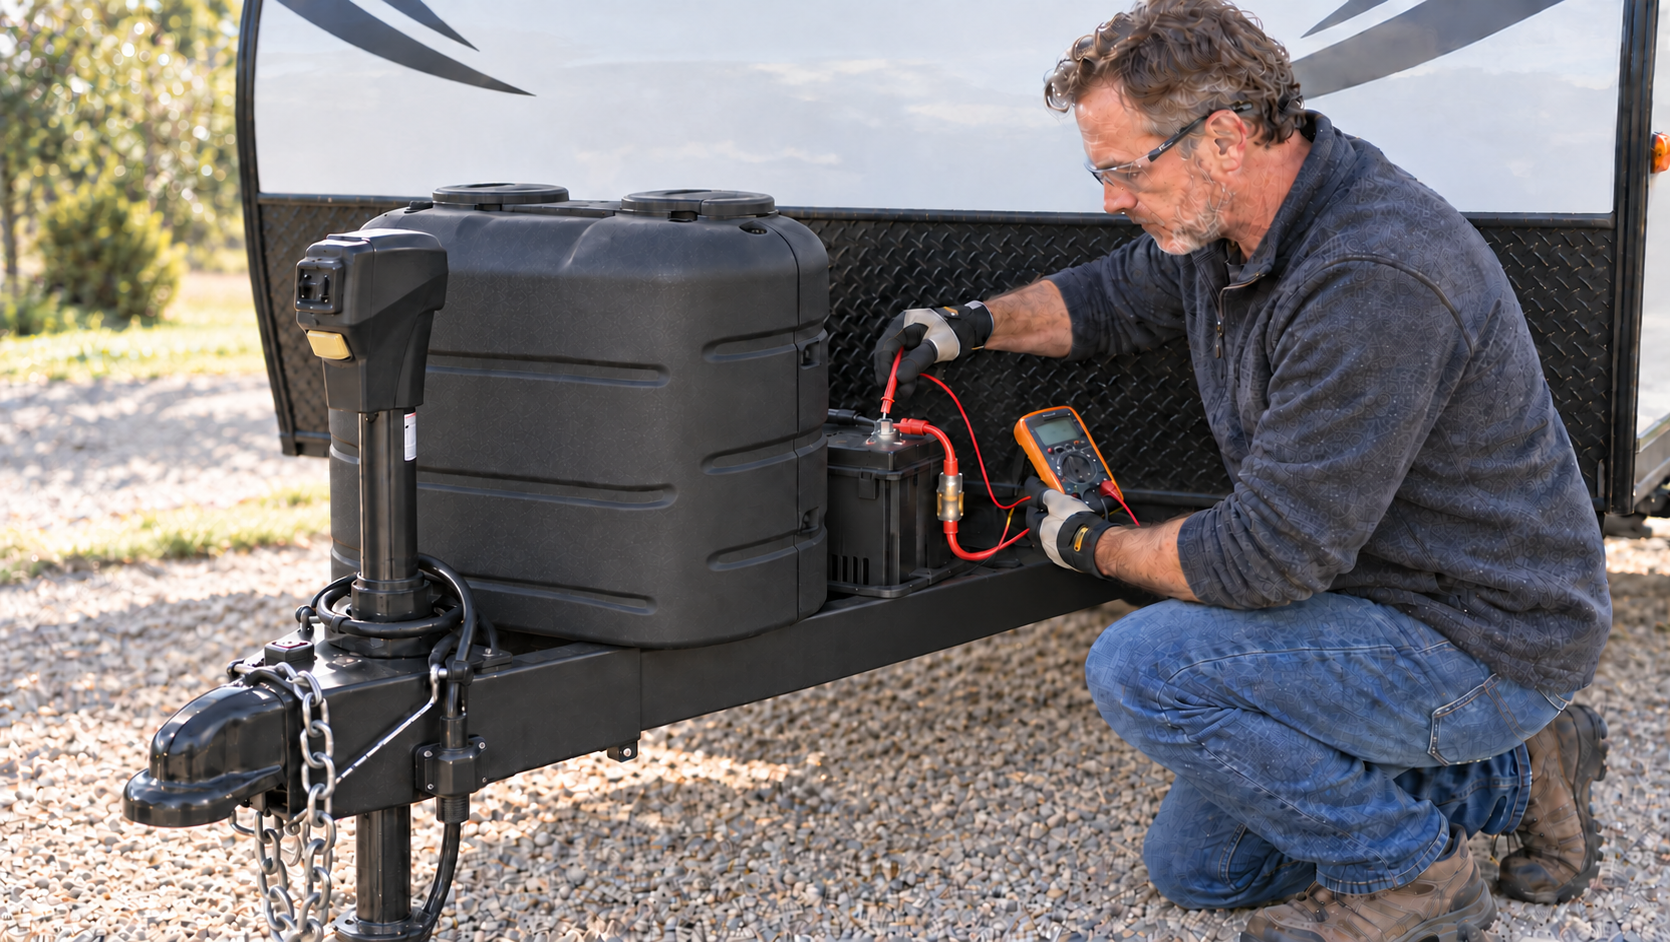
An RV’s 12-volt electrical system powers many of the components owners depend on, including lights, water pumps, furnaces, refrigerators, safety detectors, control boards, vent fans, slide-outs, and levelling equipment. RV battery maintenance helps keep those systems running reliably. Even when an RV is connected to shore power, many of these systems still require a functioning battery and 12-volt supply.
Proper RV battery maintenance helps prevent unexpected power loss, charging problems, corrosion, damaged equipment, and shortened battery life. However, maintenance requirements vary significantly between flooded lead-acid, AGM, gel, and lithium batteries. Before charging, testing, disconnecting, or servicing a battery, identify its chemistry and follow the instructions supplied by the battery and RV manufacturers.
Understanding the RV’s 12-Volt System
The house battery supplies low-voltage power to the RV’s living-area equipment. It differs from the starting or chassis battery used to start the engine in a motorhome or tow vehicle.
Depending on the RV, house batteries may receive power from:
- The converter or inverter-charger while connected to shore power
- A generator
- Solar panels and a solar charge controller
- The tow vehicle through the trailer connector
- The motorhome’s alternator
- A dedicated battery charger
- A DC-to-DC charger
The equipment must be compatible with the battery chemistry and battery-bank voltage. A charger intended for one battery type may not provide the correct charging profile for another.
Although a 12-volt system is lower voltage than the RV’s 120-volt system, it can still be dangerous. Batteries can deliver enough current to cause severe burns, sparks, melted wiring, fire, or an explosion. Metal tools, jewellery, or damaged cables can create a direct short circuit.
Identify the Battery Type
Battery labels, manuals, receipts, or model numbers should identify the battery chemistry. Never assume the type based only on its size or appearance.
Flooded Lead-Acid Batteries
Flooded lead-acid batteries contain liquid electrolyte and may have removable vent caps. These batteries generally require periodic inspection and, when serviceable, the addition of distilled water.
They must remain properly ventilated because charging can produce explosive gases. Never install them in an unventilated living area.
AGM Batteries
Absorbed glass mat batteries are sealed lead-acid batteries. They normally do not require watering and should not be opened.
AGM batteries still require correct charging settings. Overcharging can damage them even though they are commonly described as maintenance-free.
Gel Batteries
Gel batteries are another form of sealed lead-acid battery. They require a compatible charging profile and may be damaged by excessive charging voltage.
Do not use AGM, flooded, or lithium charging settings unless the charger manufacturer confirms they are suitable for the specific gel battery.
Lithium-Iron-Phosphate Batteries
Lithium-iron-phosphate batteries, often labelled LiFePO4 or LFP, contain an electronic battery-management system. They do not require watering and usually provide more usable capacity than a similarly rated lead-acid battery.
Lithium batteries require compatible charging equipment. Charging at temperatures below the manufacturer’s limit can damage the battery unless it has approved low-temperature protection or an internal heating system. Follow the specific battery manufacturer’s requirements for charging, storage, and temperature.
Understand Battery Capacity
Battery capacity is commonly stated in amp-hours. A 100-amp-hour battery can theoretically supply one amp for 100 hours, but actual usable capacity depends on battery chemistry, temperature, age, discharge rate, condition, and the manufacturer’s limits.
Electrical loads can be estimated using:
Amps × hours of operation = amp-hours used
For example, a device drawing four amps for three hours would use approximately 12 amp-hours.
Inverters can consume battery power quickly because they convert 12-volt DC power into 120-volt AC power. High-demand appliances such as microwaves, coffee makers, hair dryers, and electric heaters may require substantial current from the battery bank.
Avoid repeatedly discharging a battery below the manufacturer’s recommended limit. Deep discharging can significantly shorten the life of many lead-acid batteries, while lithium batteries have different allowable discharge limits controlled partly by their battery-management systems.
RV Battery Maintenance: Regular Inspections
Inspect the battery compartment and connections at the beginning of the camping season, before long trips, and periodically during use and storage.
Look for:
- Loose or damaged cables
- Corroded terminals
- Cracked battery cases
- Swelling or deformation
- Discolouration caused by heat
- Leaking fluid
- Damaged terminal covers
- Missing hold-down hardware
- Frayed insulation
- Signs that cables have rubbed against metal
- Water or debris in the compartment
- Blocked ventilation openings
- Unusual odours
A battery must be secured so it cannot shift during travel. Cables should have enough clearance to avoid being crushed, stretched, or rubbed against sharp edges.
Stop using a battery that is swollen, cracked, leaking, unusually hot, smoking, hissing, or producing a strong abnormal odour. Disconnect power only if it is safe to do so, keep ignition sources away, ventilate the area, and obtain professional assistance.
Work Safely Around Batteries
Before performing owner-level battery maintenance:
- Park the RV securely
- Turn off 12-volt loads
- Disconnect shore power
- Shut down the generator
- Follow the correct solar shutdown procedure
- Turn off the inverter
- Remove jewellery and metal accessories
- Wear safety glasses and appropriate gloves
- Keep sparks, flames, and smoking materials away
- Use insulated tools where appropriate
- Confirm cable polarity before disconnecting anything
Follow the RV manufacturer’s procedure for isolating the battery. In many conventional negative-ground systems, the negative cable is disconnected first and reconnected last, reducing the chance of an accidental short between a tool and grounded metal. Some RVs have more complex battery systems, so confirm the correct procedure before beginning.
Never allow a tool or other metal object to bridge the positive and negative terminals. Do not place tools on top of a battery.
Clean Battery Terminals
Corrosion can increase electrical resistance and interfere with charging or equipment operation. Before cleaning, disconnect all charging sources and isolate the battery according to the manufacturer’s instructions.
Use a manufacturer-approved battery-terminal cleaner and suitable tools. Prevent cleaning solution, corrosion residue, or debris from entering battery cells or electrical equipment.
Clean the cable ends and terminals until the contact surfaces are free of corrosion. Inspect for pitting, looseness, overheated metal, or damaged cable strands. Severely damaged terminals or cables should be replaced.
Reconnect the cables in the correct order and tighten them to the manufacturer’s specification. Overtightening can damage a battery terminal, while a loose connection may overheat.
Apply an approved terminal protectant when recommended. Replace protective terminal covers after the work is complete.
Check Flooded Lead-Acid Battery Water
Only serviceable flooded lead-acid batteries should be opened for water inspection. AGM, gel, and lithium batteries must not be opened or watered.
Wear eye and skin protection. Battery electrolyte contains corrosive acid.
Follow the battery manufacturer’s procedure carefully. In general:
- Park the RV on level ground
- Disconnect charging sources and loads
- Clean dirt from the battery top
- Remove vent caps carefully
- Check the electrolyte level in each cell
- Add only distilled water when required
- Avoid overfilling
- Reinstall the caps securely
Do not add acid during routine maintenance. Do not use tap water, bottled drinking water, or mineral water.
The correct time and level for adding water depend on the battery manufacturer’s instructions. If the plates are exposed, follow the manufacturer’s emergency filling and charging procedure rather than guessing.
Keep Batteries Properly Charged
Both undercharging and overcharging can damage batteries. A battery left partially discharged may lose capacity, while excessive charging can cause heat, water loss, corrosion, or internal damage.
A compatible multistage charger may use several charging stages, such as bulk, absorption, float, or storage modes. Lithium charging profiles differ from lead-acid profiles.
Confirm that the following equipment is compatible with the installed battery:
- RV converter
- Inverter-charger
- Solar charge controller
- Portable charger
- DC-to-DC charger
- Alternator-charging equipment
- Battery monitor
Older converters may not provide an appropriate charging profile for a newer battery type. Replacing a lead-acid battery with lithium may require changes to the converter, solar controller, battery monitor, wiring, fusing, or alternator-charging system.
Do not rely solely on a charger’s label or an indicator light. Verify its settings and operating specifications.
Measure Battery Condition
The RV’s built-in indicator panel may provide only a rough estimate of battery condition. Readings can be affected by active loads or charging sources.
A digital multimeter can measure battery voltage, but voltage alone does not provide a complete diagnosis. Accurate interpretation depends on:
- Battery chemistry
- Whether the battery is charging
- Whether equipment is drawing power
- How long the battery has been at rest
- Temperature
- Battery age and condition
A battery monitor with a correctly installed shunt can provide more useful information about current flow, energy use, and estimated state of charge. It must be configured for the battery bank to provide meaningful readings.
Lead-acid batteries may also require load testing or other professional testing. A battery can display an apparently normal voltage while lacking usable capacity under load.
Watch for Parasitic Loads
An RV can continue drawing battery power even when most switches are turned off. Common parasitic loads include:
- Propane and carbon-monoxide detectors
- Refrigerator control boards
- Stereos and clocks
- Television boosters
- Inverters
- Solar equipment
- Levelling or slide-out controllers
- Heating-system controls
- Monitoring equipment
- USB outlets and accessories
A battery disconnect switch may not isolate every circuit. Emergency breakaway switches, solar controllers, detectors, or other equipment may remain connected.
If a battery repeatedly becomes discharged during storage, identify the load instead of repeatedly recharging or replacing the battery. A qualified technician can measure current draw and determine which circuits remain active.
Never disable required safety detectors simply to prevent battery discharge.
Maintain Battery Ventilation
Flooded lead-acid batteries can release flammable gas while charging. Keep the battery compartment’s ventilation openings clear and inspect the compartment for corrosion or damage.
Do not install unapproved electrical equipment, switches, chargers, or spark-producing devices inside a vented battery compartment.
Lithium battery ventilation and installation requirements vary by product. Follow the battery and RV manufacturers’ instructions rather than assuming that all lithium batteries can be installed in any enclosed location.
Understand Series and Parallel Connections
RVs may use more than one battery to increase capacity or system voltage.
Batteries connected in parallel maintain the same nominal voltage while increasing available capacity. Batteries connected in series increase voltage while maintaining approximately the same amp-hour capacity.

Two 12-volt batteries connected in parallel remain a 12-volt bank while their amp-hour capacities are combined.

Two 6-volt batteries connected in series create a 12-volt bank while the amp-hour capacity remains unchanged.
Do Not Rely on Wire Colour Alone
RV 12-volt wiring does not always follow the same colour conventions as automotive wiring. Red commonly indicates positive, while white commonly indicates negative or ground. Black, however, may be either positive or negative depending on the circuit and the colour of the wire paired with it.
Wire gauge can help identify which wires belong to the same circuit. Paired positive and negative conductors are usually similar in thickness because they carry the same electrical load. However, colour and wire gauge should only be treated as clues. Previous repairs, modifications and aftermarket equipment may not follow the original wiring conventions.
Before disconnecting a battery, photograph the connections and label every cable. If the connections are already unknown, trace the wires or verify their function with the RV’s wiring diagram and appropriate testing equipment. Never connect a cable based only on its colour.
Incorrect wiring can damage batteries and RV equipment. Before disconnecting a multi-battery bank:
- Take clear photographs
- Label every cable
- Record the battery arrangement
- Confirm polarity
- Follow the manufacturer’s wiring diagram
Do not mix batteries with different chemistries, voltage ratings, capacities, ages, or significantly different conditions unless the system manufacturer specifically approves the arrangement.
Cable size, cable length, connection layout, and overcurrent protection affect how evenly batteries charge and discharge. Have unfamiliar multi-battery systems inspected or modified by a qualified professional.
Inspect Cables, Fuses, and Disconnects
Battery cables carry substantial current. A poor connection can generate enough heat to melt insulation or start a fire.
Inspect:
- Positive and negative cables
- Chassis-ground connections
- Main battery fuses or circuit breakers
- Battery disconnect switches
- Bus bars
- Junction points
- Converter and inverter connections
- Solar-system wiring
- Protective boots and covers
Replace damaged wiring with the correct wire type and size. Never install a larger fuse to stop repeated fuse failures. A fuse protects the wiring, and increasing its rating may allow the cable to overheat.
If a fuse repeatedly opens or a circuit breaker repeatedly trips, identify and correct the underlying fault.
Store RV Batteries Correctly
Prepare batteries for storage according to their chemistry and manufacturer’s instructions.
Storage preparation may include:
- Fully charging or partially charging the battery as specified
- Turning off the battery disconnect
- Disconnecting the battery
- Removing it from the RV
- Using an approved maintenance charger
- Checking its condition periodically
- Protecting the terminals from accidental contact
- Storing it within the approved temperature range
Lead-acid batteries should not be left discharged. Check serviceable flooded batteries periodically for charge and electrolyte condition.
Lithium storage requirements vary. Some manufacturers recommend storing their batteries at a particular state of charge and disconnecting loads. Cold temperatures may also affect charging and storage procedures.
If leaving the RV connected to shore power, confirm that the charging system is suitable for unattended long-term use and compatible with the battery.
Protect Batteries in Cold Weather
Cold temperatures reduce available battery performance. A discharged lead-acid battery is also more vulnerable to freezing than a properly charged one.
Lithium batteries may continue to provide power in cold conditions while restricting charging through the battery-management system. Do not attempt to bypass low-temperature protection. Use only heating systems and charging procedures approved by the battery manufacturer.
Battery blankets or heaters must be designed for the installed battery type and used according to their instructions. A heater intended for lead-acid batteries may not be suitable for lithium batteries.
Know the Signs of a Charging Problem
Possible signs of a battery or charging-system problem include:
- Lights dimming unexpectedly
- Furnace shutting down
- Water pump operating slowly
- Battery failing to hold a charge
- Battery becoming unusually hot
- Strong sulphur-like or chemical odours
- Excessive corrosion
- Frequent low-voltage warnings
- Charger remaining in one stage for an unusually long time
- Battery-management system repeatedly disconnecting
- Converter fan running continuously
- Melted terminals or discoloured wiring
Stop charging immediately if a battery becomes dangerously hot, swells, smokes, leaks, or makes unusual sounds. Move away from the area and contact a qualified professional.
Replacing an RV Battery
Choose a replacement that meets the RV and equipment manufacturers’ requirements for:
- Battery chemistry
- Nominal voltage
- Capacity
- Physical dimensions
- Terminal type and orientation
- Ventilation
- Weight
- Charging profile
- Maximum current
- Cold-weather operation
- Battery-management system
- Cable and fuse capacity
A lithium conversion is not always a direct battery swap. The existing converter, inverter-charger, alternator connection, solar controller, battery monitor, wiring, and protective devices must all be evaluated for compatibility.
Secure the replacement battery with approved hold-down hardware. Confirm polarity before connecting it. Reversing polarity can damage converters, control boards, appliances, and other electrical equipment.
Recycle old batteries through an approved battery retailer or recycling facility. Do not place them in household garbage.
RV Battery Maintenance Checklist
Check the following items regularly:
- Confirm the battery type and specifications
- Inspect the case for cracks, swelling, or leaks
- Make sure the battery is securely mounted
- Inspect cables and insulation
- Check terminals for looseness and corrosion
- Keep ventilation openings clear
- Check water levels in serviceable flooded batteries
- Confirm charger settings
- Monitor state of charge
- Investigate unexpected discharge
- Inspect main fuses and disconnect switches
- Follow cold-weather charging limits
- Prepare the battery correctly for storage
- Record maintenance and replacement dates
When to Contact a Professional
Contact a qualified RV technician, electrician, or battery-system installer if you find:
- Melted or overheated wiring
- A swollen, leaking, or damaged battery
- Persistent charging problems
- Repeatedly blown fuses
- Unexplained parasitic loads
- Incorrect or unidentified battery wiring
- Severe terminal corrosion
- Damaged battery-compartment ventilation
- An incompatible converter or charger
- Problems involving a large lithium battery bank
- A proposed change in battery chemistry
- Alternator or DC-to-DC charging concerns
Battery systems can appear straightforward while carrying extremely high current. If you cannot positively identify the battery chemistry, cable arrangement, disconnect procedure, or charging requirements, stop and obtain qualified assistance.
Routine inspection, correct charging, clean connections, and chemistry-specific care can substantially improve battery reliability. A properly maintained battery bank helps ensure that the RV’s lights, safety equipment, furnace, water pump, appliances, and control systems are ready when needed. For more industry safety guidance, see the RV Safety & Education Foundation.