
Seasonal RV storage protects an RV during the weeks or months when it is not being used. Weather, freezing temperatures, moisture, sunlight, pests, battery discharge, and long periods without movement can all damage an RV that has been parked and forgotten.
Preparing an RV for storage involves more than draining the water system and locking the door. The exterior must remain weather-resistant, the plumbing must be protected from freezing, batteries need appropriate care, and food or moisture should not remain inside.
The exact procedures depend on the RV, its equipment, the storage location, and the climate. Always consult the instructions supplied by the RV and its component manufacturers before beginning.
Choosing a Seasonal RV Storage Location
Whenever possible, choose a secure storage location with firm, well-drained ground. Avoid areas where water collects beneath the RV or where overhanging branches, falling debris, flooding, or heavy drifting snow could cause damage.
Consider:
- Security and controlled access
- Surface drainage
- Exposure to wind and sunlight
- Clearance from trees and structures
- Local rules and insurance requirements
- Access for periodic inspections
- Availability of approved electrical service
- Restrictions on propane, fuel, or battery storage
- Snow-removal practices
- Risk of rodents or insects
Indoor storage provides excellent weather protection, but the building must be suitable for RV storage. Fuel, propane, ventilation, electrical connections, and fire-safety requirements must be addressed according to facility rules and applicable regulations.
Clean the RV Before Storage
Wash the exterior before placing the RV into storage. Dirt, road salt, insects, tree sap, bird droppings, and other contaminants can stain or damage finishes when left for long periods.
Use cleaning products approved for the RV’s roofing, siding, windows, seals, graphics, and trim. Household or automotive products may harm materials used in RV construction.
Clean:
- Roof surfaces
- Front and rear walls
- Sidewalls
- Windows
- Awnings
- Slide-out walls
- Wheels
- Undercarriage areas exposed to road salt
- Exterior storage compartments
- Appliance vents
Allow awning fabric and other damp materials to dry completely before retracting or storing them. Trapped moisture can contribute to staining, mildew, and deterioration.
Inspect the Roof and Exterior Seals
Water intrusion is one of the most serious risks during storage. Inspect the roof and every exterior opening before leaving the RV unattended.
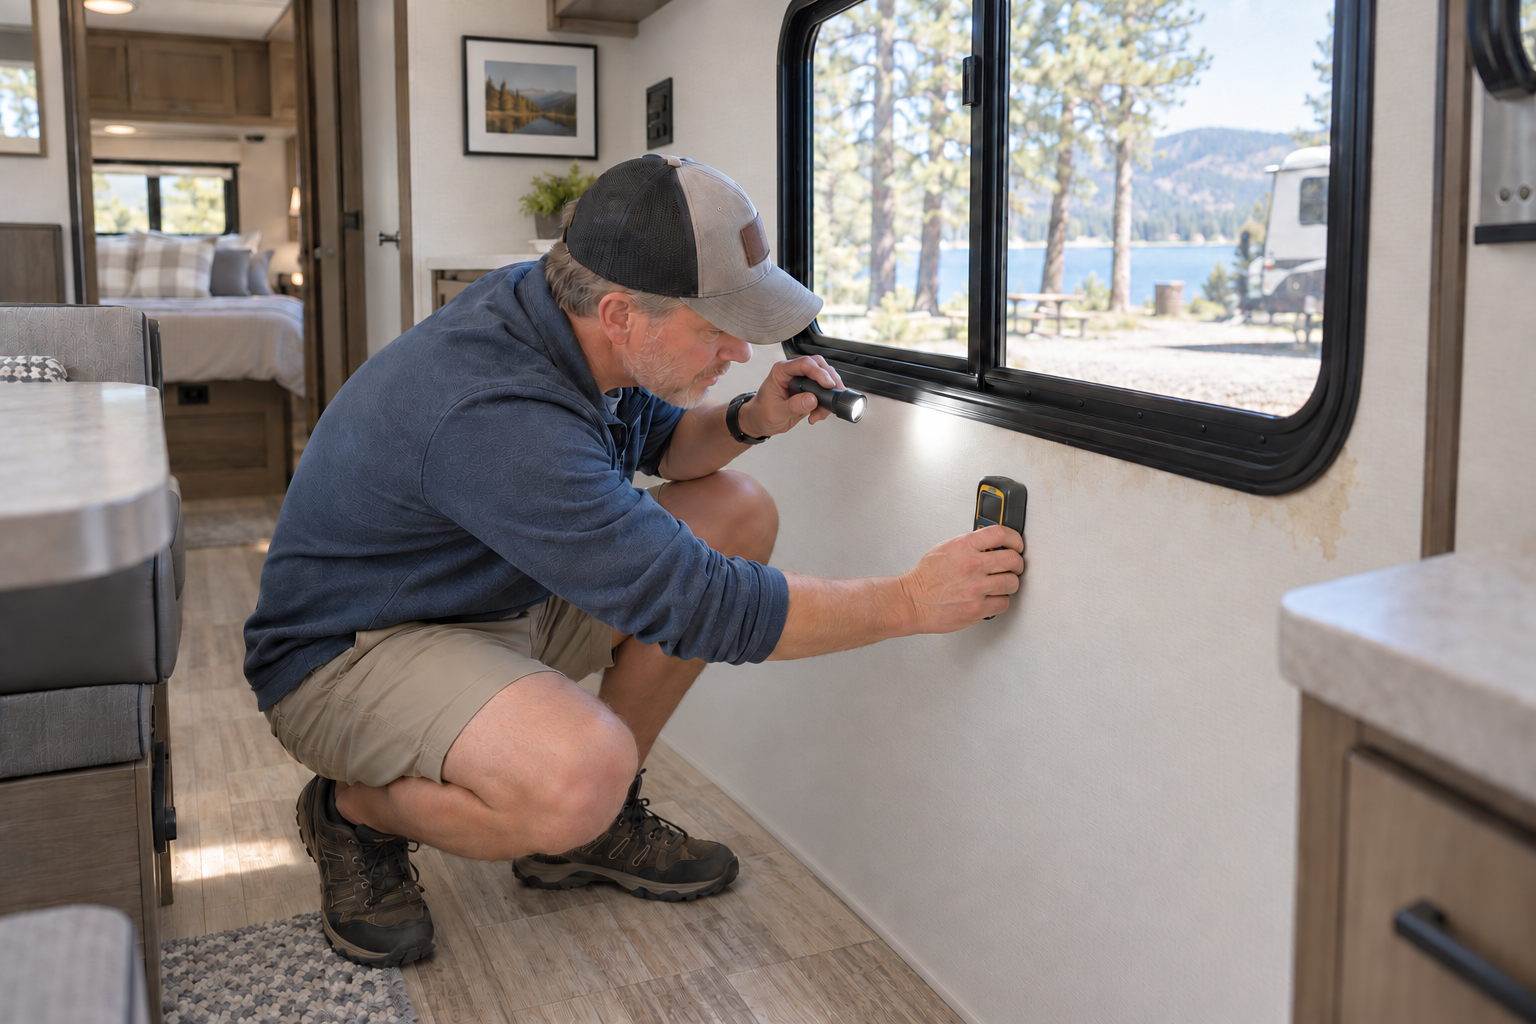
Check around:
- Roof vents
- Skylights
- Air conditioners
- Antennas
- Solar-panel mounts
- Plumbing vents
- Ladders
- Marker lights
- Windows
- Doors
- Exterior mouldings
- Slide-outs
- Storage compartments
- Appliance vents
Look for cracked, lifted, separated, or missing sealant. Also check for loose fasteners, damaged trim, soft areas, and evidence of previous leaks.
Use only sealants compatible with the specific roof or exterior material. Applying incompatible sealant over a damaged area can conceal the problem without creating a dependable repair.
If significant separation, softness, or water intrusion is found, arrange professional inspection before storage.
Protect the Plumbing From Freezing
Any water trapped inside the plumbing system can freeze, expand, and damage lines, valves, pumps, filters, fixtures, tanks, or appliances.
Winterize before freezing temperatures arrive. Do not wait for the first severe cold-weather forecast.
The procedure may include:
- Draining the fresh-water tank
- Emptying the grey- and black-water tanks
- Draining the water heater
- Bypassing the water heater
- Opening low-point drains
- Removing or bypassing water filters
- Clearing lines with regulated compressed air
- Pumping approved RV plumbing antifreeze through the system
- Protecting drain traps
- Winterizing exterior showers
- Winterizing toilet valves
- Protecting washing machines and dishwashers
- Winterizing refrigerator ice makers or water dispensers
- Protecting tank-flush connections
Use only nontoxic antifreeze labelled for RV potable-water systems. Never put automotive antifreeze into an RV fresh-water system.
Follow the RV manufacturer’s procedures and pressure limits. Excessive compressed-air pressure can damage plumbing components.
Drain and Protect the Water Heater
Turn off all energy sources to the water heater and allow the water to cool before draining it. Hot water may remain under pressure and can cause serious burns.
Open a hot-water faucet to relieve pressure and follow the heater manufacturer’s draining procedure. Never remove a drain plug or anode rod while the tank is hot or pressurized.
Inspect the applicable drain plug or anode rod and replace it when required. Some heaters use an anode rod, while others use a different drain plug. Install only the part specified for that model.
Place the water heater into bypass mode before introducing RV antifreeze when directed. Filling an ordinary tank-style water heater with antifreeze wastes product and may make spring flushing more difficult.
Tankless heaters and hydronic systems may require specialized procedures. Follow their manuals rather than applying instructions intended for conventional water heaters.
Prepare the Wastewater System
Empty the black- and grey-water tanks at an approved dumping facility. Flush and treat the tanks according to the RV and component manufacturers’ instructions.
Inspect:
- Termination valves
- Sewer outlet caps
- Valve handles
- Sewer hoses
- Tank-flush connections
- Exterior compartments
Do not store a damaged or contaminated sewer hose with fresh-water equipment.
Protect drain traps and the toilet seal as directed during winterization. Avoid allowing the toilet bowl seal to dry out if its manufacturer recommends keeping it lubricated or covered with an approved product.
Never mix holding-tank treatments, bleach, ammonia, acids, or other chemicals. Dangerous gases or damaging reactions can result.
Remove Food and Perishable Items
Remove all food, beverages, pet food, and other products that could spoil, freeze, burst, or attract pests.
Check:
- Refrigerator
- Freezer
- Pantry
- Drawers
- Cabinets
- Under furniture
- Exterior kitchens
- Storage compartments
- Pet-food containers
- Garbage bins
Even unopened food can attract rodents or insects.
Clean the refrigerator and freezer, allow them to dry, and leave their doors secured slightly open when the manufacturer recommends it. This helps reduce trapped odours and mildew. Use the designed storage latches if equipped.
Remove garbage and clean cooking surfaces, sinks, crumbs, spills, and grease.
Control Interior Moisture
Moisture trapped inside an RV can lead to condensation, mould, mildew, odours, corrosion, and damage to fabrics or wood products.
Before storage:
- Dry the interior thoroughly
- Check for plumbing leaks
- Remove wet towels and clothing
- Clean and dry the shower
- Dry the refrigerator
- Clean window tracks
- Inspect beneath mattresses
- Remove damp floor mats
- Empty condensation containers
- Check storage compartments for moisture
Moisture absorbers or dehumidifiers may be useful in some conditions, but they must be used according to their instructions. A powered dehumidifier requires a reliable electrical supply and safe drainage arrangement.
Do not assume that opening roof vents is always best. Partially open vents may allow wind-driven rain, snow, dust, or pests to enter unless they have suitable covers. Follow the RV manufacturer’s ventilation recommendations.
Protect Against Rodents and Insects
Rodents can damage wiring, insulation, plumbing, upholstery, and stored belongings. Inspect the exterior for possible entry points.
Look around:
- Plumbing penetrations
- Wiring openings
- Wheel wells
- Storage compartments
- Slide-out mechanisms
- Furnace and refrigerator areas
- Undercarriage openings
- Doors and access panels
Do not block appliance combustion or ventilation openings with improvised materials. Restricted vents can create serious hazards when equipment is operated.
Use pest-control methods that are safe for the RV, occupants, pets, and storage facility. Check traps or monitoring devices regularly.
Remove nesting materials such as food, paper, soft fabric, and loose debris. Keep vegetation trimmed away where permitted.
Battery Storage and Maintenance
Batteries can discharge during storage even when most equipment is switched off. Detectors, control boards, solar equipment, clocks, and other devices may continue drawing power.
Determine which equipment remains connected when the battery disconnect switch is off. The disconnect may not isolate every circuit.
Before storage:
- Fully charge the battery according to its instructions
- Inspect terminals and cables
- Clean corrosion safely
- Confirm that hold-downs are secure
- Check applicable electrolyte levels
- Identify parasitic loads
- Decide whether the battery will remain installed
- Follow the required charging or disconnection procedure
Flooded lead-acid, AGM, and lithium batteries have different storage and temperature requirements. Follow the battery manufacturer’s recommendations.
If using a battery maintainer, confirm that it is compatible with the battery chemistry and intended for long-term operation. The electrical connection must be properly installed and approved by the storage facility.
Solar charging may help maintain a battery, but snow, shade, dirt, equipment settings, or a disconnected system can reduce output. Continue checking battery condition rather than assuming the solar system is maintaining it. For more information on battery maintenance, check out our RV Battery Maintenance guide.
Shore Power During Storage
Some owners keep an RV connected to shore power during storage. Others disconnect it completely.
If shore power remains connected:
- Use an approved receptacle and connection
- Inspect the shore-power cord
- Protect connections from moisture
- Use appropriate electrical protection
- Confirm that the converter or charger suits the battery
- Monitor battery condition
- Check for overheating
- Follow facility rules
Do not use damaged adapters, undersized extension cords, or temporary wiring for unattended long-term power.
A connected RV still requires regular inspection. Electrical equipment can fail, batteries can overcharge, and connections can loosen or overheat.
Propane and Fuel Systems
Close propane-cylinder or tank valves when directed by the RV manufacturer and storage facility. Confirm that appliances are off.
Inspect propane cylinders, mounts, covers, hoses, and regulators for visible damage. Do not modify, plug, or obstruct the regulator vent.
Propane-storage rules vary among indoor facilities and jurisdictions. Follow all posted requirements.
For motorhomes and generators, follow the engine manufacturer’s fuel-storage instructions. Procedures may differ for gasoline and diesel equipment.
Fuel recommendations may include:
- Filling or partially filling the tank
- Using an approved stabilizer
- Operating treated fuel through the system
- Draining specific equipment
- Exercising the generator periodically
- Changing oil before storage
Follow the equipment manufacturer rather than applying a general fuel-storage procedure to every engine.
Generator Storage
A generator may require regular exercise or a specific long-term storage procedure. Consult its manual for:
- Exercise frequency
- Required electrical load
- Fuel treatment
- Oil and filter service
- Starting-battery care
- Coolant inspection
- Storage shutdown
- Ventilation
Never operate a generator inside a building, garage, enclosed storage area, or anywhere exhaust can enter an occupied RV or nearby structure.
Test carbon-monoxide alarms before using the RV or generator again.
Tire Care During Storage
Tires continue to age while the RV is parked. Long-term exposure to sunlight, standing water, petroleum products, underinflation, and overloading can contribute to damage.
Before storage:
- Check pressure when the tires are cold
- Inspect tread and sidewalls
- Remove stones or debris
- Check for cuts, bulges, and cracking
- Confirm the surface is firm and level
- Keep tires away from petroleum products
- Follow manufacturer recommendations for covers
- Record tire condition and date codes
Use tire covers that are appropriate for the application and allow proper ventilation.
Do not lift the RV or reduce tire loading unless the RV, chassis, axle, and levelling-equipment manufacturers provide an approved procedure. Stabilizing jacks are not automatically designed to support the RV’s full weight.
If the RV remains parked for a long time, follow the tire and vehicle manufacturers’ recommendations regarding movement, inflation, and support.
Chocks, Jacks, and Levelling Equipment
Park the RV securely and use wheel chocks where appropriate.
Stabilizing jacks are intended to reduce movement, not necessarily lift or support the entire RV. Hydraulic or electric levelling systems have specific storage procedures and limitations.
Inspect exposed jack components and follow manufacturer instructions regarding:
- Extension during storage
- Cleaning
- Lubrication
- Rust protection
- Hydraulic fluid
- Electrical connections
- Ground support
Never work beneath an RV supported only by levelling or stabilizing equipment.
Retract Awnings and Slide-Outs
Unless the manufacturer provides different instructions, store awnings fully retracted and secured. Clean and dry the fabric before closing it.
Slide-outs are generally stored retracted to reduce exposed roof area, protect seals, and limit access for pests. However, follow the RV manufacturer’s recommendations.
Before retracting slide-outs:
- Remove obstructions
- Clean the roof when safely accessible
- Inspect seals
- Confirm that interior items are clear
- Watch for uneven movement
- Listen for unusual sounds
- Verify complete closure
Do not operate a slide-out that binds, tilts, or moves unevenly. Have it inspected.
Protect the Exterior
Apply manufacturer-approved protectants only where recommended. Some products can damage roofing materials, sealants, graphics, rubber seals, or finishes.
Secure or remove:
- Removable antennas
- Exterior accessories
- Barbecues
- Bicycles
- Cargo carriers
- Portable solar panels
- Decorative items
- Loose covers
Lock exterior compartments and verify that doors are fully latched.
Lubricate locks, hinges, and designated mechanisms only with products approved for those components.
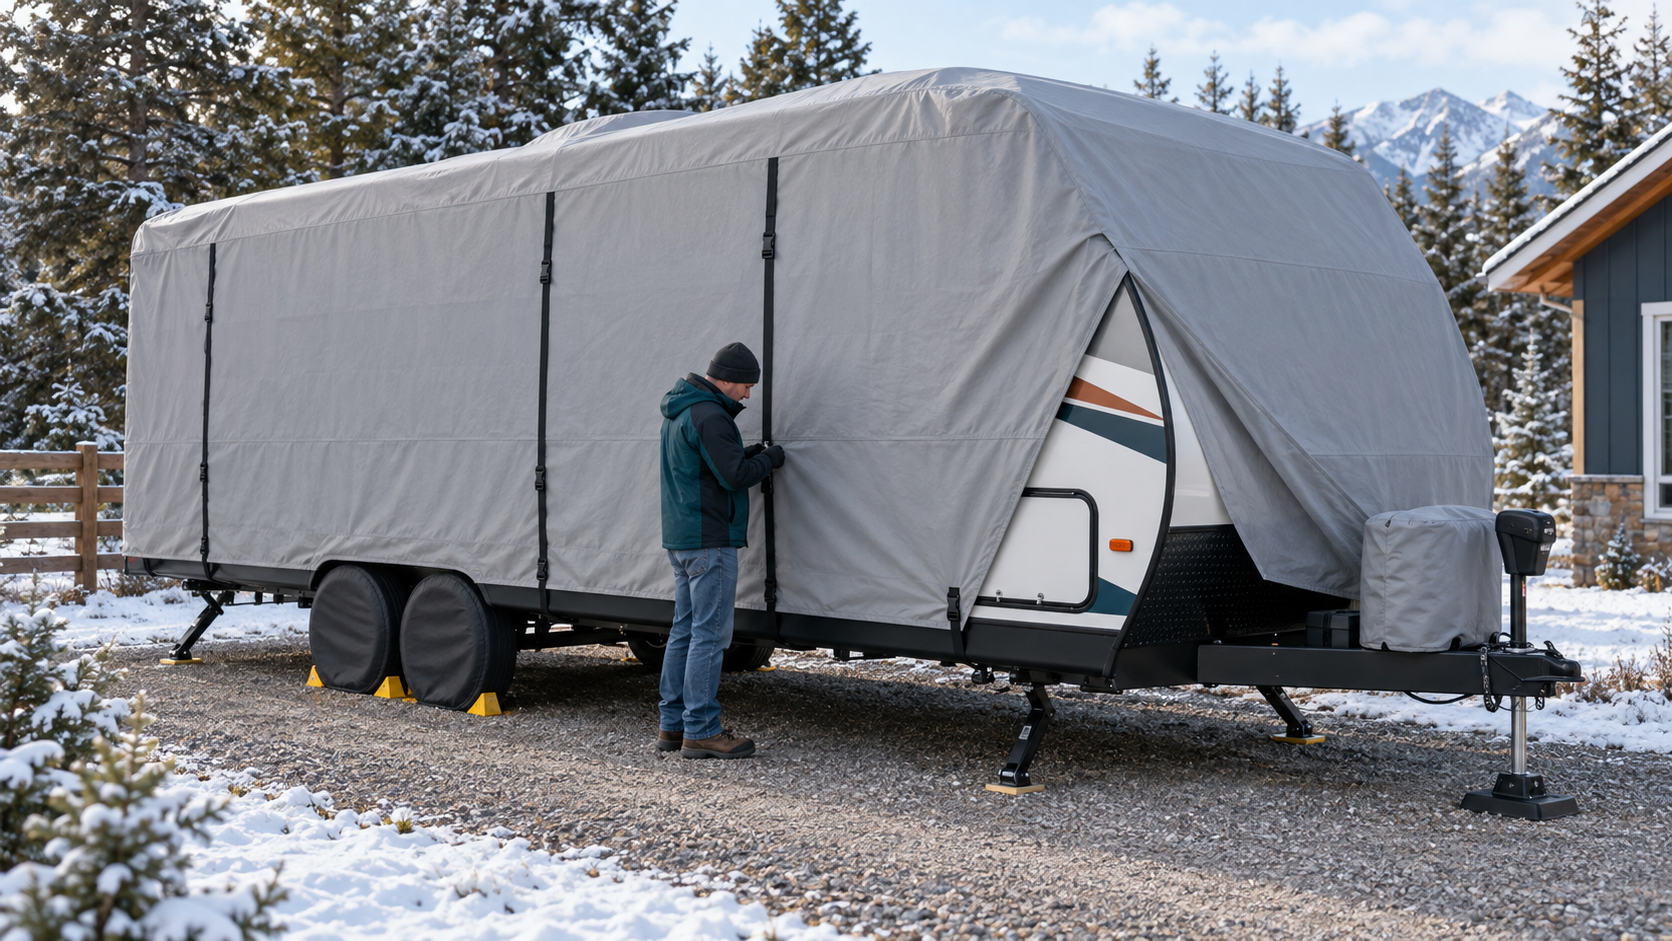
Using an RV Cover
A properly fitted RV cover may protect against sunlight, dirt, and weather. A loose or unsuitable cover can rub against the finish, trap moisture, tear in wind, or damage roof accessories.
If using a cover:
- Select one designed for the RV
- Clean and dry the RV first
- Pad sharp edges as directed
- Install it according to its instructions
- Secure it without excessive tension
- Ensure required ventilation remains available
- Inspect it after storms or high winds
Do not use an ordinary plastic tarp as a direct substitute unless the RV manufacturer approves it. Plastic can trap condensation and damage finishes.
Secure the Interior
Close and secure cabinets, drawers, doors, and movable furniture. Remove valuables, electronics, documents, medications, and temperature-sensitive products.
Consider removing:
- Bedding
- Towels
- Clothing
- Electronics
- Batteries from removable devices
- Aerosol cans
- Cleaning products that may freeze
- Pressurized containers
- Candles and wax products
Leave interior doors and cabinets open when helpful for airflow, provided they are secure and will not swing or cause damage.
Close blinds or shades as appropriate, but avoid placing materials against windows where heat could accumulate.
Fire and Safety Equipment
Before storage, inspect smoke, propane, and carbon-monoxide alarms according to their instructions. Some detectors must remain powered, while others may have specific storage recommendations.
Check the fire extinguisher’s condition and expiration or service requirements.
Do not remove detector batteries merely to silence a low-power warning without arranging appropriate replacement or storage care. Restore and test every safety device before the RV is occupied again.
Security and Documentation
Remove valuables and lock doors, windows, compartments, hitch equipment, and other access points.
Depending on the RV and storage location, security measures may include:
- Hitch locks
- Wheel locks
- Alarm systems
- Tracking devices
- Cameras
- Locked battery compartments
- Recorded serial numbers
Photograph the RV inside and outside when placing it into storage. Record its condition, mileage, tire pressures, battery status, fuel level, and storage date.
Confirm that registration and insurance remain appropriate during the storage period. Notify the insurer if required by the policy.
Inspect the RV During Storage
An RV should not be left unchecked for an entire season. Inspect it periodically and after severe weather.
Look for:
- Roof or seal damage
- Water intrusion
- Snow accumulation
- Cover damage
- Flat or damaged tires
- Battery problems
- Rodent activity
- Broken windows
- Forced entry
- Plumbing leaks
- Storm debris
- Ground movement
- Unusual odours
- Exterior components that have loosened
Remove snow only with methods and tools that will not damage the roof. Roof access during winter can be dangerous, and not every roof is designed to support a person.
Arrange professional assistance if snow load, ice, or access conditions create a risk.
Seasonal RV Storage: Preparing for Use Again
When removing the RV from storage, complete a thorough inspection before travelling or occupying it.
Check:
- Tires and pressure
- Wheels and fasteners
- Brakes and bearings
- Hitch equipment
- Batteries
- Shore-power equipment
- Propane system
- Safety detectors
- Fire extinguisher
- Plumbing system
- Water heater
- Appliances
- Roof and exterior seals
- Slide-outs and awnings
- Lights and signals
- Emergency exits
De-winterize and sanitize the fresh-water system as required. Fill the water heater before energizing it and inspect every accessible plumbing connection under pressure.
Test appliances using the procedures supplied by their manufacturers. Stop if you notice propane odour, smoke, sparks, water leaks, overheating, unusual noise, or fault codes.
Seasonal Storage Checklist
Before leaving the RV in storage:
- Clean and dry the exterior
- Inspect the roof and seals
- Winterize the plumbing when required
- Empty wastewater tanks
- Remove food and garbage
- Clean and dry the refrigerator
- Control interior moisture
- Protect against pests
- Prepare the batteries
- Follow fuel and generator procedures
- Inspect and inflate tires
- Secure awnings and slide-outs
- Close propane valves as directed
- Remove valuables
- Lock doors and compartments
- Photograph and document the RV
- Schedule periodic inspections
When to Seek Professional Assistance
Contact a qualified technician if you discover:
- Active water intrusion
- Soft walls, ceilings, or floors
- Freeze-damaged plumbing
- Propane-system concerns
- Electrical overheating
- Structural damage
- Cracked wheels
- Damaged tires
- Brake or bearing problems
- Slide-out malfunctions
- Levelling-system leaks
- Generator problems
- Significant pest damage
Correcting these problems before storage can prevent them from becoming worse while the RV is unattended. For more on seasonal RV safety, see the RV Safety & Education Foundation.
Final Thoughts
Seasonal storage is part of preventive maintenance. A clean, dry, properly winterized RV is far less likely to develop water damage, frozen plumbing, pest problems, dead batteries, or unpleasant odours.
Prepare each system according to its manufacturer’s instructions, document the RV’s condition, and inspect it periodically throughout the storage period. When the next travel season arrives, take time to recommission and test every major system before departing.
A careful storage routine protects the RV, reduces unexpected spring repairs, and helps ensure that it will be ready when the next trip begins.