
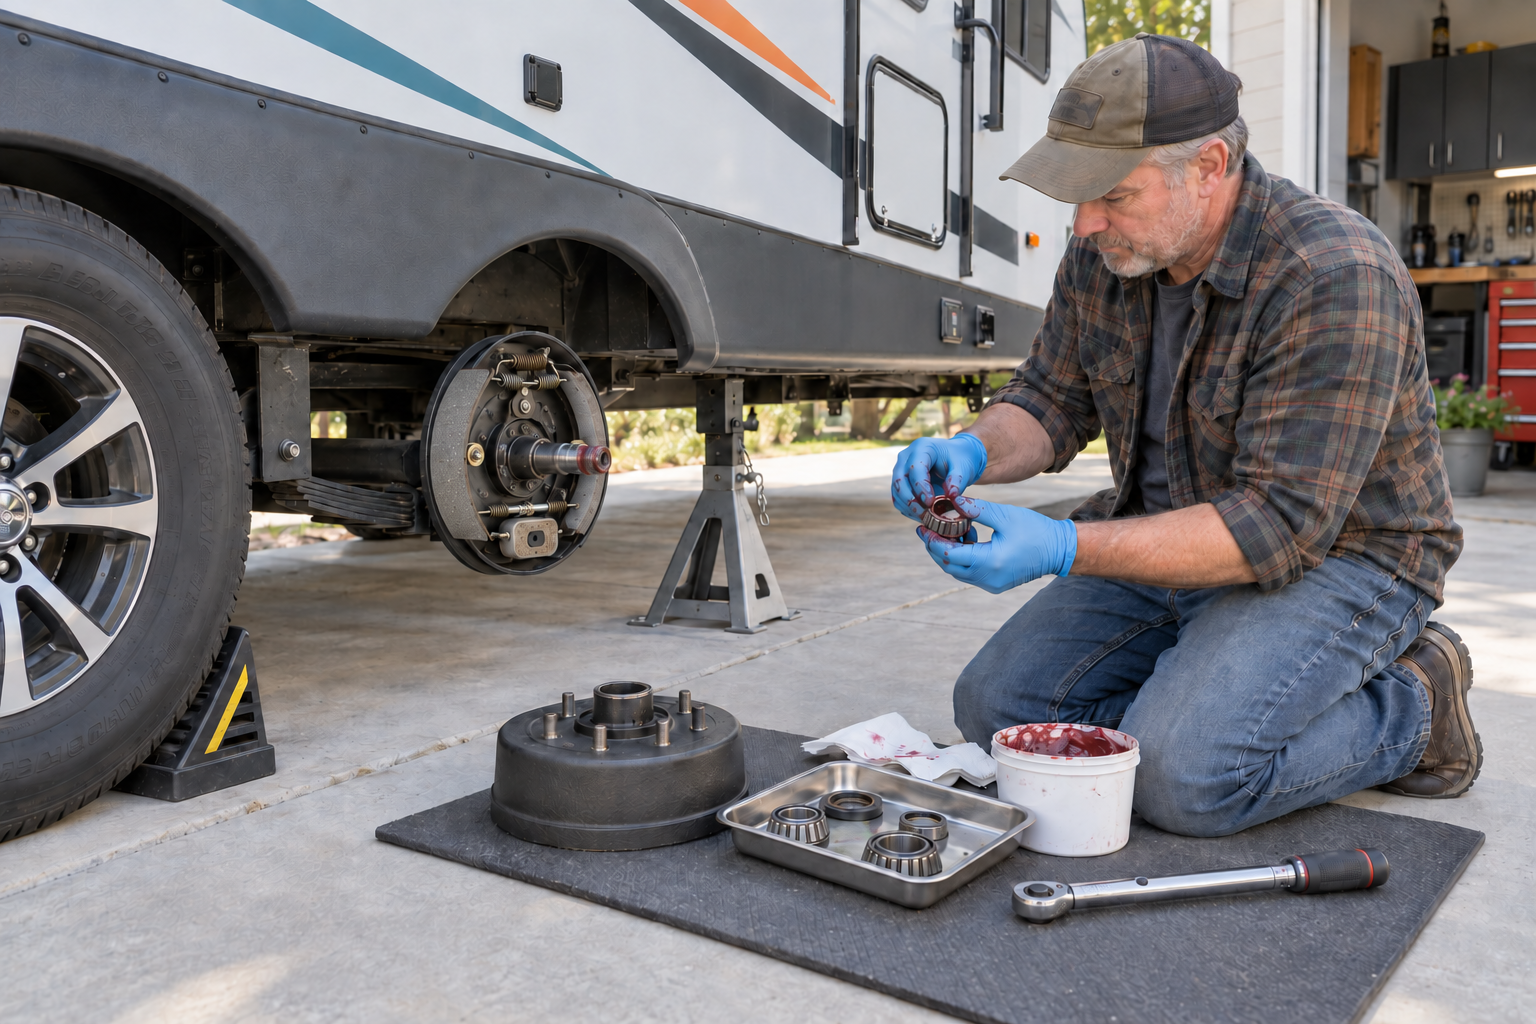
RV wheel bearing repacking and brake inspection are easy to overlook because most of the components remain hidden inside the hubs, yet they work every time the RV moves. Grease can deteriorate, seals can leak and brake components can wear long before an obvious problem develops.
A failed bearing can damage the spindle, cause a wheel to separate or leave the trailer stranded. Poorly maintained brakes can increase stopping distance and force the tow vehicle to handle more of the braking load. Regular inspection helps find these problems before they become dangerous or expensive.
RV Wheel Bearing Repacking: How Often?
A commonly cited service interval for conventional trailer bearings is once every 12 months or 19,000 kilometres (12,000 miles), whichever comes first. This is not a universal requirement. The correct interval comes from the axle, hub or RV manufacturer.
Service may be needed sooner when the trailer:
- Travels frequently or covers long distances
- Sits unused for extended periods
- Has been exposed to water or flooding
- Operates on dusty, muddy or rough roads
- Carries loads near its rated capacity
- Has an unknown maintenance history
- Develops unusual wheel-end noise, heat or looseness
A trailer that travels relatively few kilometres can still need annual inspection. Moisture contamination, seal deterioration and corrosion continue while the RV is stored.
Identify the Type of Wheel Bearing System
Before buying grease or removing a hub, identify the axle and bearing system installed on the RV. Look for the axle manufacturer’s identification label or stamped information, then obtain the appropriate service instructions.
Common configurations include:
Conventional Grease-Packed Bearings
These use inner and outer tapered roller bearings packed with wheel-bearing grease. The hub must normally be removed to clean and inspect the bearings, races, seal and brake components properly.
Grease-Fitting or EZ Lube–Style Spindles
These spindles have a grease fitting and an internal passage intended to direct grease toward the inner bearing. The fitting can help replenish compatible grease, but it does not eliminate the need for periodic hub removal and inspection.
Pumping grease too quickly can force it past the rear seal and contaminate the brake shoes. A grease gun should not be used as a substitute for inspecting the bearings and brakes.
Sealed or Cartridge Bearings
Some axles use sealed cartridge-style bearings that are not cleaned and hand-packed like conventional tapered bearings. Follow the manufacturer’s inspection and replacement procedures.
Oil-Bath Hubs
Oil-bath hubs use lubricating oil rather than packed grease. They require the correct oil, fill level and seal-inspection procedure. Do not fill an oil-bath hub with grease unless the manufacturer specifically authorizes a conversion.
Signs That Bearings or Brakes Need Attention
Inspect the wheel end promptly if you notice:
- Grinding, growling, humming or scraping noises
- Excessive movement when rocking the raised wheel
- Grease on the inside of the wheel or brake assembly
- One hub running noticeably hotter than the others
- Uneven or weak trailer braking
- Brakes that grab, pulse or pull
- A brake controller requiring an unusually high setting
- Intermittent brake operation
- Visible damage to brake wiring
- A burning smell near a wheel
- Metallic particles in the old grease
Stop travelling if a wheel end becomes extremely hot, develops substantial looseness or makes severe grinding noises. Continuing to tow can destroy the hub or spindle and may allow the wheel to separate.
Tools and Supplies
The exact tools depend on the axle and wheel assembly, but a conventional service commonly requires:
- Wheel chocks
- A properly rated floor or bottle jack
- Properly rated jack stands
- Lug-nut socket and breaker bar
- Torque wrench
- Pliers and appropriate hand tools
- Seal puller
- Bearing packer or clean gloved hands
- Parts-cleaning equipment and approved solvent
- Clean, lint-free towels
- Correct wheel-bearing grease
- New grease seals
- Replacement cotter pins or approved spindle retainers
- Brake-cleaning product suitable for the components
- Brake-adjusting tool
- Safety glasses and nitrile gloves
Confirm the bearing numbers, seal size, grease specification, spindle-retainer design and wheel-nut torque before beginning. Bearing and seal dimensions can vary even between trailers that appear similar.
Safely Lift and Support the Trailer
Park the trailer on firm, level ground. Couple it securely to the tow vehicle if required by the manufacturer, apply the tow vehicle’s parking brake and chock the wheels that will remain on the ground.
Loosen the wheel nuts slightly before raising the trailer. Consult the RV and axle manuals for approved lifting and support points. Do not assume the axle tube, suspension component or stabilizer jack is designed to carry the lifting load.
Raise only the required section and place a properly rated jack stand at an approved support point. Lower the trailer carefully onto the stand while leaving the jack positioned as secondary support when practical.
Never work beneath or beside a raised RV supported only by a hydraulic jack. Stabilizer jacks are intended to reduce movement and generally must not be used to lift the trailer unless their manufacturer specifically permits it. For more on tire and wheel safety, see our RV Tire Safety post.
Perform a Preliminary Bearing Check
Before removing the wheel, rotate it by hand. Listen and feel for grinding, roughness or binding. Electric drum brakes may create a light, consistent rubbing sound, but harsh scraping or irregular resistance requires investigation.
Grip the tire at the top and bottom and rock it inward and outward. A small amount of movement may be normal for some tapered-bearing arrangements, but noticeable looseness can indicate incorrect adjustment, bearing wear or component damage. Compare the result with the axle manufacturer’s specification.
This check can reveal a problem, but it does not confirm that the grease, bearings, races and seal remain serviceable. A quiet wheel can still contain contaminated grease or a damaged bearing.
Remove the Wheel and Hub
Remove the wheel nuts and lift the wheel straight off the hub. Mark its position if the wheels are being rotated or if you need to track an unusual wear pattern.
Remove the dust cap without damaging the hub. Depending on the axle, the spindle may use a cotter pin, locking retainer, tab washer or another fastening system. Photograph the arrangement before disassembly if necessary.
Remove the retainer and spindle nut according to the manufacturer’s instructions. Support the hub as it slides forward because the outer bearing may loosen once the washer is removed.
Avoid dropping the bearing or dragging the hub across the spindle. Place all reusable components in an organized tray.
Remove the Inner Bearing and Grease Seal
The inner bearing is held in the back of the hub by the grease seal. Remove the seal using an appropriate seal puller without damaging the hub’s sealing surface.
A removed grease seal should normally be replaced rather than reused. Even if it appears intact, removal can distort its lip or internal structure.
Lift out the inner bearing and keep it separate from the outer bearing. Bearings that will be reused should return to their original races unless both bearing and race are replaced as a matched set.
Clean and Inspect the Bearings
Remove all old grease using the cleaning method approved by the bearing or axle manufacturer. Wear eye protection, provide adequate ventilation and keep ignition sources away from flammable solvents.
Do not spin a dry bearing with compressed air. A bearing can accelerate to a dangerous speed, and spinning it without lubrication may damage its surfaces.
After cleaning, inspect every roller and cage under bright light. Replace a bearing that shows:
- Pitting or flaking
- Blue, purple or dark heat discolouration
- Rust or corrosion
- Scoring or grooves
- Cracked or damaged rollers
- A bent or damaged cage
- Roughness while rotating
- Excessive wear
Do not attempt to polish damaged bearing surfaces. If a bearing requires replacement, replace its corresponding race as well.
Inspect the Bearing Races and Spindle
Bearing races are pressed into the hub. Clean them carefully and inspect their full circumference.
Look for pitting, scoring, heat marks, corrosion and uneven wear. Run a clean fingernail lightly across questionable areas; any ridge or depression may indicate damage.
Inspect the spindle for scoring, heat discolouration, damaged threads and worn bearing surfaces. Pay particular attention to the area where the grease seal rides. A grooved or damaged sealing surface can cause repeated grease leakage.
Spindle damage requires professional assessment. Installing new bearings on a badly worn spindle will not correct the underlying problem.
Inspect the Electric Drum Brakes
With the hub removed, inspect the brake assembly without breathing or blowing accumulated dust into the air. Use an appropriate brake-cleaning method and follow the product’s safety directions.
Check the following components:
- Brake-shoe lining thickness and condition
- Grease or oil contamination on the linings
- Cracks, glazing or separation in the friction material
- Uneven shoe wear
- Broken, stretched or missing springs
- Worn adjuster components
- Magnet surface and wear indicators
- Frayed, pinched or disconnected brake wiring
- Scoring, cracking or heat damage inside the drum
- Loose or damaged mounting hardware
Brake shoes contaminated with grease should generally be replaced. Cleaning the surface may not remove lubricant absorbed by the lining. The leaking seal and any underlying bearing or hub problem must also be corrected.
Measure the brake drum and shoe lining where required. Compare all measurements with the brake or axle manufacturer’s service limits.
Inspect the Brake Magnet
Electric trailer brakes use an electromagnet that contacts the rotating drum. The magnet’s surface should wear relatively evenly.
Deep grooves, exposed windings, abnormal wear or damaged wiring indicate that replacement may be necessary. Some magnets have wear indicators that show when their service limit has been reached.
Do not apply full brake-controller power while the drum is removed. The magnet is designed to operate against the drum’s armature surface, and the brake mechanism can move unexpectedly.
Hand-Pack the Wheel Bearings
Use the exact grease specified or approved by the axle manufacturer. Do not mix grease types unless compatibility has been confirmed. Incompatible thickeners can cause the grease to soften, harden or lose its protective properties.
Place a small amount of grease in one palm while wearing clean gloves. Press the wide edge of the bearing cage into the grease repeatedly until fresh grease emerges between the rollers at the narrow side. Work around the bearing until grease has passed through every section.
A bearing-packing tool can perform the same task while reducing mess and contamination. After packing, apply a light coating of grease to the rollers and race.
Packing grease only around the outside of a bearing does not force lubricant between its rollers. The grease must pass completely through the bearing.
Install a New Grease Seal
Place the packed inner bearing into its race. Lightly lubricate the new seal lip if required, then position the seal squarely in the hub.
Drive or press it evenly using a seal installer or another tool that contacts the seal’s outer edge without distorting it. Install it to the depth specified by the manufacturer.
Confirm that the seal faces the correct direction. A reversed, crooked or damaged seal can leak grease into the brake assembly.
Reinstall and Adjust the Hub
Clean the spindle and apply the specified light coating of grease. Carefully slide the hub onto the spindle without dragging the new seal across the threads.
Install the packed outer bearing, washer and spindle nut. Bearing-adjustment procedures vary, so follow the axle manufacturer’s exact sequence and torque values.
A common tapered-bearing procedure involves tightening the spindle nut while rotating the hub to seat the bearings, then backing the nut off and retightening it to a specified position or minimal preload. This must not be treated as a universal setting.
The hub should rotate smoothly without binding. Excessive preload can overheat and destroy the bearings, while excessive end play can damage the bearings, seal, brakes and tire.
Install a new cotter pin or the specified spindle-locking device. Never loosen or tighten the nut beyond the approved range merely to reuse a damaged cotter pin.
Install the dust cap carefully and make sure it seats securely.
Adjust the Trailer Brakes
Many electric drum brakes require periodic manual adjustment, although some assemblies use self-adjusting mechanisms.
For a manually adjusted brake, access the star wheel through the backing plate. Turn the adjuster in the correct direction until the shoes contact the drum, then back it off according to the brake manufacturer’s instructions.
The wheel should rotate with the specified light, even drag. Adjust every brake consistently. Too much clearance delays braking, while excessive drag creates heat and rapid wear.
A new or substantially serviced brake assembly may require a manufacturer-specified burnishing procedure. Burnishing seats the brake shoes against the drums and helps the system develop its intended braking force.
Reinstall and Torque the Wheel
Inspect the wheel and mounting surfaces before installation. Remove rust, grease and debris as directed by the wheel and hub manufacturer.
Install the wheel and tighten the nuts in the specified star pattern. Lower the trailer enough to prevent the wheel from rotating, then tighten the nuts in stages using a calibrated torque wrench.
Use the torque specification for the RV’s wheel, fastener and hub combination. Do not guess based on wheel size, and do not rely on an impact wrench for final tightening.
Recheck wheel-nut torque at the intervals specified by the RV or wheel manufacturer, particularly after a wheel has been removed and reinstalled.
Test the Brakes Before Travelling
After servicing all wheel ends:
- Confirm that every dust cap, fastener and access plug is installed.
- Remove all tools and supports.
- Verify that the wheel nuts are correctly torqued.
- Connect the trailer to the tow vehicle.
- Test the running lights, brake lights and turn signals.
- Confirm that the brake controller recognizes the trailer.
- Test the trailer brakes at very low speed in a safe area.
- Adjust the brake-controller output as needed.
- Follow any required brake-burnishing procedure.
After a short initial drive, stop safely and compare the wheel-end temperatures. A non-contact infrared thermometer can help identify one hub that runs substantially hotter than the others, although readings vary with braking, weather and measurement location.
Do not touch a suspected overheated hub with bare skin. For a printable pre-trip inspection checklist, see our RV Pre-Trip Inspection Checklist.
Keep a Wheel-End Service Record
Record the date, odometer estimate and work completed. Include:
- Bearing and seal part numbers
- Grease brand and specification
- Brake-lining and drum measurements
- Components replaced
- Wheel-nut torque specification
- Brake adjustments
- Observed damage or unusual wear
- Date of the next inspection
A consistent record makes it easier to spot repeated seal failures, abnormal brake wear and shortening service intervals. For more on RV maintenance records, see our RV Maintenance Schedule and Recordkeeping guide.
When to Call an RV Technician
Wheel bearings and trailer brakes are safety-critical systems. Arrange professional service if you find:
- A damaged spindle
- A loose or spun bearing race
- Severe heat discolouration
- Cracked or oversized brake drums
- Grease-soaked brake shoes
- Damaged brake wiring
- Repeated seal failures
- Uncertain bearing adjustment
- Persistent wheel looseness
- Weak or uneven braking after adjustment
- A hub that continues running hotter than the others
Professional service is also the right choice when safe lifting equipment, accurate torque specifications or suitable measuring tools are unavailable. For help identifying specific problems, see our RV Troubleshooting guides. For more industry safety guidance, see the RV Safety & Education Foundation.
Regular bearing and brake inspections protect more than the parts inside the hub. They help the trailer stop predictably, reduce the risk of roadside failure and reveal small problems before they threaten the entire wheel assembly.