
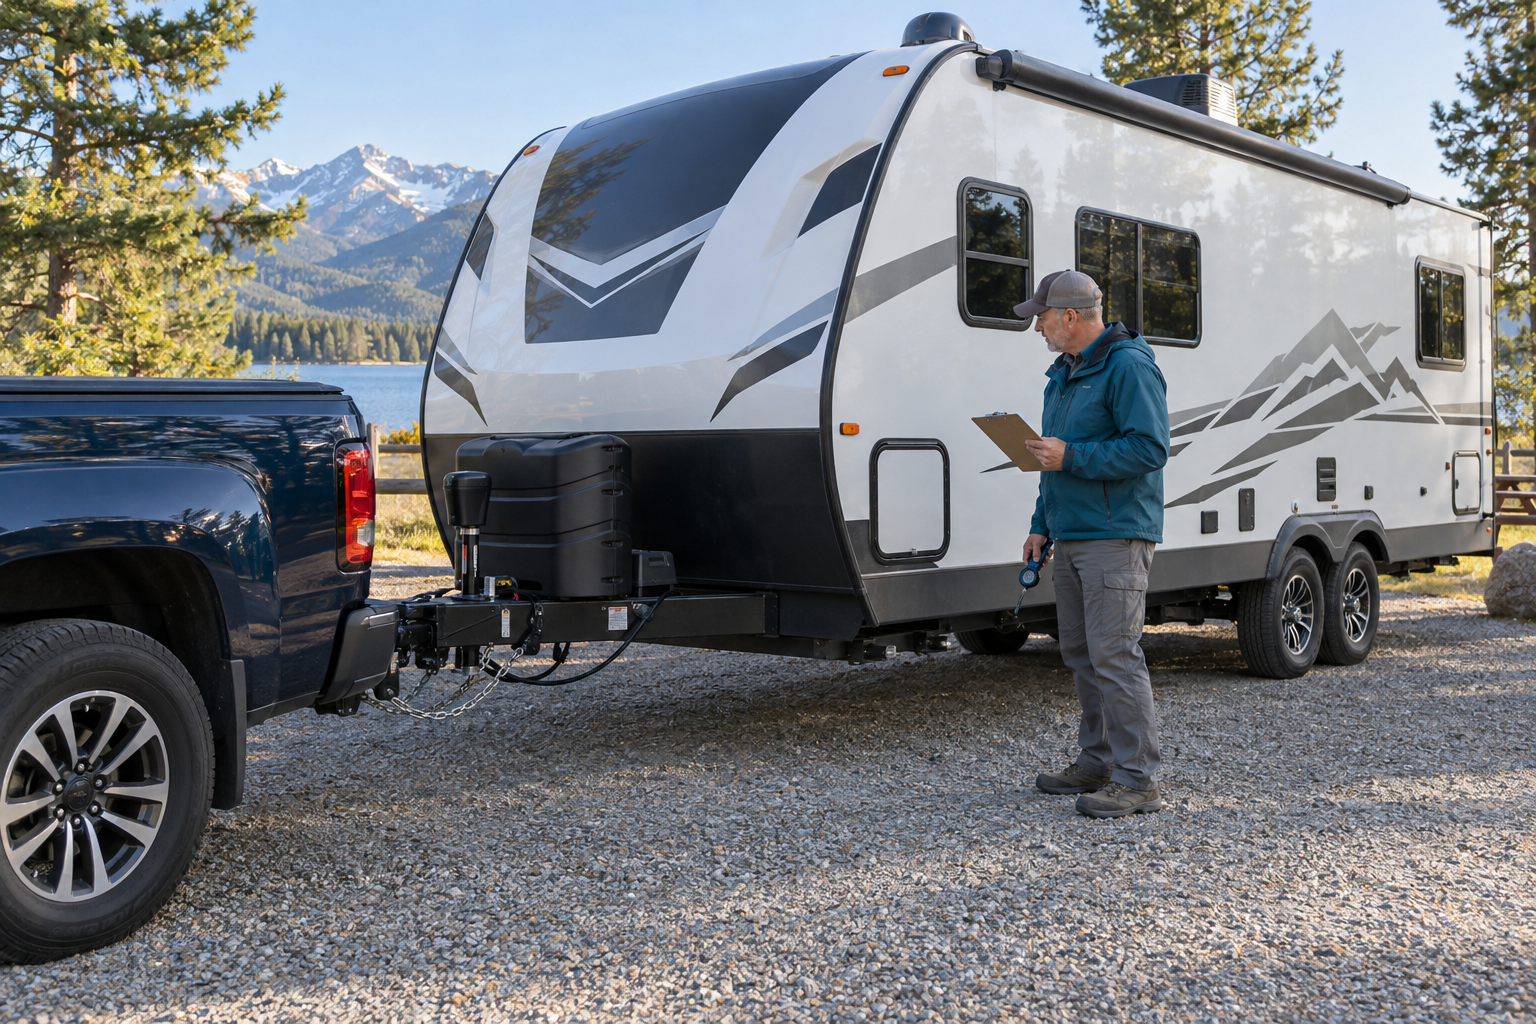
A careful RV pre-trip inspection checklist can prevent many of the problems that cause roadside breakdowns, property damage, delays, and unsafe driving conditions. RVs contain more equipment than ordinary passenger vehicles, and even a short trip can place significant stress on tires, hitches, appliances, plumbing, storage compartments, and exterior components.
This checklist covers both towable RVs and motorhomes. Some items will not apply to every RV, so adapt it to your equipment and the instructions supplied by its manufacturers.
Perform the detailed inspection early enough to correct any problems before departure. Complete a shorter final walkaround immediately before moving the RV.
Prepare for the Trip in Advance
Avoid leaving inspections, repairs, and loading until the morning of departure. Tires may need replacement, batteries may require charging, and appliance problems may need professional attention.
Several days before leaving:
- Review the RV’s maintenance records
- Check for outstanding repairs
- Confirm required service intervals
- Review the route and road conditions
- Check campground access and site dimensions
- Confirm bridge, tunnel, ferry, and propane restrictions
- Check the expected weather
- Verify roadside-assistance coverage
- Confirm insurance and registration documents
- Locate fuel, propane, and dumping services
- Make required campground reservations
- Share the travel plan with a trusted person
Check the total height, width, length, and weight of the RV. Keep this information in the tow vehicle or motorhome where the driver can refer to it quickly. Because repairs can take time, start preparing several days in advance.
Check the RV’s Weight
An RV can exceed its weight ratings before it appears overloaded. Water, propane, batteries, food, tools, camping equipment, aftermarket accessories, and personal belongings all add weight.
Know the meaning of the applicable ratings:
- Gross Vehicle Weight Rating, or GVWR
- Gross Axle Weight Rating, or GAWR
- Gross Combined Weight Rating, or GCWR
- Cargo Carrying Capacity, or CCC
- Tire load ratings
- Hitch and receiver ratings
- Tongue-weight or pin-weight limits
The most reliable way to confirm the loaded weight is to use an appropriate vehicle scale. Weigh the RV in normal travel condition with passengers, cargo, fuel, water, and equipment positioned as they will be during the trip.
Distribute cargo so no axle or tire is overloaded. Heavy items should be stored low, secured against movement, and placed according to the RV manufacturer’s loading guidance.
Do not attempt to correct overloading by increasing tire pressure beyond the tire or wheel rating. If you are unsure of the loaded weight, visit a public scale before departure.
Inspect the Tires
Check tire pressure when the tires are cold, before driving or prolonged sun exposure. Inflate them according to the RV or vehicle manufacturer’s specifications for the actual application and load. Because tire problems often begin internally, replace tires based on age as well as tread depth.
Inspect every tire, including the spare, for:
- Cuts
- Cracks
- Bulges
- Blisters
- Exposed cords
- Embedded objects
- Uneven tread wear
- Low tread depth
- Valve-stem damage
- Missing valve caps
- Signs of rubbing
- Flat spots from storage
- Age-related deterioration
Read the tire identification code to determine its manufacturing date. An older tire may require replacement even when its tread appears adequate.
Confirm that each tire has the correct:
- Size
- Load range
- Speed rating
- Inflation pressure
- Clearance from nearby components
Dual tires must have adequate spacing and should not contact each other. Mismatched diameters or inflation pressures can cause one tire to carry more than its share of the load.
If a tire repeatedly loses pressure, determine the cause before travelling. Do not rely on repeatedly adding air. Even if tires look fine, use a gauge rather than relying on appearance. For a complete tire guide, see our RV Tire Safety post.
Check Wheels and Lug Nuts
Inspect wheels for cracks, bends, corrosion, damaged mounting holes, or other visible defects. Look for rust trails or shiny movement marks around lug nuts, which may indicate looseness.
Use a properly calibrated torque wrench and the manufacturer’s torque specification when checking wheel fasteners. Do not estimate torque with an impact wrench or ordinary breaker bar. If a lug nut repeatedly loosens, investigate before travelling again.
Wheel-fastener procedures vary. Some manufacturers require torque checks after:
- A wheel has been removed
- A tire has been replaced
- Initial travel with a new RV
- A specified distance after service
- Extended storage
Follow the instructions for the axle, hub, and wheel combination installed on your RV.
Confirm that the wheel bearings, brakes, hubs, and seals meet their required service intervals. Grease or oil appearing on the inside of a wheel may indicate a failed seal and contaminated brakes.
Inspect the Suspension and Undercarriage
Without crawling beneath an unsupported RV, inspect visible undercarriage components for:
- Broken or shifted leaf springs
- Damaged shackles or hangers
- Loose or missing fasteners
- Cracked welds
- Bent axle components
- Leaking shock absorbers
- Hanging wires or hoses
- Damaged brake wiring
- Torn or loose underbelly material
- Fluid leaks
- Evidence of tire contact
- Low or unsecured tanks
Never work under an RV supported only by stabilizers or levelling jacks. Suspension, axle, brake, frame, and bearing concerns should be assessed by a qualified technician. Because undercarriage components are difficult to inspect on the road, address visible problems before departure.
Inspect the Hitch on a Travel Trailer
For a conventional travel trailer, inspect the coupler and hitch system carefully. If any hitch component shows wear, replace it rather than risk a failure on the road.
Confirm that:
- The hitch ball matches the coupler size
- The ball and mount are correctly rated
- The receiver pin and retaining clip are installed
- The coupler is fully seated on the ball
- The coupler latch is closed and secured
- Safety chains are attached to the tow vehicle
- Chains have enough slack for turns
- Chains will not drag on the road
- The electrical connector is fully seated
- The breakaway cable is connected separately
- The tongue jack is fully retracted
- The jack foot or block has been stored
- Weight-distribution components are correctly installed
- Sway-control equipment is adjusted as directed
- Hitch fasteners show no damage or looseness
Crossing safety chains beneath the tongue may help support it if the coupler separates, where recommended and permitted. Follow the requirements for your location and equipment.
The breakaway cable must not be wrapped around the safety chains or connected in a way that prevents it from activating if the trailer separates. For more on weight ratings and towing safety, see our RV Weight, Loading and Towing Safety guide.
Inspect a Fifth-Wheel Hitch
Before towing a fifth wheel, check both the hitch and pin box. Even if the hitch appears secure, complete a visual pull test before moving.
Confirm that:
- The hitch is correctly secured to the truck
- Mounting pins and clips are installed
- The hitch jaws fully surround the kingpin
- The locking handle is secured
- The kingpin is not resting above the jaws
- A visual pull test has been completed
- The breakaway cable is properly connected
- The electrical cable has enough turning clearance
- The landing gear is fully retracted
- The tailgate is closed
- The truck bed is clear
- There is adequate clearance between the trailer and truck
- The pin box cannot contact the truck’s bed rails
- The trailer can turn without striking the cab
Follow the hitch manufacturer’s coupling and pull-test procedure. Do not rely solely on the sound of the jaws closing or the position of the release handle.
Check the Tow Vehicle
Inspect the tow vehicle before attaching the trailer. If any warning light stays on, investigate before hitching the trailer.
Check:
- Engine oil
- Coolant
- Brake fluid
- Transmission fluid, where serviceable
- Windshield-washer fluid
- Fuel level
- Tires and spare tire
- Exterior lights
- Windshield wipers
- Mirrors
- Brakes
- Battery condition
- Warning lights
- Trailer-brake controller
- Hitch receiver
- Suspension condition
Adjust towing mirrors so the driver can see along both sides of the trailer and monitor surrounding traffic.
Confirm that the vehicle remains within its payload, axle, hitch, and combined-weight ratings. Published tow capacity alone does not determine whether a specific trailer can be towed safely.
Check a Motorhome Chassis
Motorhome owners should complete the vehicle manufacturer’s required pre-trip checks. Because chassis problems can worsen quickly, investigate anything unusual before driving.
Depending on the chassis, inspect:
- Engine oil
- Coolant
- Transmission fluid
- Brake fluid
- Power-steering fluid
- Diesel exhaust fluid
- Windshield-washer fluid
- Belts and hoses
- Chassis battery
- Fuel level
- Tires and wheels
- Mirrors
- Windshield
- Wipers
- Horn
- Exterior lights
- Suspension
- Air-pressure system, if equipped
- Warning indicators
Check beneath the motorhome for leaks before starting the engine. After starting, allow warning lights and gauges to stabilize and investigate anything abnormal before driving.
Test Trailer Brakes and the Breakaway System
Confirm that the trailer-brake controller recognizes the trailer. Test brake response at low speed in a safe area and adjust the controller according to its instructions.
Inspect the breakaway switch, cable, battery, and wiring. The breakaway battery must be charged and capable of applying the trailer brakes if separation occurs. If the brake controller does not recognize the trailer, do not proceed until it is corrected.
Do not leave the breakaway pin pulled during storage or use it as a parking brake. Extended activation can discharge the battery and overheat the brake magnets.
Follow the manufacturer’s procedure for testing the breakaway system. Reinstall the pin completely after the test.
Test Every Exterior Light
With another person assisting, test:
- Headlights
- Tail lights
- Brake lights
- Turn signals
- Four-way flashers
- Clearance lights
- Marker lights
- Licence-plate light
- Reverse lights, if equipped
- Auxiliary driving or fog lights
A camera or reflective surface may help when working alone, but it should not replace a direct inspection when possible. If a light flickers, repair the connection before travelling.
A light that appears dim or flickers may indicate corrosion, a weak ground, damaged wiring, or a loose connector.
Inspect the Roof and Exterior
If you can access the roof safely, inspect it several days before departure. Never climb onto a roof unless the RV manufacturer confirms it can support a person.
Look for:
- Cracked or separated sealant
- Loose roof components
- Damaged vent covers
- Deteriorated skylights
- Missing fasteners
- Punctures or tears
- Tree or hail damage
- Debris around drains
- Air-conditioner shroud damage
- Signs of water intrusion
From ground level, inspect:
- Windows
- Entry doors
- Compartment doors
- Corner mouldings
- Marker lights
- Exterior trim
- Utility connections
- Awning hardware
- Ladders
- Grab handles
- Steps
- Body panels
- Bumpers
Correct loose or damaged exterior components before highway travel. For roof and seal inspection guidance, see our RV Roof and Exterior Seal Inspection post.
Retract and Secure Slide-Outs
Bring every slide-out fully into its travel position.
Confirm that:
- The interior and exterior paths are clear
- Loose objects cannot interfere with movement
- Seals are not folded or trapped
- The slide is fully seated against the sidewall
- Install travel locks where required
- Awnings over the slide have retracted correctly
- Nothing remains on the slide roof
- Interior doors and furniture cannot strike the slide
- The operating switch cannot be activated accidentally
Do not travel with a slide-out partially extended. If a slide does not retract evenly or stops before sealing, follow its approved manual-retraction procedure or contact a technician.
Retract Awnings and Exterior Equipment
Roll up the main awning and confirm that both arms are locked for travel. Retract window, door, and slide-topper awnings.
Also secure:
- Exterior televisions
- Outdoor kitchens
- Portable grills
- Patio rails
- Steps
- Handrails
- Satellite equipment
- Antennas
- Clotheslines
- Flags
- Mats
- Chairs
- Tables
- Barbecues
- Bicycles
- Portable solar panels
Check beneath and around the RV for forgotten levelling blocks, wheel chocks, hoses, cables, toys, and pet equipment.
Secure Exterior Compartments
Close, latch, and lock every exterior storage compartment. Push gently on each door after latching it to confirm it is secure.
Make sure heavy cargo cannot shift against a compartment door. Secure tools, jacks, generators, batteries, fuel containers, and other dense equipment.
Never store gasoline, propane cylinders, or flammable chemicals in an unapproved compartment. Follow product labels and applicable transportation requirements. Because shifting cargo can damage a compartment door, secure heavy items before closing it.
Inspect the Propane System
Before travel:
- Confirm propane cylinders are properly secured
- Check that cylinder mounts and straps are intact
- Inspect accessible hoses for visible damage
- Make sure the regulator cover is secure
- Confirm the compartment is unobstructed and ventilated
- Check that no propane odour is present
- Turn appliances off
- Close cylinder valves where required
Whether propane may remain on while travelling depends on the RV, appliances, location, and route. Propane appliances must be shut down where required, including certain fuel stations, tunnels, ferries, garages, and enclosed spaces.
Never travel with portable propane cylinders loose inside the living area. Because propane rules vary by region, check local requirements before travelling. For propane appliance safety, see our RV Propane System and Appliance Safety guide.
Check the Electrical System
Before disconnecting shore power:
- Charge the house batteries
- Test interior lights
- Test safety detectors
- Confirm the converter or inverter operates correctly
- Check battery-monitor readings
- Inspect accessible battery terminals
- Turn off unnecessary appliances
- Confirm the refrigerator is set for the intended travel mode
When disconnecting:
- Turn off high-demand appliances.
- Switch off the pedestal breaker.
- Disconnect the shore-power cord.
- Inspect the plug for heat or damage.
- Coil and store the cord securely.
- Close and latch the electrical compartment.
- Store adapters and surge-protection equipment.
Never drive away while connected to shore power.
Inspect the Batteries
Check that every battery is firmly secured and protected from shifting.
Look for:
- Loose terminals
- Corrosion
- Damaged cables
- Swollen cases
- Cracks
- Leaking electrolyte
- Excessive heat
- Missing terminal protection
For serviceable flooded lead-acid batteries, check electrolyte levels using the manufacturer’s safety procedure.
Lithium, AGM, gel, and flooded batteries have different charging and maintenance requirements. Use only compatible equipment and settings.
Prepare the Fresh-Water System
Decide how much fresh water to carry. A full tank increases available water but also adds significant weight.
Before departure:
- Fill the tank only to the desired level
- Confirm the gravity-fill cap is secure
- Set the water-panel valves for travel
- Disconnect and store the drinking-water hose
- Remove and store the water-pressure regulator
- Drain or secure external water filters
- Turn off the water pump
- Check beneath sinks for leaks
- Confirm faucets are closed
- Secure shower fixtures
- Check the toilet valve for leakage
- Verify that the water heater is in the intended operating mode
If you winterized the RV, confirm that you have properly de-winterized it and flushed all antifreeze from the potable-water system before use. For more on RV water systems, see our RV Plumbing Basics guide.
Prepare the Wastewater System
Empty the black and grey tanks at an approved dumping location when appropriate.
After dumping:
- Close every termination valve
- Install the sewer outlet cap
- Rinse and store the sewer hose
- Secure all fittings
- Store wastewater equipment separately from drinking-water equipment
- Wash or sanitize your hands
- Confirm the sewer compartment is closed
Do not assume a valve is closed because its handle appears to be pushed in. A damaged cable or linkage can leave the valve partly open.
Secure the Interior
Anything left loose can move during sudden braking, cornering, or travel over rough roads.
Secure:
- Dishes
- Cookware
- Small appliances
- Televisions
- Computers
- Books
- Decorations
- Bathroom items
- Food containers
- Cleaning products
- Pet supplies
- Tools
- Folding furniture
Close and latch:
- Cabinets
- Drawers
- Closet doors
- Refrigerator doors
- Shower doors
- Bathroom doors
- Pocket doors
- Pantry doors
Remove heavy objects from countertops and tables. Store them low and prevent them from sliding.
Prepare the Refrigerator
Follow the refrigerator manufacturer’s instructions for travel.
Before departure:
- Confirm food is cold
- Secure containers
- Lock the refrigerator and freezer doors
- Remove spill-prone items
- Verify the selected energy mode
- Confirm exterior vents are unobstructed
- Check that no warning indicator is present
Absorption refrigerators may require the RV to remain reasonably level while parked. Operating requirements during travel vary by model and local restrictions.
Check Windows, Vents, and Doors
Close and secure:
- Roof vents
- Skylights
- Windows
- Emergency-exit windows
- Entry doors
- Screen doors
- Baggage doors
- Range-hood vents
- Exterior vent covers
Manufacturers design some roof vents to remain open during rain or travel when equipped with approved covers.
Confirm that the main entry step is retracted and the handrail is locked in its travel position.
Test Safety Equipment
Before every trip, test:
- Smoke alarm
- Carbon-monoxide detector
- Propane detector
- Fire extinguisher
- Emergency exits
- Flashlights
- Weather radio, if carried
- First-aid kit
- Roadside warning devices
Check detector expiration dates and replace units that have reached the end of their service lives.
Make sure every traveler knows where the emergency exits, fire extinguisher, propane shutoff, electrical disconnect, and first-aid kit are located. If a detector has reached its replacement date, install a new one before the next trip. For more industry safety guidance, see the RV Safety & Education Foundation.
Carry Essential Documents and Information
Keep important information where it can be reached without unpacking the RV.
Carry:
- Driver’s licences
- Vehicle registrations
- Insurance documents
- Roadside-assistance information
- Campground confirmations
- Emergency contacts
- Medication information
- Pet vaccination records, when applicable
- RV and appliance manuals
- Vehicle dimensions
- Weight information
- Maintenance records
- Warranty contacts
Store digital copies securely, but carry paper copies of documents that may be needed where cellular service is unavailable.
Check Emergency and Roadside Supplies
Useful supplies may include:
- First-aid kit
- Fire extinguisher
- Reflective warning triangles
- High-visibility vest
- Flashlights
- Spare batteries
- Tire-pressure gauge
- Portable air compressor
- Wheel chocks
- Correctly rated jack
- Jack base
- Lug wrench
- Torque wrench
- Spare tire
- Basic hand tools
- Replacement fuses
- Drinking water
- Warm clothing
- Blankets
- Phone chargers
- Emergency food
- Weather radio
- Roadside-assistance contact information
Know whether your jack and tools are actually capable of servicing the RV. Never place yourself beneath a raised RV during a roadside tire change.
Confirm Navigation and Clearance
Review the planned route using information suitable for the RV’s size and weight.
Watch for:
- Low bridges
- Weight-restricted roads
- Narrow lanes
- Steep grades
- Sharp turns
- Construction
- Seasonal closures
- Propane restrictions
- Ferry requirements
- Fuel accessibility
- Limited turnaround areas
Passenger-car navigation systems may direct an RV onto an unsuitable road. Compare the route with current maps, road-agency information, and campground directions.
Perform a Final Walkaround
Complete the final walkaround in the same direction every time. A consistent routine makes missed items less likely.
Check that:
- Tires appear properly inflated
- Wheels and hubs look normal
- Remove all chocks
- Levelling blocks have been stored
- Stabilizers are fully retracted
- Levelling jacks are fully retracted
- Steps and handrails are secured
- Awnings are locked
- Slide-outs are fully retracted
- Antennas are lowered
- Roof vents are secured
- Exterior compartments are latched
- Utility cords and hoses are disconnected
- Sewer valves are closed
- The sewer cap is installed
- Propane equipment is secured
- Hitch connections are complete
- Safety chains are connected
- The breakaway cable is attached
- Landing gear or tongue jack is retracted
- Exterior lights work
- Licence plates are visible
- No tools or equipment remain beneath the RV
- The campsite is clean
Look underneath the RV one final time before moving.
Conduct a Low-Speed Brake Test
After pulling forward a short distance in a safe area, stop and check that the brakes respond normally.
For a towable RV:
- Confirm the trailer-brake controller still recognizes the trailer
- Apply the manual controller briefly at low speed
- Listen for unusual sounds
- Check that the combination stops straight
- Confirm mirrors remain correctly adjusted
Stop immediately if the trailer feels unstable, the brakes do not respond, or an unusual warning appears.
Recheck After the First Few Kilometres
After beginning the trip, stop in a safe location and repeat a brief inspection.
Check:
- Hitch connections
- Safety chains
- Breakaway cable
- Electrical connector
- Cargo straps
- Exterior compartments
- Tires
- Wheels and hubs
- Leaks
- Unusual heat or odours
Do not touch brake drums, hubs, or wheel components with bare hands. They may be hot. Compare temperatures cautiously and investigate any wheel or hub that is significantly hotter than the others.
Repeat walkarounds during fuel, meal, and rest stops.
RV Pre-Trip Inspection Checklist: Quick Reference
Use this condensed list immediately before departure:
- Tires inspected and inflated cold
- Spare tire checked
- Wheels and lug nuts inspected
- Hitch properly connected
- Safety chains secured
- Breakaway cable attached
- Electrical connector installed
- Trailer brakes tested
- Exterior lights tested
- Jacks and stabilizers retracted
- Chocks and levelling blocks stored
- Slide-outs fully retracted
- Awnings secured
- Steps and handrails stored
- Antennas lowered
- Roof vents secured
- Exterior compartments latched
- Shore-power cord disconnected
- Water hose disconnected
- Sewer hose stored
- Waste valves closed
- Sewer cap installed
- Propane equipment secured
- Interior cargo secured
- Cabinets and drawers latched
- Refrigerator doors locked
- Water pump turned off
- Safety detectors tested
- Entry door locked
- Route and clearances confirmed
- Final walkaround completed
RV Pre-Trip Inspection Checklist: Key Takeaways
A pre-trip inspection should become a routine rather than an occasional project. Following the same sequence before every departure reduces the chance of missing a raised antenna, open compartment, loose hitch component, underinflated tire, or forgotten utility connection.
Take the time to correct problems before moving the RV. A minor delay at the campsite is far safer and less expensive than discovering the same problem at highway speed.
Adapt this checklist to your RV, keep a printed copy inside the vehicle, and update it whenever equipment is added or changed. A careful final walkaround remains one of the simplest and most effective ways to begin every trip safely.