
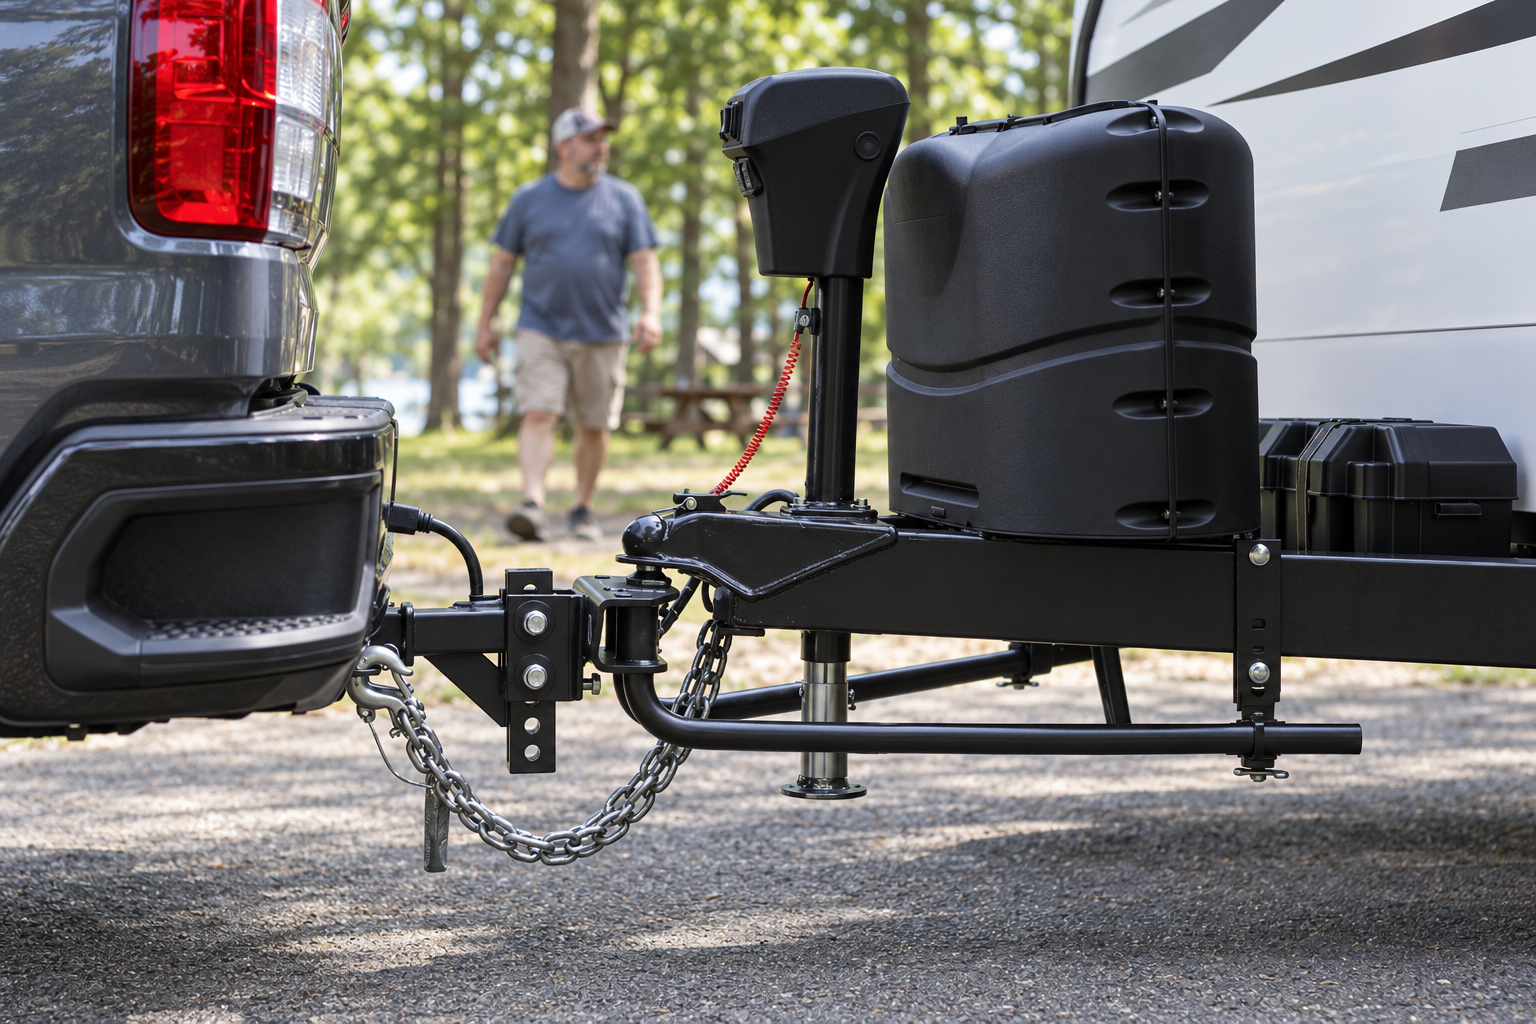
RV hitch inspection matters because the connection between a travel trailer and its tow vehicle carries the trailer’s tongue weight, controls its movement, and keeps it attached during travel. A worn coupler, loose hitch ball, damaged safety chain, or failed breakaway system can turn a manageable problem into a serious emergency.
Inspect the connection before every trip. Some components also need periodic cleaning, lubrication, and professional examination. This guide focuses on the parts you can see and check at the hitch. For vehicle ratings, trailer loading, and driving techniques, see Towing Your RV Safely.
Know the Parts of Your RV Hitch System
A conventional travel-trailer connection may include:
- A receiver mounted to the tow vehicle
- A removable ball mount or weight-distribution hitch head
- A correctly sized hitch ball
- The trailer’s ball coupler and latch
- A coupler safety pin or lock
- Two safety chains
- A breakaway switch, cable, and charged battery
- A seven-way electrical connector
- A power or manual tongue jack
- Weight-distribution spring bars, when equipped
- A separate or integrated sway-control system
Each load-bearing component must be rated for its intended use. The complete hitch system is limited by its lowest-rated applicable component.
Check the Tow Vehicle’s Receiver
Inspect the receiver before inserting the ball mount or hitch head. Use adequate lighting to check its mounting points and the area beneath it.
Look for cracks, bent steel, elongated hitch-pin holes, heavy corrosion, loose or missing mounting hardware, cracked welds, impact damage, or movement between the receiver and tow-vehicle frame. You can usually clean and protect light surface rust, but deep scaling, deformation, or cracking requires professional evaluation.
Confirm that the receiver is rated for the trailer’s loaded weight and tongue weight. Some receivers have different limits with and without a weight-distribution hitch. Do not weld, drill, or modify a receiver unless its manufacturer permits the work.
Inspect the Ball Mount or Hitch Head
Check the removable ball mount or weight-distribution hitch head for bending, cracks, severe looseness, distorted metal, and damaged pin holes. Confirm that the shank is fully inserted, the hitch pin passes through both sides of the receiver, and its retaining clip or approved lock is installed.
Check that adjustment hardware is present and secure, the ball platform sits squarely, and the component’s rating is sufficient for the loaded trailer. Some movement between a shank and receiver can be normal; significant looseness or visible wear deserves inspection.
Use an approved hitch pin of the correct size. Do not substitute an ordinary bolt unless the hitch manufacturer specifically approves it.
Verify the Hitch-Ball Size and Rating
The ball must match the size marked on the trailer coupler. A coupler can appear to latch over an undersized ball while remaining dangerously insecure.
Inspect the ball for flattening, deep grooves, cracks, heavy corrosion, damaged threads, a bent shank, or a loose mounting nut. Verify its marked load rating against the trailer’s loaded weight.
Hitch-ball nuts may require substantial torque and specific installation steps. Use the manufacturer’s torque specification and procedure; do not estimate the final torque with an impact wrench.
Inspect the Trailer Coupler
Remove enough dirt and old grease to see the coupler body and moving parts. Check its top, sides, and underside for cracks, distorted metal, questionable welds, severe rust, loose hardware, wear inside the socket, or missing latch parts.
Operate the latch while the trailer is uncoupled. It should move smoothly and close completely. Follow the coupler manufacturer’s instructions for lubrication and adjustment.
If the coupler will not close over the correctly sized ball, do not force it. Dirt, damage, incorrect adjustment, or a mismatched ball may be preventing engagement.
Confirm That the Coupler Is Fully Seated
Lower the coupler squarely over the hitch ball. It must settle onto the ball rather than rest on its top or edge. Close the latch and install its safety pin or approved lock.
Perform the pull test specified for your hitch and trailer. For many conventional ball couplers, this involves raising the tongue jack only enough to begin lifting the rear of the tow vehicle, confirming that the latched coupler has captured the ball. Do not raise the combination unnecessarily high.
Lower it back to its normal position, retract the jack, and secure any removable foot or wheel. Inspect the connection from the front and side. A closed latch alone does not prove that the coupler has properly captured the ball.
Lubricate the Hitch Ball and Coupler
Metal-to-metal movement between the ball and coupler creates wear. Clean away contaminated grease and apply only the lubricant recommended by the hitch or coupler manufacturer.
Keep lubricant off electrical connectors, brakes, and friction-style sway-control surfaces. Some couplers have additional grease points or latch components that require service; follow their instructions. Do not grease a surface that the manufacturer says must remain dry.
Inspect and Connect the Safety Chains
Safety chains provide a secondary connection if the coupler separates from the ball. Inspect both chains and their frame attachments for stretched or worn links, cracks, severe corrosion, road-dragging damage, questionable welds, or damaged hooks and latches.
Replace damaged chains and attachment hardware with properly rated components. Do not repair a load-rated chain using an ordinary link or unapproved welding.
Connect the chains to the approved attachment points on the tow vehicle—not to the removable ball mount or ball. Arrange them as required by the equipment manufacturer and applicable rules. Crossing them beneath the coupler may provide a cradle on some conventional setups, but that arrangement is not a substitute for following the instructions for your hitch.
Allow enough slack for full turns without binding, while keeping the chains from dragging. Use an approved adjustment method rather than simply twisting a chain to shorten it. During a controlled turn in an open area, check that neither chain tightens or contacts the road or hitch equipment.
Inspect the Breakaway Switch and Cable
The breakaway system applies the trailer’s electric brakes if the trailer separates from the tow vehicle.
Inspect its switch housing, mounting bracket, activation pin, cable, end fitting, wiring, and battery. The switch must be secure, and the pin must stay seated during normal travel while remaining able to pull out when required.
Attach the breakaway cable to a secure tow-vehicle point independent of the removable ball mount and safety chains, as instructed by the equipment manufacturer. Do not loop it around the hitch ball, clip it to a safety chain, or weave it through the chains. Route it with enough slack for turns but not so much that it drags or snags.
Do not use the breakaway switch as a parking brake. Leaving its pin removed can discharge the battery and overheat brake components.
Test the Breakaway System
Follow the trailer and breakaway-system manufacturers’ test procedures. Confirm that the battery is charged and that the system activates the brakes as specified. Keep any activation test brief and reinstall the pin immediately afterward.
Some procedures require disconnecting the seven-way plug before testing. Do not test through the tow-vehicle electrical connection unless the manufacturer permits it. A weak or dead breakaway battery cannot perform the system’s intended job.
Inspect the Seven-Way Connector
Check both the tow-vehicle socket and trailer plug for bent or recessed contacts, corrosion, dirt, moisture, cracked housings, loose strain relief, damaged insulation, exposed wires, or melted plastic.
The plug should fit securely. Route the cable with enough slack for turns without letting it drag, pinch, or contact sharp parts. Grip the plug body—not its cable—when disconnecting it.
After connecting, test the running lights, brake lights, turn signals, and trailer brakes. Have another person confirm the lights from behind the trailer. Do not tow if required lights or brakes are not functioning.
Inspect the Tongue Jack
Check the jack’s mounting flange, fasteners, welds, inner tube, foot, and operating mechanism. Watch for bent tubes, excessive movement, loose bolts, damaged wiring, corrosion, leaks, abnormal noise, or jerky operation.
A power tongue jack should have protected electrical connections and appropriate circuit protection. Retract the jack for travel as its manufacturer directs, and secure any removable foot, handle, or pin so it cannot contact the road.
Never place any part of your body beneath a trailer supported only by its tongue jack.
Inspect the Trailer A-Frame
The A-frame transfers towing forces from the coupler into the trailer chassis. Check the visible frame members and welded connections near the coupler and jack for cracks, bending, buckling, separating welds, severe corrosion, or damage from a sharp turn or impact.
A line in the paint may not be a structural crack, but a questionable mark near a weld or other highly loaded area deserves professional inspection. Do not drill, weld, or modify the A-frame without confirming that the work is permitted.
Inspect Weight-Distribution Equipment
If fitted, inspect the hitch head, spring bars, sockets, frame brackets, adjustment hardware, retaining pins, clips, and manufacturer-specified lubrication points. Look for cracks, bending, excessive wear, loose hardware, or interference during turns.
Confirm that spring bars are installed correctly, including their designated sides if they are side-specific. Follow the hitch and vehicle manufacturers’ instructions for adjustment. Recheck the setup if you change tow vehicles, replace hitch components, or significantly change the trailer’s loading.
A weight-distribution hitch does not increase the ratings of the tow vehicle, trailer, receiver, tires, or other equipment. For more on weight ratings and loading, see our RV Weight, Loading and Towing Safety guide
Check Sway-Control Components
Sway control may be integrated with the weight-distribution hitch or installed as a separate friction device. Inspect its mounts, adjustment parts, and contact surfaces. Follow the manufacturer’s directions for tightening, lubrication, and any required removal for particular manoeuvres.
Never lubricate a friction surface unless instructed to do so. Sway control cannot correct an overloaded trailer, unsuitable cargo placement, underinflated tires, or damaged equipment.
Check Hitch Height and Turning Clearance
With the combination connected and loaded for travel, confirm that its hitch height and trailer attitude meet the RV and hitch manufacturers’ specifications. Recheck the setup when changing tow vehicles, tires, suspension, or hitch equipment.
In a safe, open area, have an observer watch while the tow vehicle makes slow, controlled turns in both directions. Stop if a chain, breakaway cable, or seven-way cable pulls tight; a spring bar or sway-control component binds; the tongue jack approaches the tow vehicle; or anything drags or makes contact.
RV Hitch Inspection: Final Pre-Trip Check
Before moving the trailer, confirm:
- Receiver and hitch parts show no visible damage.
- Hitch pin and retaining clip are installed.
- Correct hitch ball is secure.
- Coupler is seated, latched, and fitted with its safety pin or lock.
- The required pull test is complete.
- Safety chains are attached correctly and have turning clearance.
- Breakaway cable is independently attached and its battery is charged.
- Seven-way plug is secure; lights and trailer brakes work.
- Weight-distribution and sway-control parts are secured, if equipped.
- Tongue jack is retracted and its foot is secure.
- Nothing at the hitch binds, drags, or contacts the tow vehicle during a turn.
Finish with a full walk-around of the entire trailer. For tire, cargo, awning, slide-out, and other travel-readiness checks, use the pre-departure section of Towing Your RV Safely. For a printable pre-trip checklist that covers the entire RV, see our Complete RV Pre-Trip Inspection Checklist.
When to Call a Professional
Arrange inspection if you find a cracked receiver, coupler, or A-frame; bent components; damaged welds; severe corrosion; a ball that cannot be correctly secured; a coupler that will not latch; worn mounting holes; damaged chain attachments; a failed breakaway system; or uncertain hitch adjustment.
Do not tow after a separation, jackknife, or significant hitch impact until the affected components have been checked. An unreadable component rating is also a reason to verify the equipment before use. For more industry safety guidance, see the RV Safety & Education Foundation.
The hitch is the primary mechanical connection between the tow vehicle and travel trailer. Inspect it before every trip and service it according to its manufacturer’s instructions. For help identifying specific problems, see our RV Troubleshooting guides.