
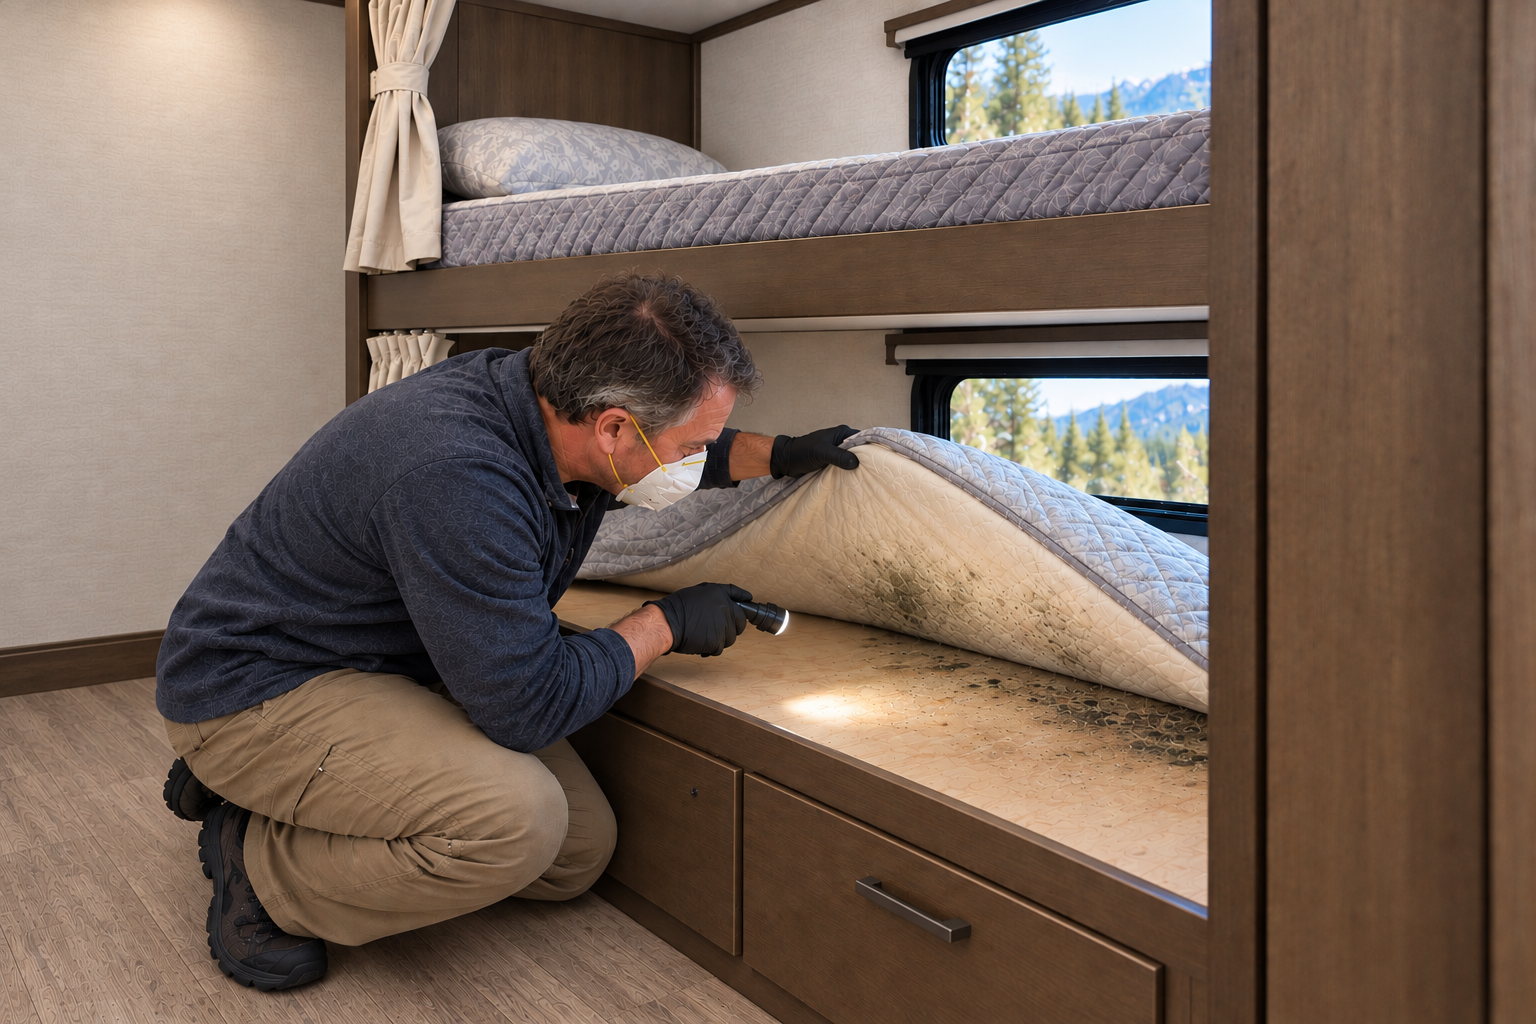
RV mould and mildew can develop anywhere moisture remains trapped inside. Leaks are one possible cause, but condensation, poor ventilation, damp belongings, and limited airflow behind furniture can create similar conditions.
An RV’s small interior and lightweight construction allow moisture to spread into walls, floors, cabinets, insulation, and the enclosed underbelly. Surface cleaning may remove a visible patch, but the growth will return if the moisture source remains.
Prevention begins with controlling water and humidity. When mould is found, the cleanup method depends on the size of the affected area, the material involved, the source of the moisture, and the health of the people performing the work.
This guide covers prevention and limited owner-level cleanup. Extensive growth, contaminated heating or air-conditioning equipment, sewage exposure, and mould hidden inside structural materials should be evaluated by a qualified professional.
Understand What Mould Needs to Grow
Mould spores exist naturally in indoor and outdoor air. They become a problem when they settle on a suitable material that remains damp long enough to support growth.
Inside an RV, mould may grow on:
- Wood and wall panels
- Paper-faced construction materials
- Carpet and underlay
- Upholstery and mattresses
- Ceiling panels
- Insulation
- Dust and organic residue
- Cabinet interiors
- Window coverings
- Stored clothing and bedding
- Leather and fabric
- Roof and slide-out materials
Removing the visible growth without correcting the moisture problem does not provide a lasting repair.
Mould and Mildew Are Signs of Moisture
The terms mould and mildew are often used differently in everyday conversation. Mildew commonly describes lighter surface growth on fabrics, seals, shower walls, or other damp surfaces. Mould may appear fuzzy, powdery, spotted, or irregular and can grow beneath or inside materials.
Colour does not reliably identify the species or determine how hazardous the growth may be. Mould can appear white, grey, green, brown, orange, or black.
There is usually no reason for an RV owner to identify the species before responding. Visible growth or a persistent musty odour means the moisture source and affected materials need attention.
Look for Early Warning Signs
Visible growth may not be the first indication of a problem. Watch for:
- A persistent musty or earthy odour
- Condensation on windows or walls
- Discoloured wall or ceiling panels
- Dark spots around window frames
- Damp carpet or upholstery
- Soft flooring
- Swollen cabinets or trim
- Peeling wall covering
- Water staining
- Mould beneath a mattress
- Moisture inside cabinets and closets
- Dampness behind cushions or furniture
- Growth on stored clothing or bedding
- Unexplained respiratory irritation that improves outside the RV
A musty odour that returns after ventilation may indicate growth inside a wall, floor, ceiling, cabinet, duct, or underbelly.
Do not cover a stained or mouldy area with paint, wallpaper, flooring, or trim. Concealing the surface will not stop growth inside damp materials.
Check Common RV Problem Areas
Limited space and restricted airflow make certain locations especially vulnerable.
Inspect:
- Beneath mattresses
- Behind headboards and bed platforms
- Inside closets and wardrobes
- Behind cushions and sofas
- Under dinette seats
- Around windows and roof vents
- Inside sink cabinets
- Around the toilet and shower
- Beneath the refrigerator
- Near the water heater and water pump
- Inside exterior storage compartments
- Along slide-out floors and corners
- Behind removable wall panels
- Around exterior-wall plumbing
- Beneath carpet and vinyl flooring
- Inside the enclosed underbelly
- Around air-conditioner openings and ducts
Use a flashlight and inspect areas where warm interior air contacts a cold exterior wall. Feel for dampness, but wear gloves and avoid disturbing questionable material unnecessarily.
Distinguish Condensation From a Leak
Condensation develops when warm, humid air contacts a cold surface. It commonly appears on windows, metal frames, exterior walls, roof vents, and inside cabinets during cold-weather camping.
A leak may produce a concentrated stain, dampness after rain, unexplained pump cycling, wet material beneath a fixture, or moisture that appears regardless of indoor humidity.
Condensation is more likely when:
- Several windows become wet at once.
- Moisture develops overnight.
- Cooking or showering increases the problem.
- Cabinets against exterior walls feel damp.
- The RV is tightly closed in cold weather.
- Humidity drops after ventilation.
A leak is more likely when:
- Water appears in one repeated location.
- Moisture follows rain or snowmelt.
- The water pump cycles with every fixture closed.
- Dampness appears only while connected to city water.
- Water appears while a sink or shower drains.
- A wall, floor, or ceiling remains wet after humidity falls.
Both problems can exist at the same time. Condensation should not be used to dismiss a concentrated stain or soft structural material. For help tracing a suspected leak, see our RV Water Leak Detection guide.
Control Indoor Humidity
Health Canada recommends maintaining indoor relative humidity between approximately 30 and 50 percent. The practical target inside an RV depends on outdoor temperature and conditions. During very cold weather, condensation may develop before the humidity reaches the upper end of that range.
Use an indoor hygrometer to monitor relative humidity rather than judging moisture only by comfort.
To reduce humidity:
- Run the bathroom fan while showering and afterward.
- Use the range hood while cooking.
- Open a roof vent or window when conditions permit.
- Operate a properly sized dehumidifier.
- Use the air conditioner during warm, humid weather.
- Dry wet clothing and towels outside when possible.
- Wipe condensation from windows and frames.
- Avoid storing wet footwear or equipment inside.
- Cover pots and reduce unnecessary boiling.
- Do not use the propane range or oven to heat the RV.
- Avoid unvented fuel-burning heaters.
Empty dehumidifier and air-conditioner drain containers regularly. Confirm that condensate drains away from the RV as intended. For more on managing moisture through ventilation, see our RV Heating, Cooling and Ventilation Maintenance guide.
Improve Airflow Behind Furniture
Cold exterior walls can collect moisture when mattresses, cushions, or stored items prevent warm air from circulating.
Leave space between belongings and exterior walls whenever possible. Open cabinet and closet doors periodically, especially during cold weather or storage.
Lift mattresses and cushions to inspect beneath them. Moisture-resistant under-mattress ventilation products may improve airflow, but they do not correct an active leak or excessive indoor humidity.
Avoid packing closets and exterior storage compartments so tightly that air cannot circulate. Do not block furnace registers, cold-air returns, roof vents, or air-conditioner openings.
Repair Water Leaks Promptly
Mould prevention depends on keeping materials dry. Repair roof, window, plumbing, drain, slide-out, appliance, and compartment leaks as soon as they are found.
After stopping the leak:
- Remove standing water.
- Open accessible panels and compartments.
- Remove soaked belongings.
- Use fans and a dehumidifier where appropriate.
- Dry wet insulation and structural material.
- Check adjacent areas for hidden moisture.
- Confirm the repair before closing the area.
Drying only the visible surface may trap moisture inside the wall, floor, roof, or underbelly. Materials that remain wet can continue supporting mould after the leak disappears.
Inspect the RV After Storage
A closed RV can develop high humidity even when no active plumbing leak is present. Temperature changes may cause condensation, while small roof or window leaks can remain unnoticed for months.
During storage:
- Inspect the RV periodically.
- Check for roof and exterior seal damage.
- Look inside cabinets and closets.
- Examine the floor around windows and doors.
- Remove damp fabrics and food.
- Keep exterior vents protected as designed but unobstructed.
- Use moisture control appropriate for the storage environment.
- Maintain safe ventilation if recommended by the RV manufacturer.
- Avoid placing absorbent items directly against exterior walls.
- Confirm winterizing and plumbing procedures were completed correctly.
Disposable moisture absorbers can collect some moisture in small spaces, but they do not replace leak repairs, ventilation, or a dehumidifier. Secure them so the liquid cannot spill during movement.
Decide Whether Owner Cleanup Is Appropriate
Health Canada guidance considers an area smaller than approximately one square metre potentially manageable by an occupant when the contamination is limited and the source has been corrected.
An RV is much smaller than a house, however, and contamination can extend behind thin panels or into insulation. Even a small visible patch may be part of a larger concealed problem.
Owner cleanup may be reasonable when:
- The affected area is small and clearly defined.
- Growth is limited to a washable surface.
- The moisture source has been found and corrected.
- The material beneath the surface remains sound.
- The area is not connected to contaminated ventilation equipment.
- No sewage or heavily contaminated water was involved.
- The person cleaning it does not have a condition that increases the risk from exposure.
Seek professional assistance when the affected area is extensive, keeps returning, involves porous construction materials, or cannot be safely accessed.
Protect Yourself During Cleanup
Mould cleanup can release spores and contaminated dust into the air. Keep children, pets, and anyone not involved in the work away from the area.
For limited cleanup, public-health guidance commonly recommends:
- A properly fitted N95, KN95, or better respirator
- Non-porous protective gloves
- Safety glasses or goggles
- Clothing that can be washed immediately afterward
People with asthma, severe allergies, chronic lung conditions, weakened immune systems, or other relevant health concerns should not perform mould cleanup without medical and professional advice.
Ventilate the area where practical without blowing contaminated air into another occupied space. Turn off nearby fans or HVAC equipment if they would distribute spores through the RV.
Do not dry-brush, sand, or aggressively scrape mouldy material. These actions can release more particles into the air.
Clean Small Areas on Washable Surfaces
For a small amount of surface growth on a sound, washable material:
- Correct the moisture source.
- Remove nearby belongings.
- Wear suitable personal protective equipment.
- Clean the surface with water and a mild unscented detergent.
- Avoid soaking the material.
- Wipe away the loosened residue.
- Dry the surface completely.
- Dispose of used cloths or clean reusable materials appropriately.
- Monitor the area for returning moisture or growth.
Follow the RV surface manufacturer’s cleaning instructions. Test any product in an inconspicuous area because cleaners can damage wall coverings, fabrics, seals, plastics, and finishes.
Do not mix cleaning products. Combining bleach with ammonia, acids, or other chemicals can release dangerous gases.
Routine use of bleach is not necessary for most mould cleanup and may damage RV materials. Cleaning away the growth, removing contaminated porous materials, correcting moisture, and drying the area are more important than attempting to sterilize the surface.
Know Which Materials May Need Removal
Porous materials can hold mould beneath the surface where ordinary cleaning cannot reach it.
Replacement may be necessary for contaminated:
- Insulation
- Carpet underlay
- Ceiling panels
- Soft wall panels
- Unsealed wood products
- Upholstery foam
- Mattresses
- Fabric-covered panels
- Severely swollen cabinetry
- Paper-faced wall material
- Underbelly insulation
A washable outer surface does not guarantee that the material underneath is dry or clean.
Bag contaminated material before carrying it through the RV. Avoid dragging it across clean furnishings. Large removal projects require containment and equipment that are usually beyond owner-level work.
Handle Mould Beneath a Mattress
Mattresses trap moisture where body heat meets a cold bed platform or exterior wall. Lift the mattress regularly and inspect its underside, the platform, surrounding wall, and nearby storage.
If light surface growth is present on a washable platform, correct the humidity problem and clean the surface according to its material requirements.
A mould-contaminated mattress may not be practical to clean because spores and moisture can penetrate the fabric and foam. Replacement is often safer than attempting to treat internal contamination.
Before installing another mattress:
- Dry the platform completely.
- Check for exterior leaks.
- Improve under-mattress ventilation.
- Maintain space between the mattress and exterior wall.
- Monitor humidity.
Do not place a replacement mattress over damp or contaminated material.
Inspect Cabinets and Closets
Cabinets against exterior walls often remain cooler than the open living area. Packed clothing and supplies reduce airflow and can absorb condensation.
Remove all contents and inspect the walls, floor, corners, fasteners, and plumbing penetrations. Check stored items individually rather than returning them automatically.
Wash and dry unaffected fabrics as appropriate. Discard badly contaminated cardboard, paper, food packaging, and other porous materials.
Leave space around stored items and open the cabinet periodically. A small fan may improve circulation while the RV is occupied, provided it can be used safely and does not spread contamination from an active mould problem.
Address Mould Around Windows
Window condensation can keep frames, seals, curtains, and surrounding panels damp.
Clean the frame and keep its drainage openings clear. Do not apply sealant over designed window weep holes.
Inspect the exterior window flange and the wall above it. Mould concentrated at one corner may indicate a failed seal rather than condensation alone.
Replace mould-damaged curtains or blinds that cannot be cleaned completely. Dry the wall and window frame before reinstalling them.
Opening window coverings during the day can allow warm interior air to reach the glass and frame, reducing trapped condensation.
Treat HVAC Contamination Seriously
Mould in an air conditioner, furnace duct, or ventilation system can distribute particles throughout the RV.
Turn the affected equipment off and inspect only accessible areas identified in the manufacturer’s maintenance instructions. Clean filters, drain pans, evaporator areas, and ducts only as the equipment manufacturer permits.
Do not spray household cleaners or disinfectants into ducts, air-conditioner components, furnace openings, or electrical equipment.
Widespread growth, contaminated insulation, inaccessible ductwork, or recurring odours when the fan starts should be assessed by a qualified RV HVAC technician or remediation professional.
Do Not Seal Over Contaminated Materials
Paint, caulking, flooring, wall covering, or undercoating should not be applied over active mould or damp construction material.
Before closing a repaired area:
- Remove visible contamination.
- Replace materials that cannot be cleaned.
- Dry the structure completely.
- Confirm the leak has stopped.
- Verify that odours do not return.
- Continue monitoring moisture levels.
Encapsulation products may have specialized uses during professional remediation, but they are not a substitute for removing damaged material and correcting the moisture source.
Avoid Unnecessary Mould Testing
Visible mould and a musty odour already indicate that moisture control and cleanup are required. Consumer test kits may detect spores that normally exist in the environment without identifying the size, source, or condition of hidden contamination.
Professional inspection can be useful when:
- The source cannot be found.
- Occupants experience unexplained symptoms.
- An insurance or legal process requires documentation.
- Contamination may be hidden inside the structure.
- A large repair or purchase decision depends on the results.
Testing should support a specific investigation. It should not delay stopping a leak, drying the RV, or removing visibly damaged material.
RV Mould and Mildew Prevention Checklist
Regularly confirm:
- Indoor humidity is being monitored.
- Bathroom and kitchen exhaust fans operate correctly.
- Windows and frames remain dry.
- Roof, window, slide, and compartment seals do not leak.
- Plumbing fittings and drains show no moisture.
- Mattresses and cushions are dry underneath.
- Cabinets and closets have adequate airflow.
- Wet clothing and towels are not stored inside.
- Air-conditioner drains and pans are clear.
- Exterior walls are not blocked by tightly packed belongings.
- Storage compartments remain dry.
- The underbelly does not sag or contain trapped water.
- Musty odours are investigated promptly.
- Cleaned areas remain dry and show no renewed growth.
Check these areas more frequently during cold-weather camping, humid weather, storage, and after any water leak. For a printable version of the maintenace checklist, see our RV Checklists page.
When to Call a Professional
Professional inspection or remediation is appropriate when:
- The contaminated area is large.
- Mould returns after cleaning.
- Growth extends inside walls, floors, roofs, or the underbelly.
- Insulation or structural material is contaminated.
- Sewage or contaminated floodwater was involved.
- HVAC equipment or ductwork contains mould.
- The floor, wall, or roof feels soft.
- Extensive delamination or rot is present.
- The moisture source cannot be identified.
- Occupants have health conditions that increase their risk.
- Safe containment and removal cannot be completed inside the RV.
A qualified RV technician may be needed to repair the leak or open the structure, while a remediation professional may be needed to remove contamination safely. Significant structural damage may require both.
Mould cannot be managed permanently with surface cleaner alone. Stop the water, lower the humidity, restore airflow, remove materials that cannot be cleaned, and allow the RV to dry completely. Early action can prevent a small patch from spreading into walls, flooring, insulation, and stored belongings. For help identifying specific problems, see our RV Troubleshooting guides. For more industry safety guidance, see the RV Safety & Education Foundation.