
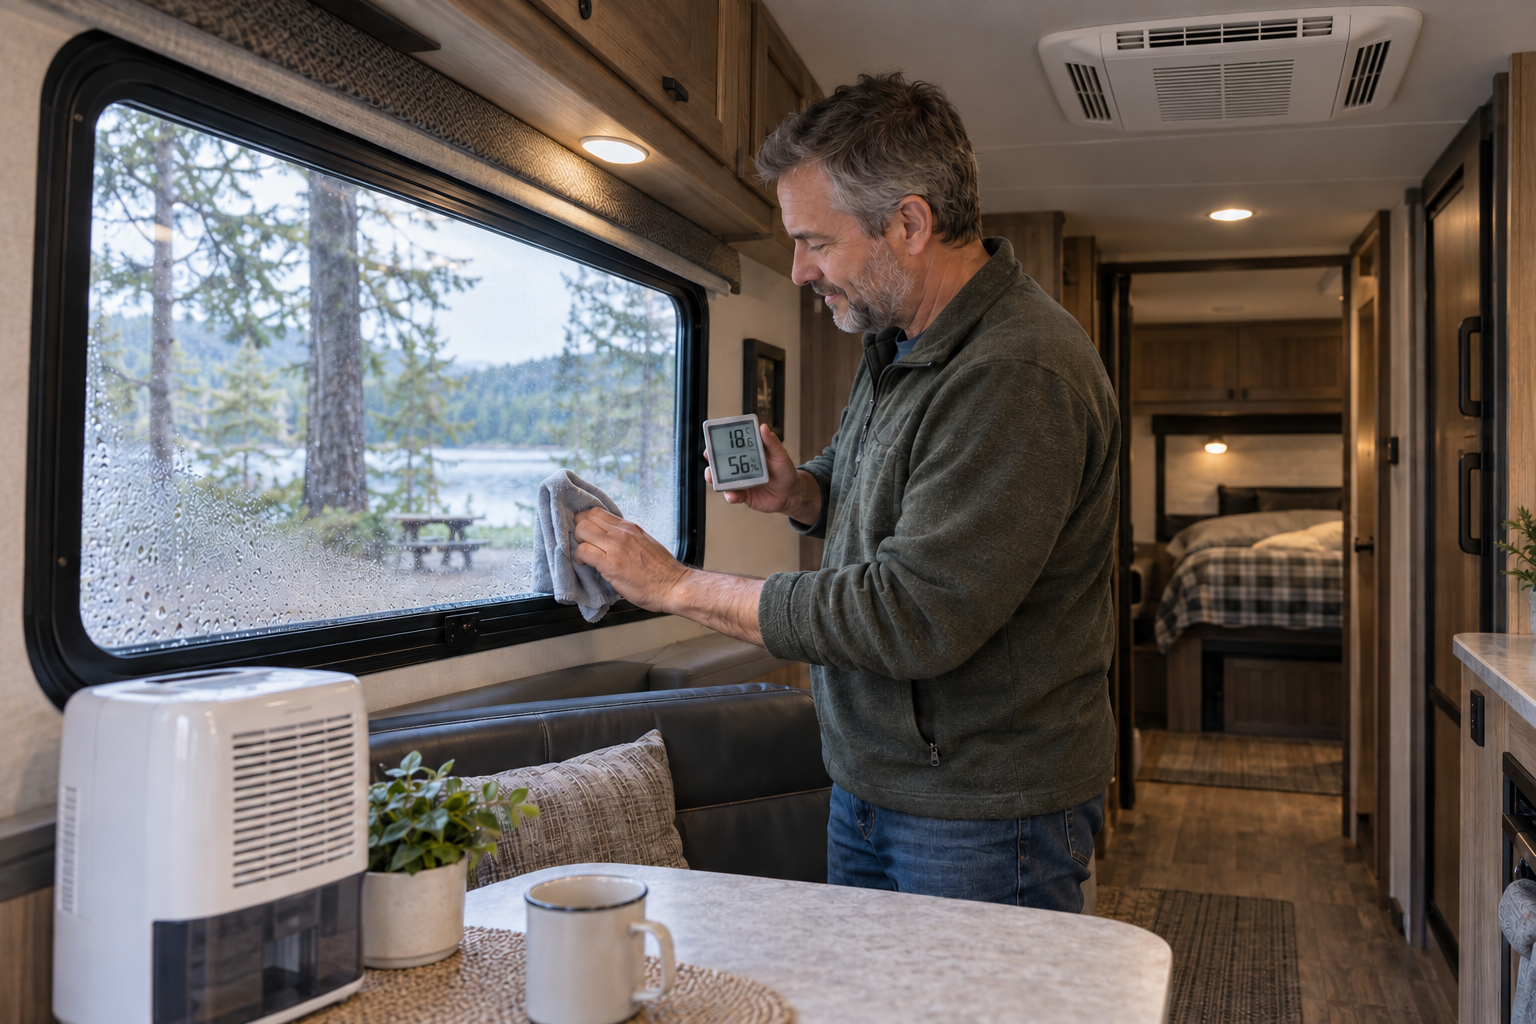
RV condensation control matters because moisture can leave windows dripping, dampen walls and mattresses, and create musty storage compartments. Because an RV has a small interior volume, everyday activities such as cooking, showering, breathing, and drying wet clothing can raise the humidity surprisingly quickly.
Occasional moisture on a window does not necessarily mean the RV is leaking. However, persistent condensation can damage wall panels, window frames, cabinetry, mattresses, flooring, and insulation. Controlling the moisture before it becomes a recurring problem can also help prevent mould and mildew.
Why Condensation Develops Inside an RV
Warm air can hold more moisture than cold air. When warm, humid interior air contacts a cold surface, the air cools and releases some of its moisture as condensation.
In an RV, condensation commonly appears on:
- Window glass and metal window frames
- Exterior walls and corners
- Skylights and roof vents
- Walls behind mattresses and cushions
- The inside of cabinets and closets
- Areas around slide-out floors and seals
- Uninsulated pipes and metal components
The problem often becomes more noticeable during cold-weather camping because the interior is heated while the exterior walls, windows, and roof remain cold.
Even when the RV is not occupied, temperature changes can produce condensation if moist air is trapped inside.
Measure the Humidity
A small digital hygrometer can display the RV’s relative humidity and temperature. Place it in the main living area away from a furnace outlet, open window, cooking appliance, or bathroom vent. Those locations may produce readings that do not represent the rest of the RV.
The U.S. Environmental Protection Agency recommends keeping indoor relative humidity below 60 percent and ideally between 30 and 50 percent when possible. An RV may require a lower humidity level during freezing weather if condensation continues to collect on cold windows or walls.
Check the reading at different times of day. Humidity may climb while occupants sleep, shower, cook, or dry clothing and then fall after ventilation or dehumidification.
A single reading does not tell the entire story. Watch for patterns and compare the humidity level with the amount of condensation appearing inside the RV.
Vent Moisture at Its Source
Removing moisture where it is produced is more effective than waiting for it to spread throughout the RV.
Run the range-hood fan while cooking if it vents outdoors. Some RV range hoods only recirculate interior air through a filter, so confirm how yours is designed. Cover pots when possible and avoid allowing water to boil longer than necessary.
Run the bathroom exhaust fan while showering and leave it operating long enough to remove the humid air afterward. Opening the bathroom door immediately after a shower without operating the fan can release that moisture into the rest of the RV.
Keep the roof vent open slightly when conditions permit. A vent cover designed for the particular roof vent may allow ventilation during light rain, but it must be installed and used according to its manufacturer’s instructions.
Cracking a window can provide replacement air while an exhaust fan is operating. Without an available air inlet, the fan may not move as much air as expected.
Use a Dehumidifier When Necessary
A portable dehumidifier can help when ventilation alone cannot maintain a suitable humidity level. Choose a unit appropriate for the RV’s interior volume and operating temperature.
A compressor-style dehumidifier can remove a significant amount of moisture in warm conditions but may become less effective as the interior temperature falls. A desiccant-style unit may perform better in cooler conditions, although it can consume more electricity and release some heat into the RV.
Position the dehumidifier where air can circulate around its intake and discharge. Do not block its grille or place it where collected water could spill into electrical equipment.
Empty and clean the collection tank as directed. If the unit has a continuous-drain connection, route the hose only to an approved drain location and protect it from freezing.
Small moisture-absorbing containers can help inside closets or enclosed storage spaces, but they are not a substitute for ventilation or a powered dehumidifier when the entire RV has high humidity.
Maintain Airflow Around Mattresses and Furniture
Mattresses and cushions placed directly against cold exterior surfaces can trap humid air. Moisture may collect underneath them even when the visible side remains dry.
Lift mattresses periodically and inspect the platform, corners, wall surfaces, and underside of the mattress. During extended occupancy, use supports or a ventilation layer designed to create airflow beneath the mattress.
Leave a small space between furniture, stored belongings, and exterior walls where practical. Avoid packing cabinets so tightly that air cannot circulate.
Open cabinet and closet doors occasionally, especially when they are installed against exterior walls. During cold weather, this allows some warm interior air to reach otherwise isolated surfaces. Be careful not to expose plumbing to freezing temperatures by changing how heated compartments are normally enclosed.
Do not block furnace registers, cold-air returns, or ventilation openings with bedding, luggage, or storage containers.
Manage Moisture While Sleeping
People release moisture into the air through breathing. In a small RV occupied by several people, humidity can rise substantially overnight.
Before going to bed:
- Check the hygrometer.
- Run an exhaust fan if humidity is already elevated.
- Leave a roof vent or window slightly open when weather and security permit.
- Avoid hanging wet coats or towels in the sleeping area.
- Confirm that bedding is not pressed tightly against an exterior wall.
In the morning, inspect the windows and walls near the beds. Wipe up collected water rather than allowing it to soak into trim, wall panels, or the mattress platform.
If heavy condensation returns every night, increase ventilation or use a dehumidifier rather than relying only on wiping the surfaces.
Control Moisture From Wet Clothing and Equipment
Rain jackets, towels, boots, swimsuits, and snow-covered clothing can release considerable moisture as they dry.
Whenever possible, dry wet items outdoors or in campground facilities. If they must be dried inside the RV, place them near an operating exhaust vent without obstructing the vent or furnace equipment.
Do not place wet clothing directly against walls, mattresses, upholstery, or wood cabinetry. Remove standing water from shower pans and entry areas promptly.
A vented RV clothes dryer must discharge outdoors through its intended duct. Never redirect dryer exhaust into the RV. A portable unvented dryer can release moisture into the living space, so follow the appliance manufacturer’s ventilation instructions carefully.
Reduce Window Condensation
RV windows are often among the coldest interior surfaces, making them the first place condensation appears.
Wipe the glass and frames when water collects. Pay attention to the bottom window track, where standing water can damage surrounding materials or overflow onto the wall.
Keep the window’s drainage or weep openings clear according to the window manufacturer’s instructions. These openings are intended to drain water that reaches the track.
Insulating window coverings can reduce heat loss, but they may also trap humid air against the glass. Open the coverings regularly and inspect behind them. If condensation becomes worse, increase airflow or leave a small gap rather than sealing the window tightly behind the covering.
Temporary interior storm-window products may help reduce condensation when installed correctly, but they should not cover required emergency-exit hardware or interfere with window operation.
Be Careful With Unvented Combustion Heaters
An unvented propane heater releases combustion moisture directly into the RV. This can raise humidity rapidly in addition to creating ventilation and carbon-monoxide concerns.
Only use heating equipment approved for the intended RV application, and follow all manufacturer instructions regarding ventilation, clearances, operation, and carbon-monoxide protection. Never use a cooking appliance to heat the RV.
The RV’s installed furnace normally vents its combustion gases outdoors, although the heating system still needs to be inspected and maintained as directed by its manufacturer. For more on propane appliance safety, see our RV Propane System and Appliance Safety guide.
Inspect Hidden Areas
Visible window condensation may be only part of the moisture problem. Check areas where airflow is limited or surfaces remain cold.
Inspect:
- Under mattresses and seat cushions
- Behind removable drawers
- Inside wardrobes and overhead cabinets
- Around exterior storage compartments
- Along slide-out floors and corners
- Beneath sinks and near plumbing connections
- Around roof vents and skylights
- Behind furniture located against exterior walls
- Around the edges of vinyl flooring
Look for dampness, staining, swollen wallboard, soft flooring, peeling material, corrosion, or a persistent musty smell.
Dry damp materials promptly. If mould is already present, identify and correct the moisture source before cleaning it. Otherwise, the growth is likely to return.
Condensation or Water Leak?
Condensation usually appears broadly on cold surfaces and is often associated with cooking, showering, sleeping, or cold outdoor temperatures. It may improve after ventilation or dehumidification.
A leak is more likely when moisture:
- Appears after rain or washing the RV
- Develops in one concentrated location
- Leaves a stain that grows over time
- Persists when interior humidity is low
- Appears around a roof penetration, window, plumbing fixture, or appliance
- Produces soft wall panels, flooring, or roof decking
- Continues when the RV is unoccupied
Do not assume every wet wall or ceiling is caused by humidity. Investigate recurring moisture and repair exterior, plumbing, appliance, or drain leaks before concealed damage spreads. For help tracing a suspected leak, see our RV Water Leak Detection guide.
RV Condensation Control: Checklist
Use this routine during humid or cold-weather camping:
- Monitor the interior temperature and relative humidity.
- Run the range hood while cooking if it vents outdoors.
- Operate the bathroom fan during and after showers.
- Open a roof vent or window slightly when conditions permit.
- Use a suitable dehumidifier when ventilation is insufficient.
- Wipe water from windows, tracks, walls, and other surfaces.
- Inspect beneath mattresses and cushions regularly.
- Maintain space for air movement around exterior walls.
- Avoid drying wet clothing throughout the living area.
- Keep window drainage openings clear.
- Inspect cabinets, closets, slide-out corners, and storage compartments.
- Investigate moisture that continues despite reduced indoor humidity.
For a printable version of the maintenance checklist, see our RV Checklists page.
When to Get Professional Help
Have the RV inspected if moisture repeatedly appears inside a wall or ceiling, the floor or roof feels soft, wall panels are swollen, electrical equipment has become wet, or the source cannot be identified.
A qualified RV technician may need to inspect exterior seals, windows, roof penetrations, plumbing, appliance vents, insulation, or concealed wall and floor cavities.
Condensation control depends on balancing heat, ventilation, moisture production, and air circulation. Monitor the humidity, remove moisture at its source, and inspect the RV’s hidden spaces before a damp surface becomes lasting damage. For help identifying specific problems, see our RV Troubleshooting guides. For more industry safety guidance, see the RV Safety & Education Foundation.