
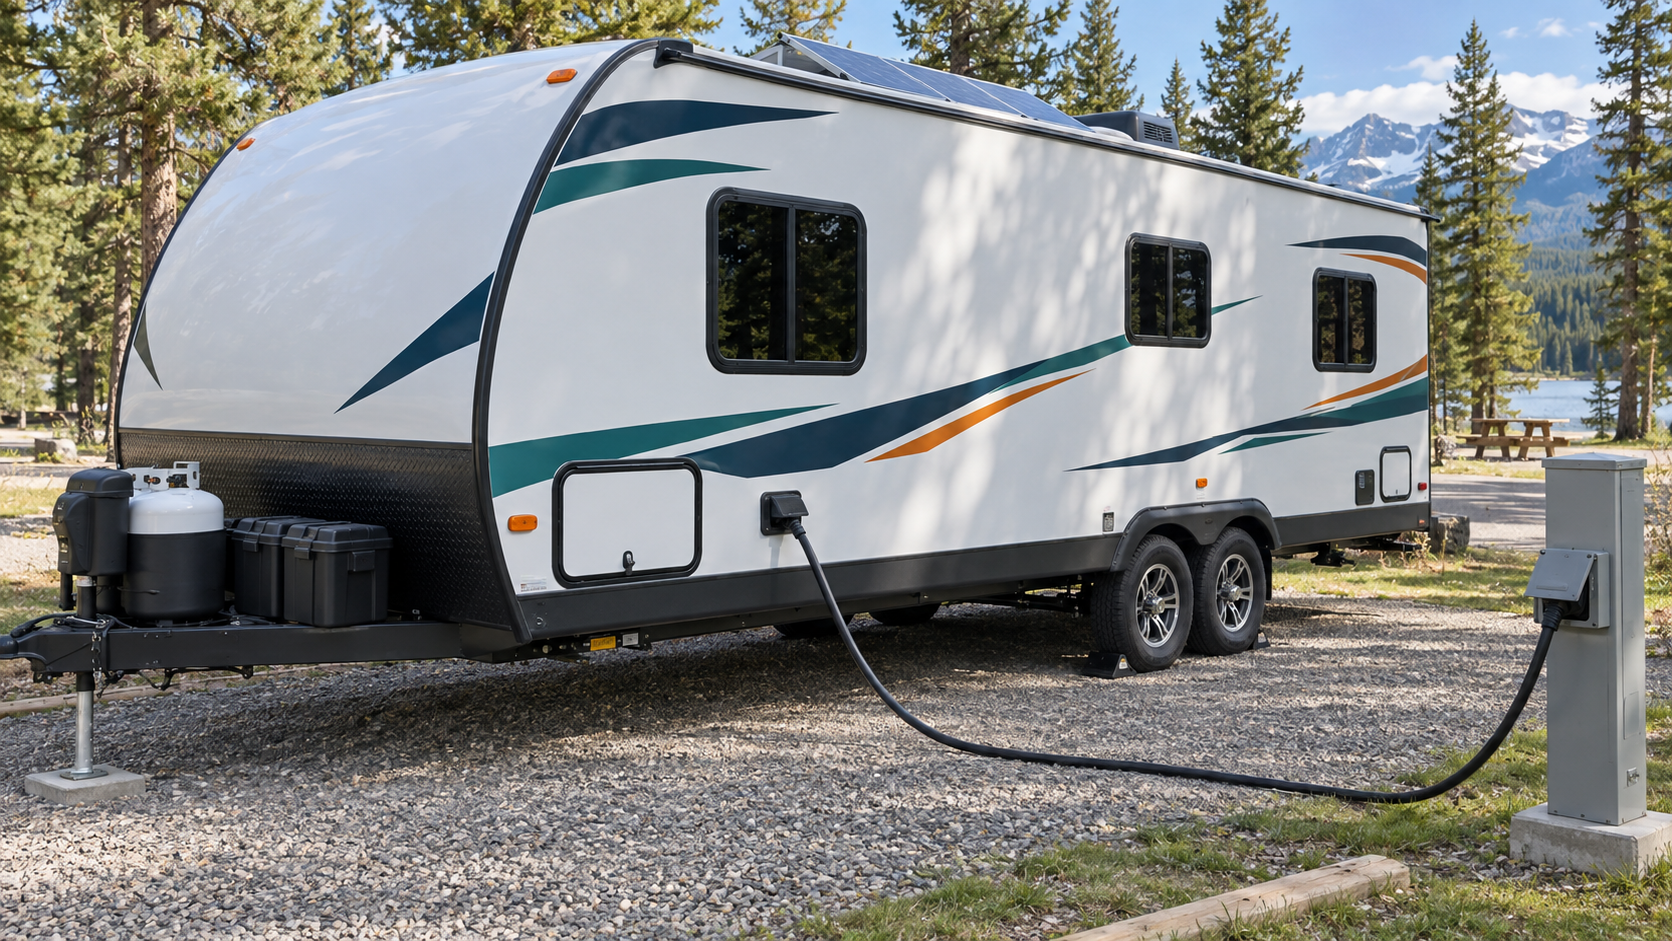
An RV electrical system supplies power to lighting, appliances, safety equipment, entertainment devices, climate-control equipment, and many of the controls that make the RV function. Understanding how RV electrical systems work can make routine maintenance and basic troubleshooting much easier. Although owners do not need to become electricians, understanding where that power comes from and how it is distributed can make routine maintenance and basic troubleshooting much easier.
Most RVs have two connected but distinct electrical systems: a 12-volt direct-current system and a 120-volt alternating-current system. Depending on the RV, these systems may receive power from batteries, a campground pedestal, a household outlet, a generator, solar panels, or the tow vehicle.
Because several power sources can be connected at once, electrical problems are not always as straightforward as they first appear. A refrigerator that will not operate, for example, may have adequate propane but insufficient 12-volt power for its electronic controls. A dead receptacle may be caused by a tripped ground-fault circuit interrupter elsewhere in the RV.
Learning the purpose of each part of the system will help you identify simple problems, communicate more effectively with a technician, and recognize situations that require professional attention.
The Difference Between 12-Volt and 120-Volt RV Electrical Systems
The 12-volt system supplies direct-current power, commonly written as 12V DC. It normally operates from one or more house batteries and powers equipment such as:
- Interior and exterior lights
- Water pumps
- Furnace fans and controls
- Slide-out controls
- Levelling-system controls
- Propane-appliance control boards
- Roof-vent fans
- Safety detectors
- USB charging outlets
- Awning motors
- Refrigerator controls
- Water-heater controls
The exact equipment varies by RV. Some newer refrigerators and other appliances operate entirely from 12-volt power and can place a significant demand on the batteries.
What Runs on 120-Volt Power
The 120-volt system supplies alternating-current power, commonly written as 120V AC. It generally becomes available when the RV is connected to shore power or operating from a generator. An inverter may also supply limited 120-volt power from the batteries when properly installed.
Equipment commonly powered by the 120-volt system includes:
- Standard electrical receptacles
- Air conditioners
- Microwave ovens
- Electric water-heater elements
- Residential-style refrigerators
- Televisions and entertainment equipment
- Battery chargers and converters
- Portable kitchen appliances
- Washer and dryer units
Some equipment can use more than one energy source. A water heater may operate on propane or electricity, while a refrigerator may operate on propane, 120-volt electricity, or 12-volt electricity depending on its design.
House Batteries and Starting Batteries
Motorhomes generally have at least two battery systems. The chassis or starting battery operates the engine and vehicle equipment. The house batteries operate the living-area equipment.
Towable RVs do not have an engine-starting battery, but they commonly have one or more house batteries. The emergency breakaway system on a trailer also requires a functioning battery so the trailer brakes can activate if the trailer separates from the tow vehicle.
A battery disconnect switch can help isolate the house batteries during storage or service, but owners should not assume it removes power from every circuit. Propane detectors, solar controllers, levelling systems, breakaway switches, and other equipment may remain connected. Shore power, a generator, solar panels, or the tow vehicle may also continue supplying electricity.
Before working on an electrical component, consult the RV’s instructions and identify every possible source of power.
Common RV Battery Types
RV house batteries are designed to supply power over time and are commonly called deep-cycle batteries. Several battery types are available, and each has different charging and maintenance requirements.
Flooded Lead-Acid Batteries
Flooded lead-acid batteries contain liquid electrolyte and removable caps. They are widely available and relatively affordable, but they require regular inspection.
When the manufacturer permits owner servicing, the electrolyte level should be checked and corrected using distilled water according to the battery instructions. Never add ordinary tap water unless specifically allowed by the manufacturer.
Flooded batteries can release flammable gas while charging. They must be installed in an approved, ventilated compartment and kept away from flames, sparks, cigarettes, and other ignition sources. Wear appropriate eye and skin protection when working near a serviceable battery.
AGM Batteries
Absorbed glass mat, or AGM, batteries are sealed lead-acid batteries. They normally do not require owners to add water and can offer lower maintenance than flooded batteries.
AGM batteries still require the correct charging profile. A charging system designed for a different battery chemistry may fail to charge them properly or may shorten their service life.
Lithium-Ion Batteries
Many modern RVs use lithium iron phosphate batteries, often identified as LiFePO4 batteries. They can provide substantial usable capacity and are lighter than comparable lead-acid battery banks.
Lithium batteries require compatible charging equipment and a suitable battery-management system. Their charging limitations, particularly in cold temperatures, depend on the battery’s design. Some batteries include internal heaters or low-temperature charging protection, while others do not.
Never replace a lead-acid battery with a lithium battery solely because it fits in the same space. Confirm that the converter, inverter charger, solar controller, wiring, overcurrent protection, and alternator-charging equipment are compatible with the new battery.
Inspecting and Maintaining RV Batteries
Perform battery inspection with the RV secured, ignition sources removed, and the manufacturer’s safety procedures in place. For a complete guide to inspecting, cleaning, and maintaining your RV batteries, see our RV Battery Maintenance guide.
Look for:
- Loose or damaged cables
- Corrosion around terminals
- Cracked or swollen battery cases
- Signs of leaking
- Damaged hold-down brackets
- Dirt or moisture across the top of the battery
- Excessive heat during charging
- Unusual odours
- Frayed insulation
- Evidence that cables have rubbed against sharp surfaces
Battery connections must remain clean and secure. Loose or corroded connections can restrict current, create heat, and cause equipment to operate unpredictably.
Before disconnecting a battery, determine whether the RV manufacturer specifies a particular sequence. In many systems, the negative cable is disconnected first and reconnected last, but the correct procedure for your RV and its equipment always takes priority.
Never allow a metal tool to bridge battery terminals or connect a positive terminal to grounded metal. The resulting current can cause severe burns, sparks, fire, or battery damage.
Understanding State of Charge
A battery can appear normal while lacking enough stored energy to operate equipment reliably. Dim lights, slow slide-outs, a water pump that changes speed, or a furnace that attempts to start but shuts down may indicate low battery voltage.
The monitor supplied with an RV may provide only a rough estimate of battery condition. Voltage readings can also be misleading while the battery is charging or powering a load.
Battery-monitoring systems that measure current entering and leaving the battery bank can provide more useful information when they are correctly installed and configured. Regardless of the monitoring method, follow the battery manufacturer’s recommendations for charging, storage, and depth of discharge.
Repeatedly leaving a battery in a discharged state can shorten its life. During storage, account for parasitic loads from detectors, control boards, clocks, monitoring equipment, and other devices that may continue drawing power.
What a Converter Does
An RV converter changes 120-volt AC power into 12-volt DC power. When you connect the RV to shore power or a generator, the converter can supply 12-volt equipment and charge the house batteries.
A converter is not the same as an inverter.
If the 120-volt equipment operates but the battery is not charging, possible causes may include:
- A tripped circuit breaker
- A blown fuse
- A disconnected or failed battery
- Loose or corroded connections
- A failed converter
- An incompatible charging setting
- A battery disconnect switch in the wrong position
A battery that repeatedly becomes discharged should not simply be replaced without determining why it is losing power. The charging system, battery condition, wiring, and connected loads may all need to be tested.
What an Inverter Does
An inverter changes 12-volt DC battery power into 120-volt AC power. It allows designated receptacles or appliances to operate when shore power is unavailable.
Inverters can draw substantial current from the battery bank. A microwave, coffee maker, hair dryer, or other high-demand appliance may discharge batteries much faster than expected.
Some RVs have a small inverter serving only a television or refrigerator. Others have a larger inverter or inverter charger supplying several circuits. The inverter’s output capacity does not necessarily mean the battery bank or wiring can support every appliance for an extended period.
Never connect an inverter to RV wiring using improvised cords or an ordinary receptacle. Incorrect connections can energize exposed plug blades, overload wiring, create a fire hazard, or send power into circuits that were not designed for it.
Shore-Power Connections
Shore power is electricity supplied through a campground pedestal, residential connection, or other approved external source. RVs commonly use 15-amp, 20-amp, 30-amp, or 50-amp connections.
A 30-amp RV connection and a 50-amp RV connection are not simply different-sized versions of the same service. Their wiring configurations and available capacity differ. Always use plugs, receptacles, cords, and adapters designed for the RV’s electrical service.
Shore-Power Connection Checklist
Before connecting:
- Turn off high-demand appliances
- Inspect the pedestal and receptacle for visible damage
- Examine the shore-power plug and cord
- Confirm that the connection is dry
- Make sure the plug fits securely
- Use only approved adapters in good condition
- Follow the campground’s connection procedure
- Keep connections off wet ground when possible
Do not use a receptacle that is loose, cracked, scorched, melted, or visibly damaged. Report a damaged campground pedestal to the campground operator.
A plug that does not fit tightly can develop resistance and excessive heat. If the shore-power plug, cord, adapter, or receptacle becomes unusually hot, disconnect power safely and have the connection inspected.
Using Household Outlets and Adapters
An RV may sometimes be connected to a properly wired household receptacle using an approved adapter. This provides much less usable power than a full RV connection.
The adapter changes the physical connection; it does not increase the electrical capacity of the household circuit. Running an air conditioner, microwave, electric water heater, portable heater, or several appliances together may overload the circuit.
If an extension cord is permitted, it must be appropriately rated for the load, environment, and distance. A cord that is too small or too long can experience voltage drop and overheating. Never use a damaged cord, leave a tightly coiled cord carrying a heavy load, or conceal a connection where heat or damage cannot be detected.
Electrical-Management Systems and Surge Protection
A basic surge protector is designed to help limit damage from certain voltage surges. An electrical-management system may provide additional monitoring and protection against conditions such as improperly wired pedestals, open grounds, abnormal voltage, or frequency problems.
Features vary significantly among products. Confirm that any device is approved for the RV’s electrical service and used according to its instructions.
No protective device makes a damaged pedestal, overheated connection, or improper adapter safe. Continue to inspect plugs and cords, and disconnect the RV if warning signs appear.
Generators
A generator can supply 120-volt power when shore power is unavailable. Depending on the RV, it may be permanently installed or portable.
Follow the generator manufacturer’s instructions for:
- Fuel selection and storage
- Oil and filter service
- Exercise intervals
- Starting and shutdown procedures
- Electrical loading
- Ventilation
- Grounding requirements
- Approved connection methods
Never operate a generator inside an RV, garage, enclosed storage area, or other location where exhaust can accumulate. Position portable generators so exhaust cannot enter doors, windows, roof vents, or neighbouring RVs.
Test the RV’s carbon-monoxide alarm regularly and never ignore an alarm. If it activates, move everyone into fresh air and obtain assistance before attempting to locate the cause.
Solar-Power Systems
Solar panels generate DC electricity. A solar charge controller manages that electricity before it reaches the battery bank. An inverter may then convert stored battery power into 120-volt AC power.
A solar system can continue producing electricity whenever light reaches the panels, even when the battery disconnect switch is off. Covering a panel may not be an adequate isolation method unless the manufacturer specifically instructs it.
Routine owner inspection may include checking accessible displays for warnings and visually inspecting exposed wiring, mounting hardware, and sealant without disturbing connections. Roof-mounted solar equipment should also be examined for loose hardware or damaged seals during regular roof inspections.
Any work involving solar wiring, charge controllers, battery-bank modifications, or roof penetrations should follow the manufacturer’s procedures. Seek qualified assistance if you do not understand how the system is isolated.
Fuses and Circuit Breakers
Fuses and circuit breakers protect wiring and equipment from excessive current.
The 12-volt system generally uses automotive-style fuses or other DC-rated protection. The 120-volt system normally uses circuit breakers in an electrical distribution panel.
When a fuse blows:
- Turn off the affected equipment.
- Identify and correct the cause when possible.
- Replace the fuse only with the specified type and amperage.
- Stop troubleshooting if the replacement fuse blows again.
Never install a higher-rated fuse to keep a circuit operating. The wiring may overheat before the larger fuse opens.
When a circuit breaker trips, move it fully to the off position before resetting it. If it trips again, unplug or switch off the connected equipment and obtain qualified assistance. A breaker that repeatedly trips is warning you about an overload, short circuit, faulty appliance, damaged connection, or another problem that requires investigation.
GFCI-Protected Receptacles
A ground-fault circuit interrupter, or GFCI, is designed to reduce the risk of electric shock. GFCI protection is commonly used around kitchens, bathrooms, exterior compartments, and other areas where electricity may be exposed to moisture.
One GFCI device may protect several receptacles located elsewhere in the RV. As a result, a dead exterior or bathroom receptacle may be connected to a tripped GFCI in the kitchen or another location.
If a receptacle stops working:
- Disconnect appliances from the affected receptacles
- Check the circuit breakers
- Locate the RV’s GFCI devices
- Press the reset button when conditions are dry and safe
- Stop if the device will not reset or immediately trips again
Never bypass GFCI protection. A device that repeatedly trips may be responding to moisture, damaged wiring, a faulty appliance, or another unsafe condition.
RV Electrical Systems: Common Warning Signs
Warning Signs That Require Immediate Attention
Stop using the affected circuit or equipment if you notice:
- Smoke or sparks
- A burning or melting smell
- Discoloured plugs or receptacles
- Melted insulation
- Buzzing or crackling from wiring
- Repeatedly blown fuses
- Repeatedly tripped circuit breakers
- A shore-power plug that becomes dangerously hot
- Tingling or shock when touching the RV
- Battery swelling, leaking, smoking, or excessive heat
- Water inside an electrical panel or compartment
- Damaged or exposed wiring
- A carbon-monoxide alarm while a generator is operating
If you feel a shock or tingling sensation when touching the RV, do not touch it again or attempt to enter it. Keep other people and animals away and have the electrical supply and RV inspected by qualified personnel. For industry-wide electrical safety information, see the Electrical Safety Foundation.
Basic Troubleshooting
Questions to Ask When Something Stops Working
When electrical equipment stops working, begin with simple observations rather than immediately replacing parts.
Ask:
- Is the problem affecting one device or several?
- Is the RV connected to shore power?
- Is the generator operating normally?
- Is the battery disconnect switch on?
- Does the battery monitor show adequate power?
- Has a fuse blown or circuit breaker tripped?
- Has a GFCI device tripped?
- Is the appliance switched to the correct energy source?
- Did the problem begin after another appliance was turned on?
- Are any warning lights or fault codes displayed?
- Is there visible damage, moisture, heat, or an unusual smell?
Record any fault codes before switching equipment off. Consult the correct manual for the RV or component because indicator lights and codes vary among manufacturers.
A digital multimeter can be useful, but it does not make electrical testing automatically safe. Measuring live voltage requires knowledge of the system, proper meter settings, appropriately rated test equipment, and safe procedures. If you are uncertain, stop and contact a qualified technician.
Routine Electrical Maintenance
A practical electrical-maintenance routine may include:
- Inspecting the shore-power cord before each trip
- Checking plugs and adapters for heat damage
- Keeping electrical connections clean and dry
- Inspecting battery terminals and hold-downs
- Following the battery manufacturer’s charging instructions
- Checking serviceable battery-fluid levels when applicable
- Testing GFCI devices according to their instructions
- Testing smoke, propane, and carbon-monoxide alarms
- Carrying spare fuses of the correct types and ratings
- Checking visible wiring for rubbing or damaged insulation
- Reviewing generator maintenance requirements
- Inspecting accessible solar equipment
- Watching for changes in battery performance
- Recording electrical repairs and battery replacements
Label the electrical panel clearly if its circuit identification is missing or inaccurate. Do not remove covers or expose live wiring simply to identify circuits.
When to Call a Qualified Technician
Contact an RV technician or appropriately licensed electrical professional when dealing with:
- Major 120-volt repairs
- Damaged shore-power inlets
- Burned or melted wiring
- Repeated fuse or breaker failures
- Failed GFCI protection
- Water-damaged electrical equipment
- Generator faults beyond routine maintenance
- Inverter, converter, or transfer-switch failures
- Battery banks involving unfamiliar wiring
- Solar-system modifications
- Signs that the RV’s exterior has become energized
- Electrical problems that continue after basic checks
Electrical work may be regulated differently depending on your location and the system involved. Confirm that the person performing the repair is trained and authorized for that work. For more on how we approach RV safety, see our Safety Disclaimer.
Key Takeaways for RV Electrical Systems
RV electrical systems become easier to understand once it is divided into its basic parts. The batteries store 12-volt power, the converter supplies 12-volt power and charges the batteries when an AC source is available, and an inverter can create limited 120-volt power from the batteries. Shore power and generators provide 120-volt electricity, while solar equipment helps recharge the battery bank.
The most valuable habits are inspecting connections, using properly rated equipment, monitoring battery condition, and responding promptly to warning signs. Never bypass a fuse, breaker, GFCI device, detector, or other safety feature to keep equipment operating.
Basic observation can solve many simple problems. When a task involves exposed wiring, live testing, unexplained overheating, damaged equipment, or repeated failures, professional assistance is the safest choice.