
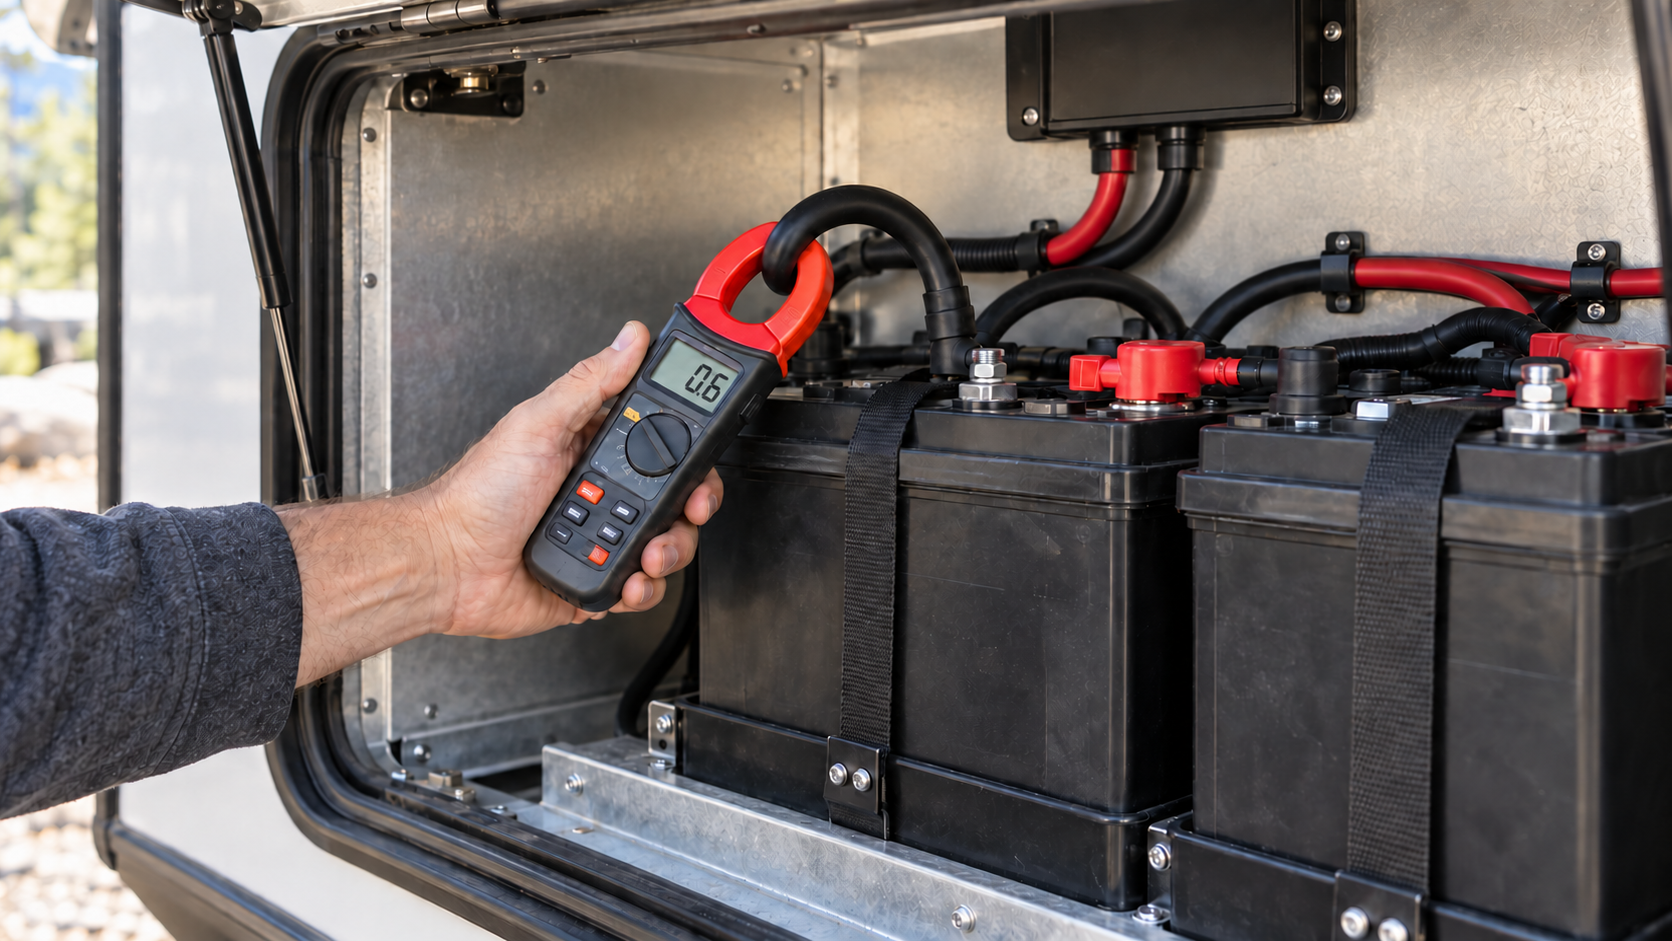
RV parasitic battery drain may be the cause when a battery loses its charge during storage, even though the battery itself may not be defective. Even when every visible light and appliance is switched off, several small electrical loads can continue drawing 12-volt power. Individually, these loads may seem insignificant, but together they can discharge a battery within days or weeks.
Finding the source requires more than switching off the battery-disconnect switch. Some equipment may be connected directly to the battery or wired around the factory disconnect. A systematic inspection can help you separate normal standby consumption from an electrical fault or forgotten load.
This guide covers basic owner-level testing. Battery banks, solar equipment, inverters, converters, and disconnect systems vary, so follow the instructions supplied with your equipment. Have damaged wiring, unexplained high current, or overheating connections inspected by a qualified RV technician.
RV Parasitic Battery Drain: What Is It?
Parasitic battery drain is electrical current that continues flowing when the RV appears to be shut down. Some of that consumption is intentional. Other draw may come from equipment that was accidentally left on, a faulty component, or wiring that bypasses the main disconnect.
Common standby loads include:
- Propane and carbon-monoxide detectors
- Stereo memory and clocks
- Refrigerator control boards
- Water-heater control boards
- Thermostats
- Tank-monitor panels
- USB outlets with indicator lights
- Inverter standby circuits
- Solar controllers and monitoring equipment
- Levelling or slide-out control modules
- Cellular routers, cameras, and other accessories
- Battery-monitor shunts and displays
A malfunctioning light, relay, circuit board, or aftermarket accessory can create additional drain. Storage-compartment lights are especially easy to overlook because they may remain illuminated behind a closed door.
Understand How Small Loads Add Up
Electrical current is usually measured in amperes, or amps. Battery capacity is commonly expressed in amp-hours.
A continuous load consumes approximately:
- 0.1 amp: 2.4 amp-hours per day
- 0.5 amp: 12 amp-hours per day
- 1 amp: 24 amp-hours per day
A battery bank’s full rated capacity is not necessarily all usable. Battery type, temperature, age, state of charge, and discharge limits affect how much energy is available.
This is why a collection of detectors, displays, control boards, and indicator lights can become significant during several weeks of storage. The problem may be normal standby consumption rather than one large hidden load.
Confirm the Battery Is Healthy First
A weak or damaged battery can resemble a parasitic-drain problem. Before searching the RV for an electrical load, fully charge the battery using equipment approved for its battery chemistry.
After charging, disconnect charging sources and allow the battery to rest according to its manufacturer’s instructions. Check its state of charge with an appropriate meter or battery monitor. A battery that rapidly loses voltage while physically disconnected from the RV may have an internal problem.
Inspect the battery and its connections for:
- Loose or corroded terminals
- Damaged cables
- Swollen or cracked cases
- Evidence of overheating
- Low electrolyte in serviceable flooded batteries
- Incorrect charger settings
- Batteries of different ages or types connected together
- Excessive dirt or moisture across the battery top
Do not open sealed AGM or lithium batteries. Follow the battery manufacturer’s instructions when inspecting flooded lead-acid electrolyte levels, and wear appropriate eye and skin protection.
If the battery cannot hold a charge while disconnected, testing the RV’s circuits will not correct the underlying battery failure. For more on battery testing and care, see our RV Battery Maintenance guide.
Remove Charging Sources Before Testing
A solar controller, converter, generator, or other charging source can hide a parasitic load by supplying current while you test. Before measuring battery discharge, isolate charging sources according to their manufacturers’ procedures.
This may involve:
- Disconnecting shore power
- Switching off the generator
- Turning off the inverter/charger
- Disabling solar charging using the approved disconnect sequence
- Disconnecting portable charging equipment
Do not simply remove solar-controller cables in an arbitrary order. Some controllers require the solar input to be disconnected before the battery connection, while reconnection may require the battery to be connected first. Follow the instructions for your equipment.
Once charging sources are isolated, switch off lights and appliances. Close exterior compartments and check that their lights turn off. Allow electronic equipment several minutes to enter standby mode before measuring the remaining current.
Measure the Battery Draw Safely
The easiest method is generally a DC clamp meter that can accurately measure low current. Clamp the meter around one battery cable—not around both the positive and negative cables together.
Zero the meter according to its instructions and observe the current flowing from the battery after the RV has been shut down.
A clamp meter does not require disconnecting the battery cable, but not every clamp meter can accurately measure small DC loads. Check the meter’s specifications before relying on the reading.
A standard multimeter can measure current when connected in series, but this method carries more risk. Connecting a meter incorrectly or allowing a large load to start can blow the meter’s internal fuse or damage the meter. Never place a meter set to the current range directly across the positive and negative battery terminals.
If you are unfamiliar with series-current testing, use a suitable DC clamp meter or have a technician perform the test.
Isolate the Load Through the Fuse Panel
After establishing that current is leaving the battery, locate the RV’s 12-volt fuse panel. Remove one fuse at a time while watching the meter.
When the current drops, note which circuit that fuse protects. Replace the fuse before moving to the next one unless your troubleshooting procedure requires it to remain removed.
A labelled circuit may supply several devices. For example, one fuse might power interior lighting, USB outlets, and a control panel. Once a circuit produces a noticeable change, inspect everything connected to it.
Check for:
- Lights that remain on
- USB adapters or accessories
- A furnace or refrigerator control board that does not enter standby
- A radio or entertainment system
- A tank-heater switch left on
- A powered antenna amplifier
- A water pump cycling intermittently
- An aftermarket accessory connected to the circuit
- A relay that remains energized
Do not replace a fuse with one rated higher than the manufacturer specifies. A fuse protects the wiring; increasing its rating can allow the wiring to overheat before the fuse opens.
Check Devices That Bypass the Fuse Panel
If removing every fuse fails to eliminate the draw, inspect equipment connected directly to the battery or to a separate distribution point.
Possible direct connections include:
- Inverter
- Solar controller
- Hydraulic levelling system
- Electric tongue jack
- Slide-out system
- Breakaway switch
- Battery monitor
- Aftermarket stereo amplifier
- Cellular or security equipment
- Accessory fuse blocks
- Generator starting circuit
The battery-disconnect switch may not isolate all of these circuits. Some RVs intentionally keep safety equipment powered when the main disconnect is off.
Trace only wiring that is visible and accessible. Do not open sealed electrical equipment or disturb wiring inside a distribution panel unless you are qualified to do so.
Inspect the Inverter Carefully
An inverter changes 12-volt battery power into 120-volt alternating-current power. Even without an appliance running, an inverter can consume power while it remains switched on.
Some models have a low-power standby or search mode, while others draw more current whenever they are enabled. Turn the inverter off using its approved control and compare the battery-current reading.
If the current drops substantially, determine whether the inverter was unintentionally left on or whether an appliance connected to an inverter-powered outlet remained active.
Turning off a remote display may not fully shut down every inverter. Verify the correct shutdown procedure in the inverter manual. For more on how converters and inverters differ, see our RV Converter vs Inverter guide.
Test the Battery-Disconnect Switch
Operate the RV’s battery-disconnect switch and watch the current reading. A major reduction shows that the switch is disconnecting at least part of the RV. Remaining current may be from circuits intentionally wired around it.
If the reading does not change, the disconnect relay or switch may be wired differently than expected, stuck in the connected position, or faulty.
Do not assume that a switch marked “Store” completely isolates the battery. Verify its operation with a meter and learn which circuits remain powered.
Look for Intermittent Battery Drain
A steady draw is usually easier to locate than an intermittent one. Some equipment activates only under certain conditions.
Examples include:
- A water pump responding to a plumbing leak
- A compartment light activated by movement or a misadjusted switch
- A furnace board attempting to start
- A refrigerator control system cycling
- A relay repeatedly engaging
- A tank heater controlled by a thermostat
- A cellular device searching for a signal
- An automatic levelling or suspension controller waking periodically
A battery monitor that records current over time can help identify loads that do not appear during a brief test. Listen for relays, fans, pumps, or control boards cycling after the RV has been sitting quietly.
Prevent Battery Drain During Storage
Once you have identified and corrected unwanted loads, choose a storage method appropriate for your RV and battery type.
Possible approaches include:
- Using the RV’s battery-disconnect system after verifying what it isolates
- Disconnecting the battery according to the RV and battery manufacturers’ instructions
- Removing specific accessory fuses
- Switching the inverter completely off
- Using an approved battery maintainer
- Using properly configured solar charging
- Checking battery state of charge regularly
- Removing the battery for storage when appropriate
Before physically disconnecting a battery, consider solar-controller procedures, security equipment, levelling systems, powered steps, and other devices that may need power. Disconnecting the battery may also disable propane and carbon-monoxide detectors.
Never disable required safety detectors while the RV is occupied.
Lithium batteries may have specific storage-charge and temperature requirements. Charging some lithium batteries below their permitted temperature can damage them unless the battery has suitable low-temperature protection.
Parasitic-Drain Checklist
Before leaving the RV in storage, confirm that:
- The battery is fully charged and in serviceable condition.
- Interior, exterior, and storage-compartment lights are off.
- The water pump is off.
- Tank heaters are off.
- The inverter is switched off when it is not needed.
- The refrigerator and water heater are set for storage.
- USB accessories and aftermarket electronics are disconnected.
- The battery-disconnect switch operates correctly.
- Direct-to-battery accessories have been identified.
- The chosen maintainer or solar system is configured for the battery chemistry.
- Battery state of charge will be checked periodically.
When to Call a Professional
Stop testing and seek qualified help if you find hot cables, melted insulation, repeated fuse failure, damaged battery terminals, smoke, an electrical smell, or current that remains high after accessible circuits have been isolated.
Professional diagnosis is also appropriate when:
- The battery-disconnect system does not work.
- Current remains after every accessible fuse is removed.
- The problem involves an inverter, converter, transfer switch, or distribution panel.
- Wiring disappears into inaccessible spaces.
- Several battery cables are connected without clear identification.
- You are uncertain how to isolate solar or lithium-battery equipment.
- The battery bank contains multiple batteries with unusual voltage differences.
Parasitic drain is rarely solved by replacing parts at random. Verify the battery first, measure the actual current, and isolate one circuit at a time. A methodical test will reveal whether the battery is supporting normal standby equipment, an overlooked accessory, or a genuine electrical fault. For help identifying specific problems, see our RV Troubleshooting guides. For more industry safety guidance, see the RV Safety & Education Foundation.