
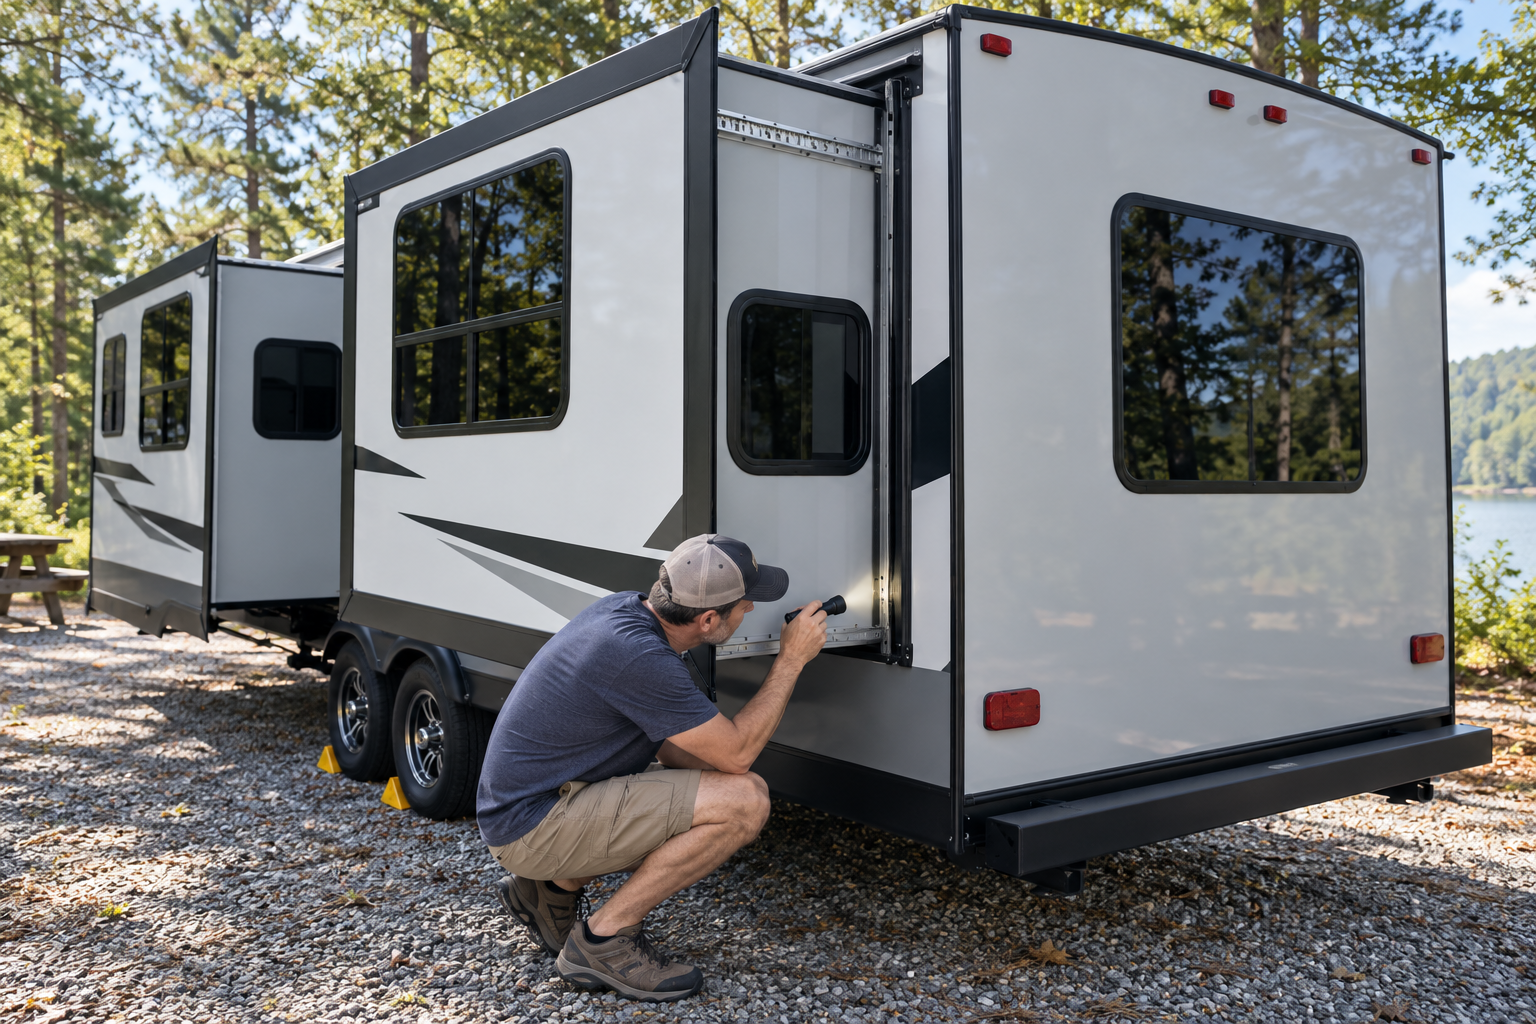
RV slide-out troubleshooting matters because a slide-out that refuses to retract can turn departure day into a stressful search for switches, fuses, and manual overrides. Some failures have simple causes, such as low battery voltage or an obstruction. Others involve damaged gears, cables, motors, hydraulic components, or structural alignment.
The wrong response can make the problem worse. Repeatedly holding the switch, forcing one side of the room, or attempting an unfamiliar manual-retraction procedure can damage the mechanism or allow the room to move unexpectedly.
This guide explains how to perform basic owner-level checks, recognize common symptoms, and prepare for emergency retraction. Because slide systems differ considerably, always identify the installed system and follow its manufacturer’s instructions before disconnecting a motor, releasing a brake, opening a hydraulic valve, or operating a manual override.
Start by Identifying the Slide System
Before removing panels or reaching for tools, determine what type of slide mechanism operates the room. The correct troubleshooting and emergency-retraction procedure depends on the system.
Common RV slide systems include:
- Rack-and-pinion systems
- Through-frame electric systems
- In-wall electric systems
- Cable-driven systems
- Hydraulic systems
- Electric screw-drive systems
- Above-floor systems
Look beneath the slide room, inside nearby cabinets, in exterior compartments, or behind an access panel for a manufacturer label. The controller, motor, hydraulic pump, or operating manual may provide a model number.
Take photographs of the labels and keep the correct manual in the RV. Do not rely on a general online video unless it clearly covers the same manufacturer and model.
Protect People and the RV Before Troubleshooting
Park the RV on firm ground, apply the parking brake when applicable, and chock the wheels. Keep people, pets, furniture, and loose objects away from the slide room.
Never place your hands between the slide and the wall opening. A stalled slide can move suddenly if power returns, a brake releases, or a mechanical bind clears.
Do not crawl beneath an unsupported slide room. If a technician needs to support or raise the room, the equipment and support points must be appropriate for that particular RV.
If the slide is partially extended, protect it from rain while arranging repairs, but do not cover appliance vents or create a setup that could trap exhaust gases.
Check Inside and Outside for Obstructions
An obstruction is one of the first things to rule out.
Inside the RV, look for:
- Furniture blocking the slide
- A cabinet door or drawer left open
- Loose bedding or clothing
- A floor register or trim piece out of position
- Debris caught along the floor
- Objects trapped beneath a flush-floor slide
- A damaged or folded interior seal
Outside, inspect:
- Tree branches
- Campsite posts
- Utility connections
- Ice or packed snow
- Debris on the slide roof
- A slide topper that has jammed or collected water
- Exterior seals folded into the mechanism
- Trim or skirting that has pulled loose
Do not operate the slide while someone stands on its roof or reaches underneath it. Remove an obstruction only when the room is stationary and cannot move unexpectedly.
Confirm the RV Is Properly Positioned
A severely twisted RV frame can make a slide bind. Confirm that the RV is supported and levelled according to its manufacturer’s instructions.
Do not try to correct a stuck slide by aggressively changing jack positions while operating the room. Frame movement can change the opening around the slide and increase the load on the mechanism.
If the problem began immediately after levelling, compare the RV’s current position with the required operating procedure. Some manufacturers instruct owners to operate slides before levelling, while others specify that the RV must be level first. Follow the instructions for the particular RV rather than applying one routine to every model.
Verify Battery Voltage
Most RV slide motors and hydraulic pumps use the 12-volt battery system, even when the RV is connected to shore power. A converter may help supply power, but weak batteries, loose connections, or a disabled battery disconnect can still prevent the slide from operating correctly.
Check that:
- The battery disconnect is in the operating position
- The house batteries are connected
- Battery terminals are clean and tight
- The main ground connection is secure
- The batteries have an adequate state of charge
- Shore power is connected correctly, if being used
- The converter or charging system is operating
Use a multimeter to measure voltage at the battery when possible. An interior monitor panel provides only a general indication and may not reveal how far the voltage falls under load.
A battery can show a reasonable resting voltage and still drop sharply when the slide motor starts. Dim lights, relay chatter, slow movement, or a controller that repeatedly resets may point to low voltage or excessive resistance in a cable connection.
Do not continue cycling a slide on weak batteries. Low voltage can overheat motors, solenoids, wiring, and circuit breakers. For more on battery testing and care, see our RV Battery Maintenance guide.
Check the Required Interlocks
Some motorhomes and trailers use interlocks that prevent slide operation unless certain conditions are met.
Depending on the RV, the system may require:
- The parking brake to be applied
- The transmission to be in Park
- The ignition to be on or off
- The entry door to be closed
- Storage-compartment doors to be closed
- Levelling jacks to be deployed
- The RV to be connected to adequate 12-volt power
Follow the sequence in the owner’s manual. A failed interlock switch or damaged wire can also prevent operation even when the RV appears to be configured correctly.
Inspect Fuses and Circuit Breakers
Locate the fuse, circuit breaker, or manual-reset breaker protecting the slide system. It may be near the battery, hydraulic pump, controller, electrical distribution panel, or motor.
Check for:
- A blown fuse
- A tripped breaker
- Corroded terminals
- Loose cable connections
- Heat-damaged wiring
- A breaker that clicks repeatedly
- A fuse that blows as soon as the switch is pressed
Replace a fuse only with the specified type and amperage. Never install a larger fuse to keep the slide operating.
If the replacement fuse blows or the breaker trips again, stop. The system may have a short circuit, seized motor, mechanical obstruction, damaged wire, or excessive load. Repeatedly resetting the protection can overheat the circuit.
Listen to What the System Does
The sounds made when the switch is pressed can help narrow the problem.
Nothing Happens
If there is no motor noise, pump noise, relay click, or controller response, possible causes include:
- Low or disconnected battery power
- An open battery disconnect
- A blown fuse
- A tripped breaker
- A failed operating switch
- A disconnected controller
- An interlock problem
- A loose ground
- A damaged wire
Begin at the power source and work toward the controls rather than replacing the motor first.
A Relay Clicks but the Motor Does Not Run
A click may mean the control circuit is working, but adequate current is not reaching the motor or hydraulic pump.
Possible causes include:
- Weak batteries
- Loose or corroded high-current connections
- A failed solenoid
- A damaged motor
- A seized mechanism
- A tripped or failing breaker
- Excessive mechanical load
Stop if the solenoid, wiring, motor, or breaker becomes hot.
The Motor Runs but the Room Does Not Move
This symptom can indicate a broken gear, disconnected drive shaft, failed shear pin, slipping clutch, damaged cable, or a motor that has become separated from the mechanism.
On a hydraulic system, the pump may run without moving the room if the fluid is low, a valve is malfunctioning, a hose is leaking, or the pump is unable to build pressure.
Do not continue running the motor. Additional operation can damage parts that may still be repairable.
The Room Moves and Then Stops
A slide that begins moving and stops partway may be encountering an obstruction, excessive resistance, low voltage, an overheating breaker, controller fault, or mechanical misalignment.
Allow an automatically resetting breaker or motor protection device to cool, but do not treat repeated stopping as normal. Find the cause before completing additional cycles.
When One Side Moves Faster Than the Other
Stop operating the slide if one side leads the other, the room twists in the opening, or one corner stops moving.
Uneven movement can be caused by:
- A failed motor
- Motors that have lost synchronization
- A broken gear or drive shaft
- A damaged cable
- A loose cable adjustment
- Debris in one track
- A controller or wiring problem
- Structural movement or damaged rollers
- An obstruction beneath one side
Continuing to hold the switch can pull the room farther out of square. That may damage seals, tracks, gears, exterior trim, flooring, or the sidewall opening.
Do not push one corner by hand while another person operates the switch. The room is heavy, and the mechanism can move suddenly.
In-Wall Electric Slide Problems
In-wall electric systems typically use tracks mounted vertically along both sides of the slide room. Motors near the upper corners move the room through gears that engage those tracks.
Inspect the visible tracks for debris, damaged teeth, loose fasteners, and unusual wear. Check that the room remains square in the opening.
Some systems require the operating switch to be held briefly after the room reaches its fully extended or retracted position so the motors remain synchronized. This procedure is system-specific; do not apply it to an unidentified slide.
Repeatedly stopping an in-wall slide midway can contribute to synchronization problems on certain systems. Operate the room according to its manual and stop immediately if one side ceases moving.
Motor disengagement, electronic synchronization, and manual retraction procedures vary by controller version. Follow the exact service information for the installed system.
Rack-and-Pinion and Through-Frame Problems
Rack-and-pinion and through-frame slides commonly use rails, gears, drive shafts, and an electric motor mounted beneath the floor.
Look for:
- Bent or damaged rails
- Missing or loose hardware
- Broken gear teeth
- A disconnected cross-shaft
- Damaged couplers or shear pins
- Debris around the mechanism
- Excessive rust
- Evidence that the room has shifted
- Torn underbelly material interfering with the drive
Do not place yourself under the slide while someone operates it. Observe from a safe position beside the RV.
A disconnected shaft can allow one side to move while the other remains stationary. Stop before the room becomes severely angled.
Cable-Driven Slide Problems
Cable-driven systems use multiple cables routed through pulleys to pull the room in and out. Cable tension and adjustment affect how evenly the room moves.
Inspect visible cables for:
- Frayed strands
- Loose cables
- Damaged pulleys
- Cables that have left their pulleys
- Unequal tension
- Contact with sharp edges
- Damaged mounting brackets
Do not operate a system with a frayed or displaced cable. A cable under tension can snap or move rapidly.
Cable adjustment requires the correct procedure and measurements. Tightening one cable without understanding how it affects the others can pull the room out of square.
Hydraulic Slide Problems
A hydraulic slide may share its pump and reservoir with the RV’s levelling system. A problem can therefore affect both the slides and the jacks.
Inspect the accessible hydraulic system for:
- Low fluid
- Wet fittings
- Damaged hoses
- Fluid beneath the RV
- Leaking cylinders
- Loose electrical connections
- A pump that runs slowly
- Solenoids or valves that become unusually hot
Check the hydraulic-fluid level only in the position specified by the manufacturer. On many systems, the slides and jacks must be fully retracted before the reservoir is checked. Adding fluid in the wrong position can overfill the reservoir when the components retract.
Use only the specified hydraulic fluid. Do not mix products or add a stop-leak additive unless the manufacturer approves it.
Never use a hand to search for a pressurized hydraulic leak. Fluid injected beneath the skin is a medical emergency.
Check Seals Without Blaming Them for Every Failure
A folded or dry seal can increase resistance, but seals are not the cause of every slide problem.
Inspect the inner and outer seals for:
- Tears
- Separation from the wall
- Debris
- Ice
- Adhesive failure
- Sections folded into the opening
- Areas pinched by the room
Clean and condition seals only with products approved for the material. Petroleum products and unapproved lubricants can damage some seal compounds or attract abrasive dirt.
If the slide has shifted enough to crush or tear a seal, correct the alignment problem before installing a replacement.
Do Not Keep Pressing the Switch
Stop operating the slide if you notice:
- One side moving without the other
- Grinding or popping sounds
- A burning smell
- Smoke
- Hot wiring
- Repeated breaker trips
- Hydraulic fluid leaking
- A cable fraying or leaving a pulley
- The room contacting furniture or trim
- The motor running without room movement
- Severe twisting in the wall opening
A momentary electrical interruption may be inexpensive to repair. Continuing to force the system can turn it into a damaged motor, gearbox, track, floor, frame, or sidewall.
Prepare for Emergency Retraction
If the slide cannot be repaired at the campsite, it may need to be retracted manually before the RV can travel.
Before beginning:
- Identify the slide-system manufacturer and model.
- Obtain the correct emergency-retraction instructions.
- Clear the room inside and outside.
- Chock the wheels and secure the RV.
- Gather the specified tools.
- Arrange enough capable assistance.
- Determine how the room will be secured after retraction.
- Keep everyone away from pinch points.
A slide room can weigh hundreds of pounds. Do not attempt to push or lift it without an approved procedure.
Manual Retraction Depends on the System
There is no universal slide-out override.
Depending on the mechanism, emergency retraction may require:
- Turning a manual drive shaft with a specified tool
- Operating a gearbox override
- Disengaging or removing a motor
- Using a controller override sequence
- Releasing a motor brake
- Opening a hydraulic valve
- Operating a hydraulic pump manually
- Disconnecting a drive component before pushing the room
Each action changes how the room is restrained. Once a motor brake, gearbox, or hydraulic valve is released, the room may be able to move on its own.
Never drill holes, cut cables, remove a motor, or open a hydraulic valve based solely on instructions for a similar-looking system.
If the correct instructions cannot be confirmed, contact the RV manufacturer, slide-system manufacturer, roadside-assistance provider, mobile RV technician, or qualified repair facility.
Secure the Slide Before Travel
A manually retracted slide may no longer be held securely by its normal mechanism. It must be secured according to the manufacturer’s instructions before the RV moves.
Approved travel locks or temporary retaining devices may be required. Do not place a loose piece of lumber between the slide fascia and interior wall without confirming that both surfaces can withstand the load. Improvised braces can damage cabinets, trim, walls, or windows.
After securing the room:
- Confirm it is fully inside the wall opening
- Check that exterior seals contact the room
- Verify nothing protrudes beyond the RV
- Confirm the mechanism cannot extend
- Recheck the room after travelling a short distance
- Drive cautiously to the repair location
Do not tow or drive with a slide partially extended.
Preventing Future Slide Failures
Routine inspection cannot prevent every failure, but it can reveal problems before a room becomes stuck.
Regularly:
- Maintain the batteries and charging system
- Inspect fuses, breakers, and high-current connections
- Keep approved tracks and mechanisms clean
- Examine seals for damage and separation
- Check beneath the room for loose trim or underbelly material
- Watch for uneven movement
- Listen for changes in operating sound
- Inspect hydraulic components for leaks
- Keep furniture and belongings clear of the travel path
- Follow the manufacturer’s lubrication instructions
- Operate the slide in the required sequence
- Keep emergency instructions and tools inside the RV
Avoid lubricating every visible component with a general-purpose spray. Some slide mechanisms require a specific dry lubricant, while others should not be lubricated at all. For routine care and maintenance, see our RV Slide-Out Maintenance guide.
RV Slide-Out Troubleshooting: Checklist
If a slide will not operate, check:
- The RV is positioned as required by its manufacturer.
- The room is clear inside and outside.
- The batteries are connected and adequately charged.
- The battery disconnect is on.
- Required ignition, parking-brake, and transmission conditions are met.
- Storage-compartment doors and other interlocks are correctly positioned.
- The fuse or breaker has not opened.
- Battery and ground connections are secure.
- The controller displays no unexplained fault code.
- Both sides begin moving together.
- No cable, gear, rail, roller, or seal is visibly damaged.
- The hydraulic system has no visible leaks.
- The correct manual and emergency tools are available.
For a printable version of this checklist, see our RV Checklists page.
When to Call a Professional
Stop troubleshooting and arrange qualified service when:
- The slide room is visibly out of square
- One side moves while the other remains stationary
- A cable is frayed, broken, or displaced
- A gear, rail, roller, or mounting bracket is damaged
- A fuse or breaker repeatedly opens
- Wiring or a motor becomes hot
- Hydraulic fluid is leaking
- The room has dropped or shifted
- The floor or wall around the opening is damaged
- Water intrusion has weakened the slide structure
- The manual-retraction procedure cannot be positively identified
- The slide cannot be secured for travel
Structural adjustment, cable tensioning, hydraulic repair, motor replacement, and major slide alignment require specialized knowledge and equipment. For help identifying specific problems, see our RV Troubleshooting guides. For more industry safety guidance, see the RV Safety & Education Foundation.
RV Slide-Out Troubleshooting: Checklist
When an RV slide-out stops moving, the safest response is to slow down and identify the system before taking anything apart. Check for obstructions, confirm battery voltage, inspect circuit protection, and observe whether both sides of the room move together.
Do not keep pressing the switch when the room twists, the motor strains, or a breaker repeatedly trips. Protecting the mechanism from additional damage is more important than completing one more operating cycle.
Keep the correct manual, emergency-retraction tools, and manufacturer contact information in the RV. If the room cannot be retracted normally, use only the approved procedure and secure it properly before travel.