
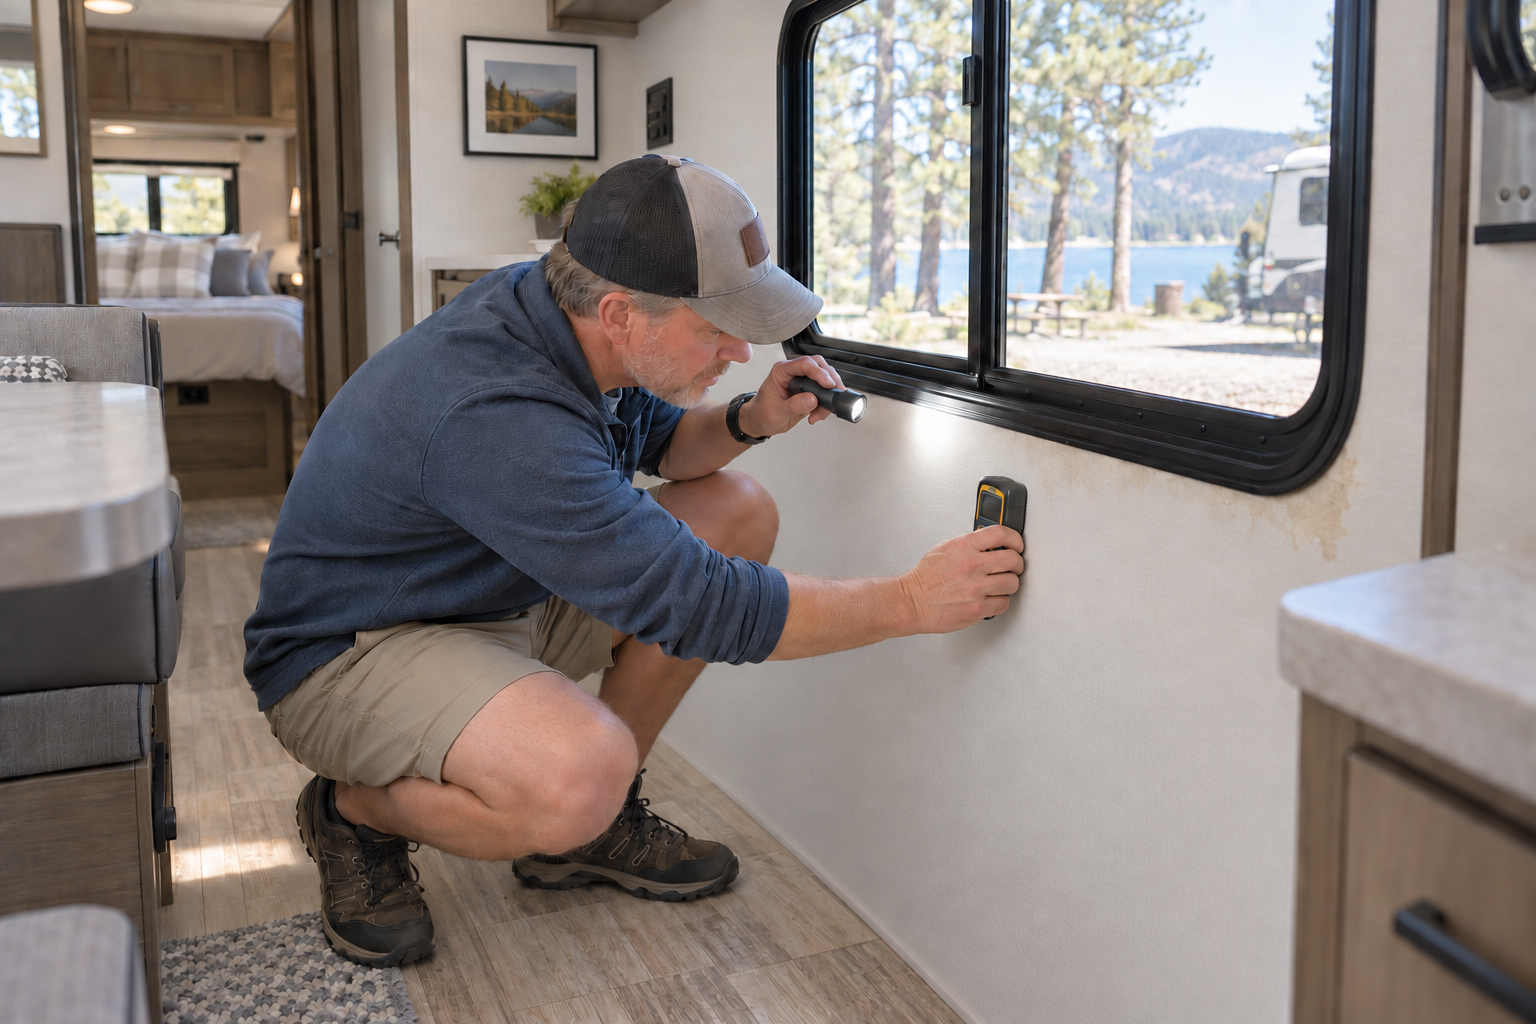
RV water leak detection matters because water inside an RV does not always appear near its source. Learn how to identify rainwater intrusion, plumbing leaks, drain problems, and condensation before hidden damage spreads.
Finding the source requires more than covering the nearest seam with sealant. First determine whether the water is coming from rain, the pressurized plumbing system, a drain, an appliance, or condensation. Once you know when and how the moisture appears, you can narrow the search and avoid sealing over damage that remains wet.
This guide covers owner-level inspections and basic leak-detection methods. Extensive structural damage, mould, damaged electrical equipment, or leaks hidden inside inaccessible walls may require a qualified RV technician or restoration professional.
Respond Quickly to Any Sign of Water
A small amount of water can spread farther than it appears. RV walls and floors may contain wood, insulation, adhesives, wiring, and lightweight panel materials that trap moisture. Left unresolved, a leak can cause staining, swelling, delamination, corrosion, mould, unpleasant odours, and structural deterioration.
When water appears:
- Move belongings away from the wet area.
- Turn off the RV water pump if a plumbing leak may be involved.
- Disconnect the city-water supply and relieve pressure from the system.
- Turn off electrical power to any wet outlet, appliance, or electrical compartment when it is safe to do so.
- Dry visible water with towels, ventilation, fans, or a dehumidifier.
- Document the location with photographs before stains or wet areas disappear.
- Begin tracing the source before applying sealant or closing the area.
Do not reconnect a leaking water system merely to continue using it. A slow leak can continue beneath flooring or inside a wall without producing another visible puddle.
Identify When the Leak Appears
The timing of the water often provides the strongest clue.
After rain, moisture during or shortly after a storm points to the roof, exterior seams, windows, doors, marker lights, vents, slide-out openings, and wall-mounted accessories.
When connected to city water, suspect a pressurized plumbing fitting, fixture, appliance connection, toilet valve, outdoor shower, water heater, or inlet.
If the water appears only when the pump is running, inspect the freshwater tank, pump, strainer, suction line, pressure lines, and fixtures. A pump that cycles briefly when no faucet is open may indicate a pressure loss, although some systems can also cycle because of a weak check valve or pressure adjustment problem.
If water appears only while a sink, shower, or appliance is draining, inspect the drain fitting, P-trap, pipe connection, holding-tank connection, or appliance drain.
If moisture develops during cold weather or while cooking, showering, or sleeping, condensation may be contributing to the problem.
Keep a simple record of the weather, water source, fixtures being used, tank levels, and exact location of the moisture. Patterns that seem insignificant can expose the source.
Look for Less-Obvious Warning Signs
Not every RV leak begins with a puddle. Watch for:
- Brown, yellow, or grey stains on ceilings and walls
- Bubbling, wrinkled, or loose wall covering
- Swollen trim or cabinet panels
- Soft areas in the roof, wall, or floor
- Delamination or rippling on an exterior wall
- Damp carpet along a wall or beneath furniture
- Musty or earthy odours
- Rusted fasteners or discoloured staples
- Water inside cabinets or storage compartments
- Damp insulation visible through an opening
- A water pump cycling when no fixture is being used
- Unexplained loss of freshwater
- Moisture beneath a sink, shower, toilet, water heater, or refrigerator
- Drips from the enclosed underbelly
- Persistent window moisture that returns after being wiped away
A moisture meter can help compare a suspicious area with a known dry area, but it does not identify the source by itself. Metal framing, wiring, fasteners, foil insulation, surface condensation, and different wall materials can affect readings. Use the meter to identify patterns rather than relying on one number.
Start Above the Visible Damage
Water follows gravity, but framing and surface tension can redirect it sideways before it drops. Begin above the visible damage and inspect progressively upward and outward.
For example, a wet floor beneath a window might result from:
- A leaking window frame
- A roof seam above the window
- A clearance light
- An awning attachment
- A wall penetration
- A plumbing line inside the wall
- Condensation running down the glass
- Water entering at a slide-out opening
Inspect the largest possible area instead of concentrating only on the closest seam.
Inspect the Roof and Exterior Seals
When rainwater intrusion is suspected, inspect the roof only if it can be accessed safely and the RV manufacturer permits walking on it. Use a stable ladder and avoid wet, icy, damaged, or questionable roof surfaces.
Examine:
- Front and rear roof termination seams
- Roof edges and sidewall transitions
- Plumbing vents
- Roof vents and skylights
- Air-conditioner openings and gaskets
- Antennas and solar-panel mounts
- Ladders and roof-rack attachments
- Clearance lights
- Awning rails and wall brackets
- Windows, doors, and compartment openings
- Exterior speakers, outlets, lights, and access panels
- Slide-out roof, corners, seals, and wall openings
Look for cracks, gaps, lifting edges, separated sealant, loose fasteners, missing trim inserts, and evidence that water has travelled beneath the sealant. Sealant can appear intact on the surface while separating at one edge.
Do not cover every suspicious area with a different sealant. Remove failed material and use a sealant approved for the RV surface and component. Silicone and incompatible products can interfere with future repairs and may not bond correctly to the existing materials. For detailed roof and seal inspection, see our RV Roof and Exterior Seal Inspection guide.
Inspect Windows and Wall Openings
A leak near a window may enter between the frame and the wall rather than through the glass. Inspect the frame, exterior flange, corner joints, weep openings, and surrounding wall.
Do not block the window’s factory drainage or weep openings with sealant. These openings allow water collected by the window assembly to escape.
Check nearby marker lights, exterior handles, vents, trim, appliance access doors, and awning mounts. Water entering above a window may travel behind the wall panel and emerge at the lower corner of the frame.
If the window flange or sealing tape has failed, applying sealant only around the outside may provide a temporary improvement without correcting the failed bedding material behind the frame. Proper repair may require removing and resealing the window.
Check Slide-Out Rooms Carefully
Slide-outs create several possible water-entry points. Inspect the roof membrane, upper corners, side seals, lower wiper seals, bulb seals, exterior trim, and the opening where the slide enters the main wall.
Debris or damaged seal material can prevent the seals from making contact. A slide that sits unevenly or does not fully extend or retract may also leave a gap.
Check the interior corners and floor after rain, especially if the RV was not level or the slide topper held water. Water can follow the slide roof or sidewall and enter at a corner that appears unrelated to the exterior problem.
Do not adjust slide alignment without the correct manufacturer procedure. An alignment problem can involve the mechanism, structure, seals, or room position and may require professional service. For more on slide-out care, see our RV Slide-Out Maintenance guide.
Test for Rainwater Intrusion One Section at a Time
A controlled hose test can help locate an exterior leak, but flooding the entire RV at once will not identify the entry point.
Before testing:
- Dry the interior as thoroughly as possible.
- Have one person remain inside with a flashlight.
- Protect nearby electrical components.
- Close all doors, windows, vents, and compartments normally.
- Begin at the lowest suspected area.
Apply a gentle stream of water to one small section for several minutes. Do not use a high-pressure nozzle, as it may force water past seals that would not normally leak. Wait and inspect the interior before moving upward to the next section.
Test lower areas first so water from an upper section does not run across an untested lower seam and confuse the result. Stop as soon as moisture appears.
Avoid spraying directly into appliance vents, furnace exhaust openings, refrigerator vents, water-heater openings, or other components that are designed for controlled airflow rather than pressurized water.
Check the Pressurized Plumbing System
If the leak appears when using the water pump or city water, inspect all accessible plumbing while the system is dry and depressurized. Use a flashlight and dry paper towel to check fittings, since a paper towel can reveal a small amount of moisture that is difficult to see.
Common leak locations include:
- Water-pump fittings and strainer
- Freshwater tank connections
- City-water inlet
- Gravity-fill connection
- Low-point drains
- Outdoor shower
- Faucet supply lines
- Toilet supply connection and valve
- Shower valve and hose
- Water-heater connections and pressure-relief valve
- Appliance water lines
- PEX fittings and threaded adapters
- Winterizing valves and suction hoses
- Filter housings and bypass valves
A loose threaded fitting may drip only under pressure. A cracked fitting can spray against a wall or cabinet and make the leak appear somewhere else.
Do not overtighten plastic fittings. Excessive force can distort a seal or crack the fitting. Follow the component manufacturer’s instructions and replace damaged washers, fittings, or connectors as required.
Use the Water Pump as a Clue
With every faucet closed and no appliance drawing water, the pump should normally reach pressure and stop. If it continues running or cycles periodically, the system may be losing pressure.
Check for visible leaks first. If none appear, inspect the pump strainer, winterizing valve, freshwater-tank line, water-heater connections, toilet valve, outdoor shower, and other hidden fittings.
A pump can also cycle because of air entering the suction side, debris in a check valve, or an internal pump problem. Pump cycling indicates that the system needs investigation, but it does not prove water is leaking into the RV.
If the pump stays quiet but water appears only while connected to city water, the higher or continuous supply pressure may be exposing a leak that the pump does not. Disconnect city water until the cause is found.
Inspect Drains and Fixtures
Drain leaks appear only when water passes through the affected fixture. Fill the sink or shower basin with a modest amount of water, then release it while watching the drain assembly, P-trap, and accessible pipe connections.
Check around:
- Sink strainers
- P-traps and slip-joint washers
- Shower drains
- Flexible drain hoses
- Pipe supports and fittings
- Washing-machine or dishwasher drains, if equipped
- Grey- and black-tank connections
- Roof vent pipes where they enter the holding tanks
A drain fitting may leak only when a basin is full or when the RV moves. Loose plumbing can shift during travel and place stress on fittings.
Water around a toilet may come from the supply valve, vacuum breaker, rinse connection, bowl, base seal, condensation, or spilled water. Identify which area becomes wet first before replacing the floor seal.
Check the Water Heater
Water near the water heater can originate from its plumbing connections, pressure-relief valve, drain plug, anode-rod opening, bypass valves, tank, or exterior access compartment.
A pressure-relief valve may discharge briefly as water expands during heating, but continuous dripping requires investigation. Do not cap or plug the relief valve.
Rust trails, mineral deposits, damp insulation, or repeated water inside the compartment may indicate a persistent leak. If the tank itself is leaking, replacement is generally required.
Turn off the water heater’s electric and fuel sources and allow the water to cool before inspecting or servicing it. Hot water can cause serious burns, and the tank can remain pressurized after the heat source is turned off.
Consider Condensation
Condensation can imitate a roof or plumbing leak. Warm, humid interior air forms moisture on cold windows, walls, metal framing, vent openings, and inside cabinets with limited airflow.
Common contributors include:
- Cooking without using the range hood
- Showering without running the bathroom fan
- Drying wet clothing inside
- Sleeping with windows and roof vents closed
- Unvented propane heaters
- Cold-weather camping
- Furniture or belongings pressed tightly against exterior walls
Condensation commonly appears across several cold surfaces rather than at one exterior penetration. Improve ventilation, use exhaust fans, leave space around exterior walls, reduce indoor humidity, and use a dehumidifier when necessary.
Do not assume every wet wall is condensation. If moisture repeatedly appears in one concentrated area, inspect for an exterior or plumbing leak as well.
Examine the Underbelly
An enclosed underbelly can conceal a leak until the material sags or water drains from an opening. Water may travel along the underbelly before dripping far from its source.
Look for:
- Sagging or bulging underbelly material
- Water dripping from fasteners or seams
- Damp insulation
- Stains around plumbing penetrations
- Moisture below tanks or drain valves
- Soft or damaged floor material above the affected area
Do not puncture a bulging underbelly while standing beneath it. It may contain a significant amount of water. Support the area, control where the water will drain, and avoid electrical wiring or plumbing hidden above it.
Opening the underbelly may be necessary to dry insulation and inspect the floor structure. Simply draining the trapped water will not correct the source or remove moisture from absorbent materials.
Dry the RV Before Closing the Repair
Stopping the leak is only the first part of the repair. Wet insulation, wood, flooring, and wall materials need adequate drying.
Remove standing water and open accessible cabinets and compartments. Use ventilation, fans, heat, or a dehumidifier as conditions permit. Remove soaked materials that cannot dry in place.
Do not seal wet materials inside a wall, roof, floor, or underbelly. Trapped moisture can continue damaging the RV even after the entry point has been repaired.
Recheck the area with visual inspections and moisture comparisons. Once dry, perform a controlled test to confirm the repair before reinstalling panels or replacing damaged finishes.
Avoid Common Leak-Diagnosis Mistakes
Avoid these shortcuts:
- Sealing only the spot where water became visible
- Applying new sealant over dirty, wet, loose, or incompatible material
- Blocking window drainage openings
- Using high-pressure water during testing
- Pressurizing a known plumbing leak repeatedly
- Ignoring a pump that cycles without an open faucet
- Assuming every damp area is condensation
- Closing wet insulation inside the underbelly
- Walking on a roof that may be structurally damaged
- Continuing to use wet electrical equipment
- Replacing interior panels before confirming the leak has stopped
A successful repair addresses the entry point, dries the affected materials, and corrects any damage caused by the leak.
RV Water Leak Detection: Checklist
When tracing a leak, confirm:
- The city-water supply and pump have been turned off when appropriate.
- Wet electrical components have been safely disconnected from power.
- The time, weather, water source, and fixtures in use have been recorded.
- The area above and around the visible damage has been inspected.
- Roof seams, vents, windows, lights, trim, and wall penetrations have been checked.
- Slide-out seals, corners, roof, and alignment have been examined.
- Plumbing fittings have been checked with the system pressurized only when safe.
- Drains have been tested separately from the supply system.
- The water heater, toilet, pump, filter, and outdoor shower have been inspected.
- Condensation has been considered without using it to dismiss a concentrated leak.
- Any wet underbelly material or insulation has been opened and dried as needed.
- The suspected repair has been retested before the area is closed.
- Damaged structural, electrical, or mould-contaminated materials have been professionally evaluated when necessary.
For a printable version of the maintenance schedule, see our RV Checklists page.
When to Call a Professional
Arrange professional service if the RV has extensive delamination, a soft roof or floor, widespread mould, soaked walls, damaged electrical components, a leaking holding tank, or water entering from an area that cannot be safely accessed.
Professional diagnosis may also be appropriate when the leak requires removal of a window, slide-out adjustment, roof-membrane repair, wall disassembly, underbelly removal, or specialized pressure testing.
Stop using the RV’s water or electrical system if water is contacting wiring, outlets, appliances, the converter, inverter, batteries, transfer switch, breaker panel, or other electrical equipment.
The first wet spot you find may only be where the water escaped. Trace the conditions that create the leak, inspect beyond the visible damage, and confirm the source before sealing or rebuilding anything. Finding the real entry point early can prevent a small repair from becoming a major structural project. For help identifying specific problems, see our RV Troubleshooting guides. For more industry safety guidance, see the RV Safety & Education Foundation.