
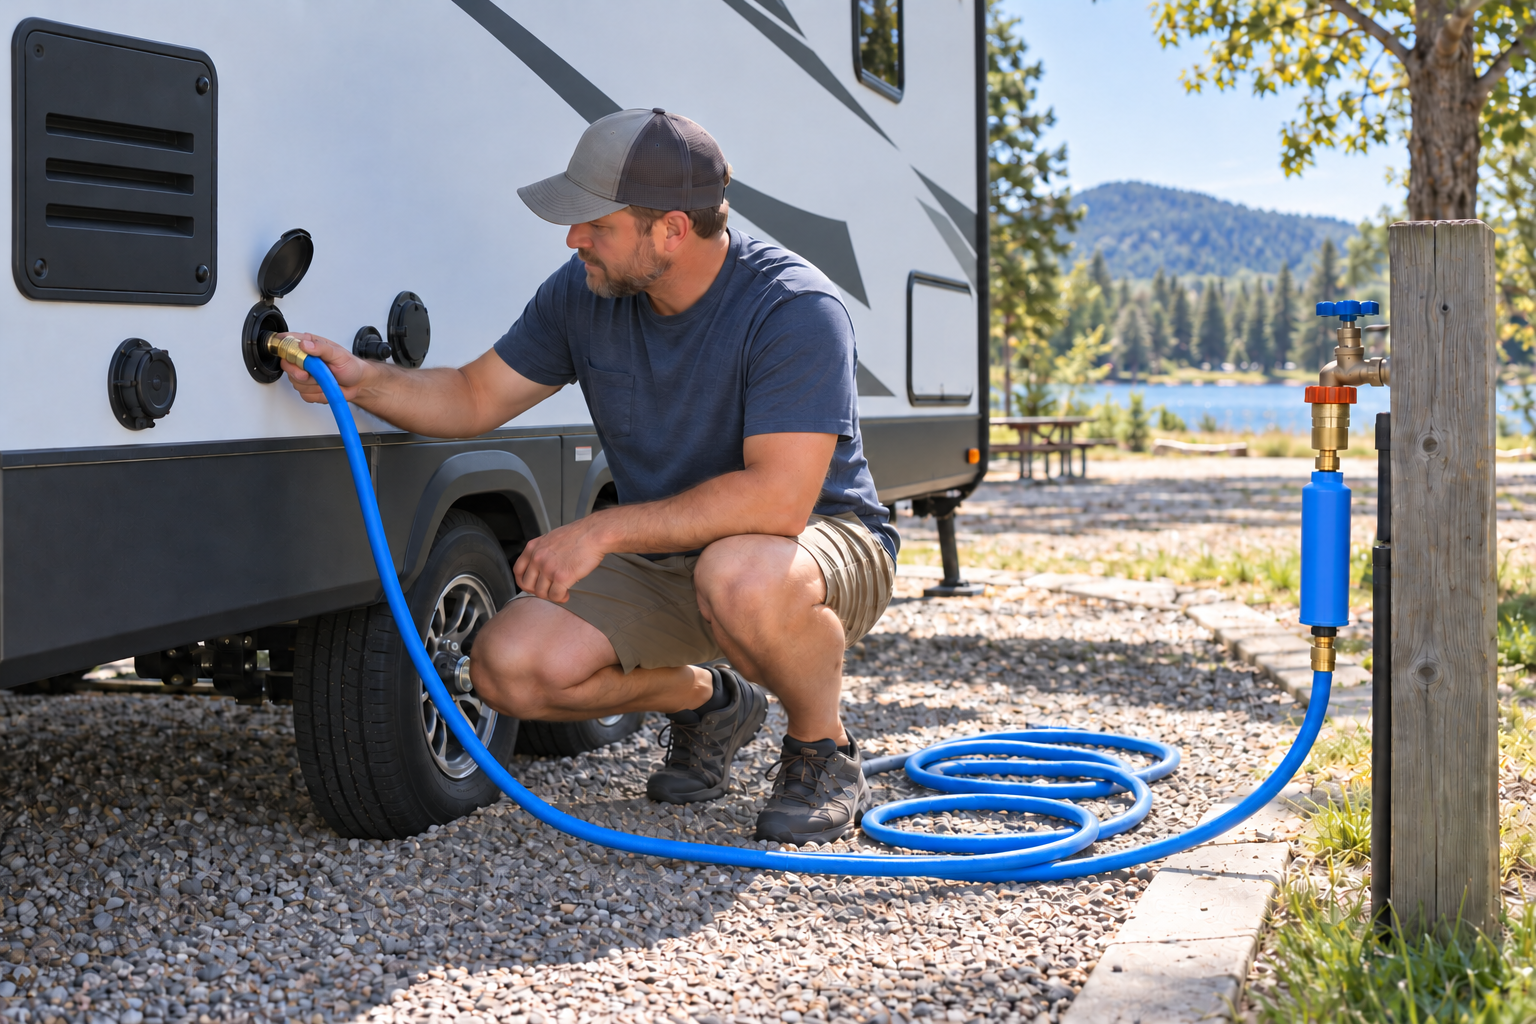
A dependable fresh-water system is one of the conveniences that makes an RV feel like a home away from home. Regular RV fresh water system maintenance keeps that system supplying clean water to the faucets, shower, toilet, and water heater, whether you are connected to a campground water supply or camping with water stored in the onboard tank.
Because this water may be used for drinking, cooking, washing dishes, and personal hygiene, the system must be kept clean and properly maintained. Stagnant water, contaminated hoses, neglected filters, excessive campground pressure, and small plumbing leaks can all create problems.
Fortunately, most fresh-water maintenance is straightforward. Regular inspections, proper equipment, and periodic sanitizing can help keep the system dependable and protect the RV from water damage.
RV Fresh Water System Maintenance: How It Works
Although layouts vary, most RV fresh-water systems include:
- A fresh-water holding tank
- A 12-volt demand pump
- A pump strainer
- A gravity-fill or pressure-fill connection
- A city-water connection
- Hot- and cold-water lines
- Faucets, showers, and toilets
- Low-point drains
- A fresh-tank drain
- A water heater
- Bypass and selector valves
- An exterior shower or spray port
- One or more water filters, when equipped
Some RVs also have a centralized utility panel with valves that control filling, normal use, winterizing, sanitizing, and other functions. Valve arrangements differ considerably, so follow the diagram and instructions supplied with your RV.
Do not assume that another RV uses the same valve positions simply because its utility panel looks similar. For more on safe drinking water, see the CDC’s guidance on water safety.
Fresh-Water Tank Versus City Water
An RV can normally receive water in two ways.
Using the Fresh-Water Tank
The onboard tank stores water for use when a pressurized connection is unavailable. A 12-volt pump draws water from the tank and sends it through the plumbing system.
The pump operates automatically when switched on. Opening a faucet causes the pressure in the plumbing to drop, which starts the pump. The pump should stop shortly after the faucet is closed and the system has repressurized.
Turn the pump off when:
- The fresh-water tank is empty
- The RV will be left unattended
- A leak is suspected
- The plumbing system has been drained
- The RV is connected to city water, unless its instructions state otherwise
Allowing some pumps to run dry for an extended period can cause damage.
Using a City-Water Connection
A city-water connection allows a campground or other pressurized supply to feed the RV directly. The onboard pump is normally not required when using this connection.
Campground water pressure can vary greatly. Excessive pressure may damage fittings, hoses, filters, faucets, or valves. Use a regulator designed for potable-water RV systems unless the RV has a suitable built-in regulator.
An adjustable regulator with a pressure gauge makes it easier to monitor the incoming pressure. Set it according to the RV manufacturer’s specifications rather than relying on a universal pressure setting.
Install the regulator at the supply end of the hose when practical. This also protects the hose and any downstream equipment from excessive pressure.
Use Potable-Water Equipment Only
Use a hose clearly identified as safe for drinking water. A conventional garden hose may contain materials that affect the taste, odour, or safety of the water.
Keep the drinking-water hose separate from equipment used for wastewater handling, tank flushing, or general cleaning. Never use the fresh-water hose to rinse sewer fittings or insert it into a wastewater connection.
Protect the ends of the drinking-water hose during storage. After use:
- Disconnect the hose.
- Allow it to drain.
- Connect its ends together or install clean protective caps.
- Store it away from sewer hoses and chemicals.
Wash or sanitize your hands after handling wastewater equipment before touching fresh-water fittings.
Only fill the tank from a water source known to be suitable for drinking. Clear water is not necessarily safe water. If the quality of a supply is uncertain, do not put it into the fresh-water system.
Inspecting the System for Leaks
A small plumbing leak can damage cabinets, flooring, insulation, and wall materials before it becomes obvious. Inspect the fresh-water system regularly and whenever it is first pressurized after storage.
Check:
- Beneath sinks
- Around the toilet
- Near the water heater
- Around the water pump and strainer
- Inside utility compartments
- At filter housings
- Around exterior water connections
- Near outdoor showers and spray ports
- Around accessible valves and fittings
- Beneath the RV for unexpected dripping
Use a dry paper towel around a questionable fitting. Even a very small leak will often appear clearly on the paper.
Plastic fittings usually require only careful hand tightening. Overtightening can damage the fitting, distort a seal, or crack a component. If a fitting continues to leak, depressurize the system and inspect its washer, O-ring, threads, and sealing surfaces.
Do not continue using a leaking system simply because the amount of water appears small.
Recognizing Unexplained Pump Cycling
When using the onboard tank, the pump should stop after the plumbing reaches its operating pressure. If it starts periodically when no fixture is open, the system may have:
- A leaking faucet or toilet valve
- A loose fitting
- A dripping exterior shower
- A leaking water-heater relief valve
- Debris in the pump’s internal check valve
- A faulty city-water check valve
- Air entering the pump’s suction line
- An incorrectly positioned winterizing valve
- A damaged pump or pressure switch
Make sure every faucet and valve is fully closed. Then inspect the system for moisture.
Persistent cycling should not be ignored. Turn the pump off until the cause can be found, especially when the RV is unattended.
Maintaining the Water Pump and Strainer
Many RV water pumps have a small inlet strainer that prevents debris from entering the pump. A dirty strainer can cause reduced flow, sputtering, noise, or difficulty priming.
Before cleaning it:
- Turn off the pump.
- Disconnect city water.
- Open a faucet to relieve pressure.
- Place a towel or shallow container beneath the strainer.
- Remove the strainer bowl according to its instructions.
- Clean the screen with fresh water.
- Inspect the bowl and sealing ring.
- Reassemble it without overtightening.
- Pressurize the system and check for leaks.
A strainer bowl that is cracked, distorted, or damaged by freezing must be replaced.
Check the pump’s mounting screws and vibration-isolating feet as well. Loose mounting hardware can make a normally operating pump sound unusually loud.
Water Filters
An RV may have an exterior inline filter, an under-sink filter, a whole-system filter, or a combination of filters. Each type has a limited service life.
Replace cartridges according to the filter manufacturer’s instructions and sooner if you notice:
- Reduced water flow
- Unpleasant taste or odour
- Visible sediment
- Discolouration
- Damage to the cartridge
- Contamination of the water supply
- The end of the recommended service interval
A water filter does not make every water source safe. Its capabilities depend on its design and certification. A sediment or carbon filter may improve taste and remove certain particles without removing microorganisms or all chemical contaminants.
Remove filter cartridges when instructed before sanitizing or winterizing. Chlorine solutions or RV antifreeze can damage some cartridges, while a cartridge may also remove sanitizer before it reaches the entire plumbing system.
After reinstalling a filter housing, pressurize the system slowly and check carefully for leaks. For more on RV water systems, see our RV Plumbing Basics guide.
When the System Should Be Sanitized
Sanitize the fresh-water system:
- Before using a new RV
- At the beginning of the camping season
- After de-winterizing
- After the RV has been stored for an extended period
- After filling from a questionable water source
- After contamination is suspected
- When water develops an unexplained taste or odour
- At the interval specified by the RV manufacturer
Sanitizing is different from routine tank treatment. Products marketed to freshen stored water should not be assumed to sanitize the entire plumbing system. For the seasonal sanitizing and flushing routine after storage, see our How to De-Winterize an RV guide.
Important Sanitizing Precautions
Always use the sanitizing procedure specified by the RV manufacturer. The correct sanitizer concentration, contact time, valve positions, and water-heater procedure can depend on the RV and its installed equipment.
This is particularly important if the RV has:
- A hydronic heating system
- An Aqua-Hot or similar appliance
- Specialized water filters
- A tankless water heater
- A washer or dishwasher
- An ice maker
- A residential refrigerator water dispenser
- Components with restrictions on chlorine exposure
Some systems may be damaged by an overly strong solution or prolonged exposure to bleach.
If the approved procedure uses household bleach, use only the type and concentration specified in the manual. Bleach products are sold in different strengths, and some contain fragrances, thickeners, splash-control additives, or other ingredients unsuitable for a potable-water system.
Never mix bleach with:
- Ammonia
- Vinegar
- Acids
- Household cleaners
- Other sanitizers
Mixing chemicals can produce dangerous gases.
Wear eye protection and suitable gloves, work in a ventilated area, and prevent sanitizing solution from contacting clothing or interior finishes.
General Sanitizing Procedure
The following describes the general process used by many RV manufacturers. It does not replace the instructions for your particular RV.
1. Review the Manuals
Confirm:
- Fresh-water tank capacity
- Approved sanitizer
- Correct concentration
- Required contact time
- Water-heater instructions
- Filter-removal requirements
- Valve positions
- Instructions for connected appliances
Account for the capacity of the complete system if the manufacturer requires it, not just the listed tank capacity.
2. Drain the Existing Water
Turn off the water heater and allow the water to cool. Disconnect city water and turn off the pump.
Drain the fresh-water tank as directed. Open the required low-point drains and fixtures if specified by the manufacturer.
Never remove a water-heater drain plug or anode rod while the tank is hot or pressurized.
3. Remove or Bypass Filters
Remove filter cartridges or place the filter system in bypass if its manufacturer requires this. Reinstall the empty housing securely so the plumbing can be pressurized.
4. Prepare the Sanitizing Solution
Measure the approved sanitizer carefully. Dilute concentrated bleach in water before introducing it into the RV unless the manufacturer gives different instructions.
Do not pour undiluted bleach directly onto the tank, plumbing components, or exterior finishes.
Because household bleach strength varies, do not substitute a remembered bleach-to-water ratio for the current instructions supplied with the RV.
5. Add the Solution and Fill the Tank
Introduce the solution through the approved tank-fill or winterizing connection. Fill the tank with potable water as directed.
Do not connect a pressurized hose to a gravity-fill opening unless the system is specifically designed for it. The tank and vent may not tolerate supply pressure.
6. Distribute the Solution
Turn on the water pump and open each fixture individually until the sanitizing solution reaches it. Include all outlets identified by the manufacturer, which may include:
- Kitchen faucet
- Bathroom faucet
- Shower
- Exterior shower
- Toilet
- Spray ports
- Low-point drains
- Washer connections
- Refrigerator or ice-maker supply
Operate both the hot and cold sides when instructed. Close each fixture after the solution reaches it.
Avoid splashing chlorinated water onto fabric, countertops, flooring, walls, or other finishes.
7. Allow the Required Contact Time
Let the solution remain in the system for the period specified by the manufacturer. Do not drink, cook with, or bathe in the sanitizing solution.
Longer contact is not necessarily better. Excessive chlorine concentration or exposure time may damage certain components.
8. Drain and Flush
Drain the sanitizing solution into an appropriate location in accordance with local requirements. Refill the tank with potable water.
Run fresh water through each fixture until the chlorine odour has been reduced to the level described in the instructions. More than one fill-and-drain cycle may be required.
9. Restore the System
Return all valves to their normal operating positions. Reinstall new or serviceable filter cartridges as instructed.
Fill the water heater completely before turning on its electric heating element or propane burner. Operating an empty water heater can damage it.
Pressurize the system and perform a complete leak inspection.
Filling and Storing the Fresh-Water Tank
Avoid carrying stale water from one trip to another for long periods. Drain the tank if the RV will be stored and the manufacturer recommends dry storage.
When filling:
- Use a known potable-water source
- Use a drinking-water-safe hose
- Keep hose ends clean
- Monitor the tank level
- Make sure the tank vent is unobstructed
- Stop if water backs up unexpectedly
- Do not leave a pressure-fill system unattended
Water is heavy. In addition to affecting fuel consumption, a full tank adds substantially to the RV’s loaded weight. Confirm that the RV remains within its weight ratings.
When storing the RV, follow the manufacturer’s directions for draining, ventilation, winterizing, and valve positioning. Water left in a system exposed to freezing temperatures can crack pumps, strainers, valves, filter housings, faucets, water heaters, and plumbing fittings.
Troubleshooting Common Fresh-Water Problems
Low Water Flow
Possible causes include:
- A clogged filter
- A dirty faucet aerator
- A blocked pump strainer
- A kinked hose
- A partially closed valve
- Low campground pressure
- An incorrectly adjusted regulator
- A weak or obstructed pump
- Debris in a fitting
Check whether the problem affects one fixture or the entire RV. Low flow at one faucet often points to its aerator or local plumbing. Low flow everywhere suggests a supply, regulator, filter, valve, or pump problem.
Pump Runs but No Water Flows
Possible causes include:
- An empty tank
- An incorrectly positioned selector valve
- An open winterizing line
- A blocked strainer
- An air leak on the suction side
- A pump that has lost its prime
- A frozen or kinked line
Do not allow the pump to run continuously while troubleshooting.
Water Sputters From Faucets
Sputtering is common temporarily after the system has been drained or a filter has been replaced. Persistent sputtering may indicate low tank level, an air leak before the pump, a loose strainer bowl, or an incorrectly positioned valve.
Unpleasant Taste or Odour
Drain and sanitize the system according to the manuals. Replace overdue filters and inspect the hose and tank fill equipment.
A rotten-egg odour may originate in the water heater rather than the fresh-water tank. Certain water supplies can react with the water-heater tank or anode rod. Follow the water-heater manufacturer’s cleaning and service instructions.
Do not assume that an odour is harmless if contamination may have occurred.
Water Leaks From the City-Water Inlet
A leaking inlet may have a damaged washer, cap, fitting, or internal check valve. Disconnect the water source and depressurize the system before inspection.
Fresh-Water Tank Fills While Connected to City Water
This can indicate an incorrectly positioned utility-panel valve or leakage through a pump check valve or tank-fill valve. If the tank begins overflowing, shut off the campground supply immediately.
When to Contact a Technician
Obtain professional assistance if:
- The system cannot maintain pressure
- A hidden leak is suspected
- Water appears inside a wall or beneath the floor
- The pump repeatedly loses its prime
- The fresh-water tank is damaged or displaced
- A city-water fitting leaks inside the RV
- The tank fills unintentionally on city water
- A water heater or hydronic system requires specialized sanitizing
- Contamination cannot be removed
- Freezing has damaged plumbing components
- Electrical problems affect pump operation
- You cannot identify the correct valve arrangement
Shut off the water supply and pump whenever continued operation could cause water damage.
Fresh-Water Maintenance Checklist
Before Each Trip
- Inspect the drinking-water hose and fittings
- Check the pressure regulator
- Confirm that the tank drain is closed
- Inspect beneath sinks and around the pump
- Test the pump
- Check the filter’s condition and service date
- Confirm that utility-panel valves are correctly positioned
At the Campsite
- Verify that the water source is potable
- Install the pressure regulator
- Inspect every connection for leaks
- Keep fresh-water equipment away from sewer equipment
- Turn off the campground supply when leaving for an extended period if appropriate
After Each Trip
- Disconnect and drain the hose
- Protect the hose ends
- Inspect the RV for moisture
- Drain stored water when appropriate
- Record filter replacement or maintenance
Seasonally
- Sanitize the complete system
- Clean the pump strainer
- Inspect accessible hoses and fittings
- Test drains and valves
- Service filters
- Inspect the water heater
- Winterize before freezing conditions
For a printable version of the maintenance schedule, see our RV Checklists page.
Protecting the System
Fresh-water maintenance is about more than water quality. It also protects the RV from leaks, excessive pressure, freezing damage, and premature component failure.
Use potable-water equipment, control incoming pressure, inspect the plumbing regularly, replace filters as required, and sanitize the system according to the instructions for your RV and its components.
A clean, leak-free system provides dependable water at the campsite and prevents a small plumbing problem from becoming a costly repair.