
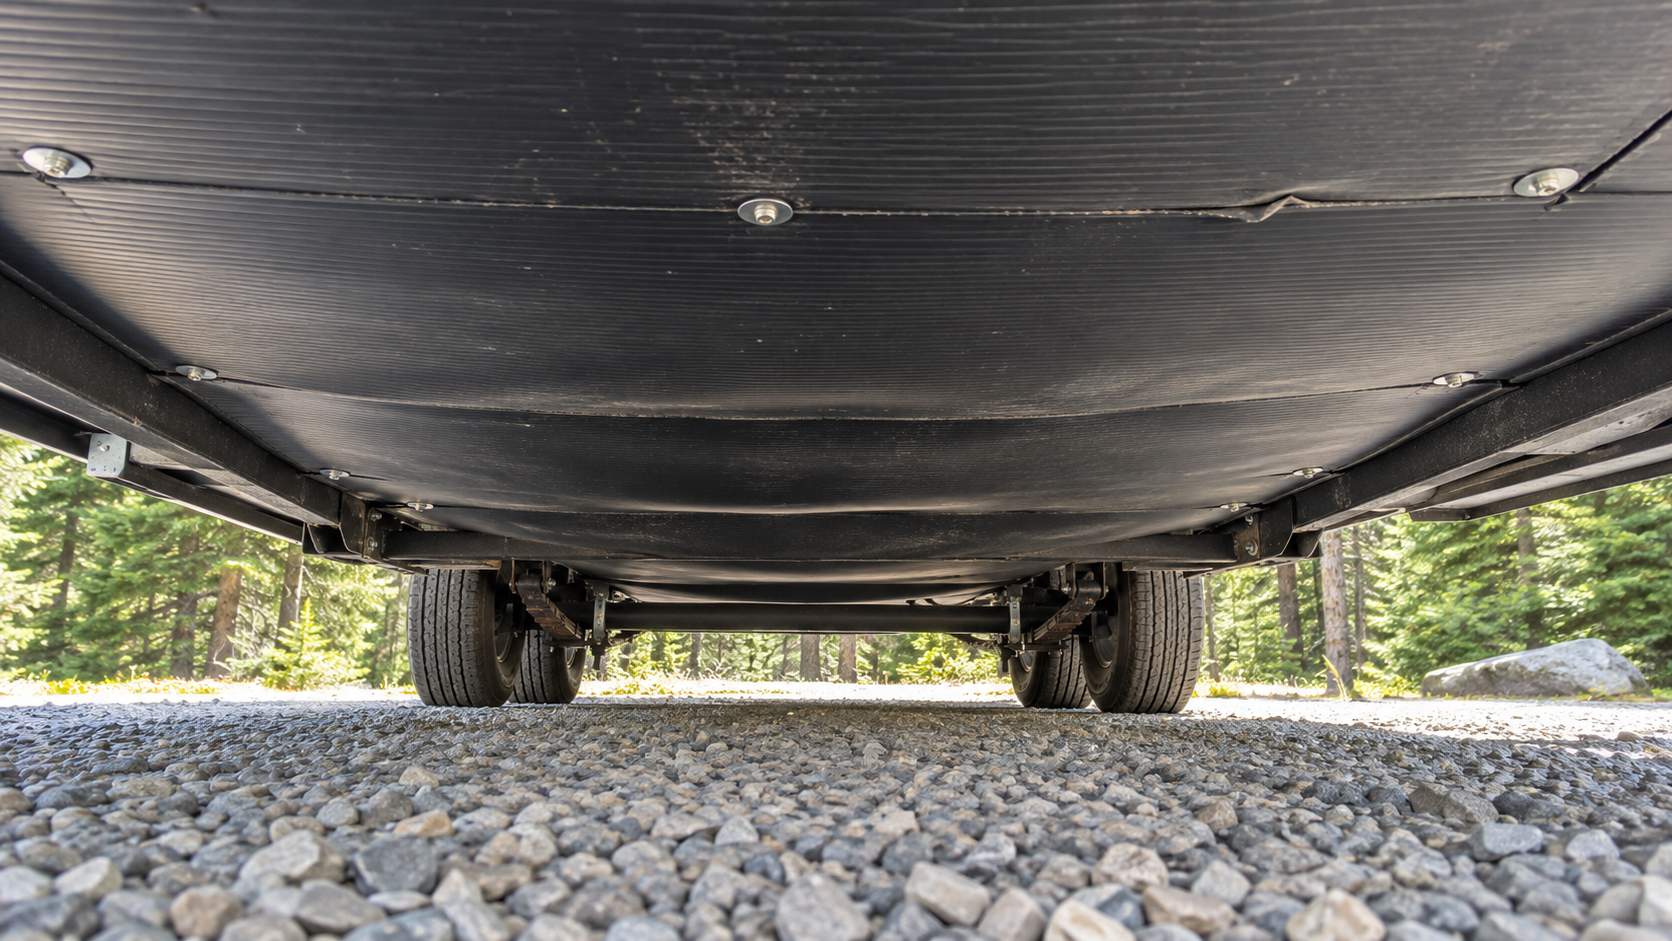
RV underbelly inspection matters because the underside protects tanks, plumbing, wiring, insulation, and structural components from road debris and weather. On many travel trailers and fifth wheels, these systems are concealed behind corrugated plastic panels or a flexible underbelly membrane.
Because most of this area remains out of sight, damage can develop unnoticed. A loose panel can catch airflow while travelling, a plumbing leak can saturate the insulation, and a small opening around a pipe or wire can provide rodents with access to the protected space above the underbelly.
Regular inspection can reveal loose fasteners, sagging material, trapped water, damaged insulation, and possible rodent entry points before they lead to larger repairs.
Understand What Is Behind the Underbelly
The contents and construction of an RV underbelly vary by manufacturer and model. Concealed components may include:
- Fresh-water tank
- Grey- and black-water tanks
- Drain piping
- Water lines
- Tank-heating pads
- Furnace ducting
- Electrical wiring
- Brake wiring
- Propane lines
- Slide-out equipment
- Levelling-system components
- Insulation
- Frame crossmembers
- Tank supports
- Holding-tank valves and cables
Some RVs have a fully enclosed and insulated underbelly. Others use several removable panels, flexible fabric, individual tank covers, or no enclosure at all.
Before loosening anything, determine what type of material is installed and what may be resting above it. Waterlogged insulation or accumulated debris can place considerable weight on a panel.
Inspect the Underbelly Safely
Park the RV on firm, level ground and chock the wheels before beginning the inspection. Use a bright flashlight and inspect from the perimeter whenever possible.
A phone or inspection camera attached to an extension can help you see above axles, behind tanks, and along frame rails without placing yourself beneath the RV.
Never crawl under an RV supported only by:
- A hydraulic jack
- A tongue jack
- Stabilizer jacks
- Electric levelling jacks
- The tow vehicle’s suspension
If access requires raising the RV, follow the manufacturer’s lifting instructions and use equipment rated for the loaded weight. Support the frame only at approved locations.
Do not loosen an underbelly panel while lying directly beneath it. Trapped water, wet insulation, road debris, or animal nesting material may fall when a fastener is removed.
Start With a Complete Visual Inspection
Walk around the RV and examine the underbelly from both sides, the front, and the rear.
Look for:
- Sagging panels
- Torn or punctured material
- Missing fasteners
- Loose panel edges
- Gaps around pipes and wiring
- Stains or discolouration
- Wet areas
- Bulges
- Exposed insulation
- Rodent droppings
- Nesting material
- Chewed material
- Damaged wiring
- Abrasion against the frame
- Openings around frame members
Pay particular attention to the front edge of the underbelly. Airflow while towing can enter a loose seam and pull a large section downward.
Check again after driving on gravel roads, through deep snow, or over road debris.
Do Not Ignore a Sagging Underbelly
A slight wave in flexible material may be normal, but a new or pronounced bulge deserves attention.
Sagging may be caused by:
- Trapped water
- Wet insulation
- A plumbing leak
- A leaking holding tank
- Condensation
- Loose fasteners
- Broken support straps
- Improper previous repairs
- Debris resting on the panel
- Rodent nesting material
Do not puncture the lowest point to release suspected water. The liquid could be contaminated, and the puncture can enlarge while travelling.
If the bulge contains liquid, identify the source before replacing or resealing the panel. Drying the visible surface without repairing the leak will allow the problem to return.
Look for Evidence of Water
Water can enter the enclosed underbelly from an internal plumbing leak or from exterior road spray.
Possible signs include:
- Dark staining
- Water dripping from seams
- Damp insulation
- A musty smell
- Rust developing on nearby fasteners
- A panel that feels unusually heavy
- Water appearing after the plumbing system is pressurized
- Dripping while a fixture or appliance is used
- Water appearing after filling a holding tank
- Moisture around a tank fitting or drain pipe
The location of the drip may not identify the source. Water can travel along pipes, wiring, insulation, frame members, and the top of the underbelly before finding an exit.
Observe when the leak occurs. This can help narrow the source:
- A leak only when connected to city water may be on a pressurized water line.
- A leak only while the pump is running may involve the fresh-water system.
- A leak after filling a tank may involve the tank, vent, fitting, or overflow.
- A leak while draining a fixture may involve a drain pipe.
- A leak during rain or road travel may be entering from outside.
Turn off the water supply and pump if an active leak is found.
Inspect Panel Fasteners and Seams
Underbelly panels may be secured with screws, washers, clips, bolts, straps, adhesive, or combinations of these materials.
Check for:
- Missing fasteners
- Fasteners pulling through the panel
- Oversized holes
- Rusted hardware
- Cracked material around screws
- Unsupported panel edges
- Failed tape
- Loose overlapping seams
- Panels rubbing against suspension components
Replace missing fasteners only with suitable hardware in the correct location. A screw that is too long can puncture a tank, water line, wire, or floor above it.
Large washers may help distribute the load when approved, but they will not correct a panel that is sagging because it contains water or wet insulation.
Do not use household duct tape as a permanent underbelly repair. Heat, moisture, dirt, and road spray can cause it to release.
Check Around Every Penetration
Pipes, cables, wires, hoses, and frame components must pass through or around the underbelly material. These penetrations are common entry points for water, dirt, insects, and rodents.
Inspect around:
- Low-point drains
- Fresh-water drain lines
- Waste pipes
- Holding-tank outlets
- Propane lines
- Electrical wiring
- Brake wiring
- Stabilizer jacks
- Levelling equipment
- Slide mechanisms
- Steps
- Axles and suspension hangers
- Spare-tire mounts
- Frame crossmembers
Look for gaps, torn material, failed sealant, and abrasion.
A penetration must not be sealed in a way that restricts the movement of suspension parts, slide mechanisms, drain valves, cables, or flexible connections.
Signs That Rodents Have Entered
Rodents often enter an RV underbelly seeking warmth, shelter, nesting material, or food odours.
Warning signs include:
- Droppings
- Shredded insulation
- Chewed foam or fabric
- Gnawed wiring
- Damaged furnace ducting
- Nesting material
- Food debris
- Strong urine odour
- Scratching sounds
- Tracks in dust
- Openings with greasy rub marks
Finding droppings inside a cabinet does not necessarily mean the entry point is directly below that cabinet. Rodents can move through the enclosed underbelly, wall cavities, plumbing openings, and cabinet voids.
Inspect the entire underside rather than sealing only the first visible hole.
Check Wiring and Plumbing for Chew Damage
Rodents can damage wiring insulation, flexible ducting, water lines, and insulation.
Look for:
- Exposed copper
- Tooth marks on wire insulation
- Partly severed cables
- Damaged wire loom
- Chewed PEX tubing
- Punctured flexible ducting
- Loose electrical connectors
- Damaged tank-sensor wiring
- Exposed brake wiring
Turn off electrical power before handling damaged wiring. Disconnect shore power, stop the generator, turn off the inverter, and isolate the battery system according to the RV’s instructions.
Do not cover damaged wiring with tape and return the RV to service without determining the extent of the damage. Wiring hidden farther inside the underbelly may also be affected.
Have propane lines professionally inspected if rodent activity or physical damage is found near them. For more on RV water and plumbing systems, see our RV Plumbing Basics guide.
Clean Rodent Contamination Carefully
Do not dry sweep or vacuum rodent droppings and nesting material. Disturbing dry contamination can release particles into the air.
Use the health authority’s recommended cleanup procedure for your location. A typical process includes:
- Ventilate the area when practical.
- Wear disposable gloves.
- Thoroughly wet droppings and nesting material with an appropriate disinfectant.
- Allow the disinfectant the specified contact time.
- Wipe up the material with disposable towels.
- Place waste in sealed bags.
- Disinfect the surrounding surface.
- Remove gloves carefully and wash your hands.
Additional protective equipment may be appropriate for heavy contamination, confined areas, or large nests.
Do not place poison inside the underbelly. A rodent may die in an inaccessible area, producing odour and attracting insects. Poison also creates risks for pets, children, and wildlife.
Seal Openings With Suitable Materials
The best rodent prevention begins by physically excluding them.
Depending on the location and RV construction, suitable repair materials may include:
- Replacement underbelly material
- Manufacturer-approved underbelly tape
- Mechanical fasteners with suitable washers
- Metal mesh
- Metal flashing
- Compatible exterior sealant
- Purpose-made grommets
- Split loom or protective conduit
- Removable access panels
Match the repair to the opening. A large structural gap requires more than sealant, while a wire passing through a panel may need a grommet and flexible seal.
Avoid sharp metal edges that can cut wires, hoses, or hands during future service.
Preserve access to drain valves, tank fittings, electrical connections, and other serviceable components.
Use Expanding Foam Carefully
Expanding foam is sometimes used to fill underbelly gaps, but it is not suitable for every opening.
Problems can occur when foam:
- Expands against wiring or plumbing
- Blocks a drain or valve
- Covers a propane fitting
- Encases a component that requires service
- Holds damaged material in place
- Hides an active leak
- Is installed near a heat source
- Fails to resist chewing
- Separates from dirty or flexible surfaces
Standard foam should not be treated as a permanent rodent barrier by itself. Rodents may chew through it.
If foam is approved for a particular location, use a product compatible with the surrounding materials and protect the opening with a more durable barrier when appropriate.
Never apply foam around furnace exhaust components, generator exhaust, hot appliances, or openings that require ventilation.
Avoid Blocking Required Ventilation or Drainage
Not every opening is accidental.
Some spaces provide:
- Drainage
- Ventilation
- Combustion-air clearance
- Appliance access
- Component movement
- Condensation release
- Pressure relief
Before sealing an opening, determine why it exists. Consult the RV manufacturer or a qualified technician if its purpose is unclear.
Blocking an appliance vent, furnace opening, refrigerator vent, battery-compartment vent, or combustion-air passage can create a serious hazard.
Inspect the Insulation
Underbelly insulation may be fibreglass, foam board, reflective material, spray foam, or a combination of materials.
Inspect accessible insulation for:
- Water saturation
- Compression
- Missing sections
- Rodent tunnels
- Urine or droppings
- Mould-like growth
- Separation from the floor
- Contact with moving parts
- Damage around tanks and pipes
Wet fibreglass insulation can hold moisture against wood, metal, and the underbelly panel. It may need to be removed so the area can dry completely.
Do not close the underbelly while insulation, flooring, or framing remains wet.
Find and repair the moisture source before installing replacement insulation. For more on how moisture and ventilation affect the RV, see our RV Heating, Cooling and Ventilation Maintenance guide.
Check Tank and Plumbing Supports
While inspecting the underbelly, look for evidence that tanks or plumbing have shifted.
Warning signs include:
- Bent or loose support straps
- Tanks resting directly on underbelly panels
- Cracked mounting brackets
- Pipes pulling against fittings
- Drain pipes with inadequate support
- Water lines rubbing against sharp metal
- Tank movement when filling or draining
- Underbelly panels carrying visible weight
A holding tank can become extremely heavy when full. The underbelly material is not intended to replace a proper tank-support system.
Do not travel with a tank that has shifted or lost its structural support.
Protect Wiring and Plumbing From Abrasion
Road vibration can make wiring and water lines rub against frame edges, fasteners, suspension parts, and openings in the underbelly.
Look for:
- Flattened wire loom
- Polished areas on tubing
- Cuts in insulation
- PEX touching sharp metal
- Unsupported wire bundles
- Brake wiring hanging near an axle
- Cables pulled tight
- Hoses contacting exhaust components
Secure wiring and plumbing with suitable supports while allowing necessary movement. Do not attach anything to brake lines, propane lines, suspension components, or moving slide mechanisms unless the manufacturer specifically permits it.
Prepare the Underbelly for Storage
Before placing the RV into storage:
- Remove all food and scented waste.
- Clean crumbs and grease from cabinets and appliances.
- Inspect the underbelly for openings.
- Repair loose panels and damaged seams.
- Check doors and compartment seals.
- Remove nesting materials.
- Inspect wiring and plumbing.
- Empty waste containers.
- Store pet food and birdseed elsewhere.
- Cut back vegetation around the storage area where permitted.
- Avoid storing cardboard, fabric, or nesting material beneath the RV.
- Check the RV periodically.
Repellents may discourage rodents temporarily, but they should not replace physical exclusion and regular inspection.
Products that create strong odours can also affect people, pets, fabrics, and interior materials. Follow their labels and do not use unapproved chemicals inside the living area.
Inspect After Winter Storage
Cold weather can loosen fasteners, damage plumbing, and encourage rodents to seek shelter.
During the spring inspection, check for:
- Fresh droppings
- New nesting material
- Chewed wiring
- Damaged furnace ducts
- Water stains
- Split plumbing
- Sagging panels
- Loose seams
- Missing fasteners
- Cracked sealant
- Corroded electrical connections
- Signs of frozen or leaking tanks
Pressurize the water system only after inspecting accessible lines and fittings. Watch the underbelly while the system is filled and while each fixture is operated.
If the RV was stored outdoors in Alberta or another cold climate, inspect areas around low-point drains, tank valves, and exposed plumbing carefully.
Lowering a Small Underbelly Section
A small section may sometimes be lowered to inspect a known leak or repair an accessible opening.
Before removing fasteners:
- Disconnect shore power.
- Turn off the generator.
- Shut down the inverter.
- Isolate the battery system as instructed.
- Turn off the water supply and pump.
- Close the propane supply if the work area contains propane equipment.
- Empty nearby holding tanks when practical.
- Support the panel before removing its fasteners.
- Mark the original fastener locations.
- Lower the material slowly.
Expect wiring, insulation, or plumbing to rest directly above the panel.
Do not cut blindly into the material. A tank, wire, water line, duct, or propane line may sit immediately above it.
Large panels can be difficult to reinstall because insulation and wiring shift when the material is lowered. Extensive removal is often better left to an RV technician.
RV Underbelly Inspection Checklist
Check that:
- Panels are secure and not sagging
- Seams remain closed
- Fasteners are present
- No water is trapped above the enclosure
- Insulation is dry
- Tank supports remain secure
- Drain pipes are properly supported
- Wiring is protected from abrasion
- Brake wiring is clear of suspension parts
- Water lines do not rub against sharp edges
- Propane lines show no visible damage
- Openings around penetrations are properly sealed
- Required vents and drains remain open
- No rodent droppings or nesting material are present
- No wires, hoses, or ducts show chew damage
- Previous repairs remain secure
Record the inspection date and photograph any questionable areas. Comparing images over time can reveal increasing sag, widening gaps, or fasteners pulling through the material. For a printable version of this checklist, see our RV Checklists page.
When to Call a Professional
Arrange professional service if you find:
- A sagging panel filled with liquid
- Extensive wet insulation
- A damaged holding tank
- Loose tank supports
- Chewed electrical wiring
- Propane-line damage
- Burnt or melted wiring
- Structural frame damage
- Large sections of loose underbelly
- Widespread rodent contamination
- Mould-like growth
- Repeated water accumulation
- A leak that cannot be traced
- Damage requiring major panel removal
Underbelly repairs become complicated quickly when tanks, plumbing, wiring, furnace ducts, and insulation occupy the same enclosed space.
A technician can lower the material safely, identify the source of the problem, dry the affected area, and restore the enclosure without concealing further damage. For help identifying specific problems, see our RV Troubleshooting guides. For more industry safety guidance, see the RV Safety & Education Foundation.
RV Underbelly Inspection: Key Takeaways
An RV underbelly should not be ignored simply because its components are hidden. Loose panels, trapped water, damaged insulation, exposed wiring, and small openings can turn into expensive repairs if they remain unnoticed.
Inspect the underside before storage, after winter, and following travel over rough or debris-covered roads. Look for changes rather than waiting for a panel to fall or a rodent to enter the living space.
A secure, dry, and properly sealed underbelly protects the plumbing and electrical systems while still allowing required ventilation, drainage, movement, and future service access.